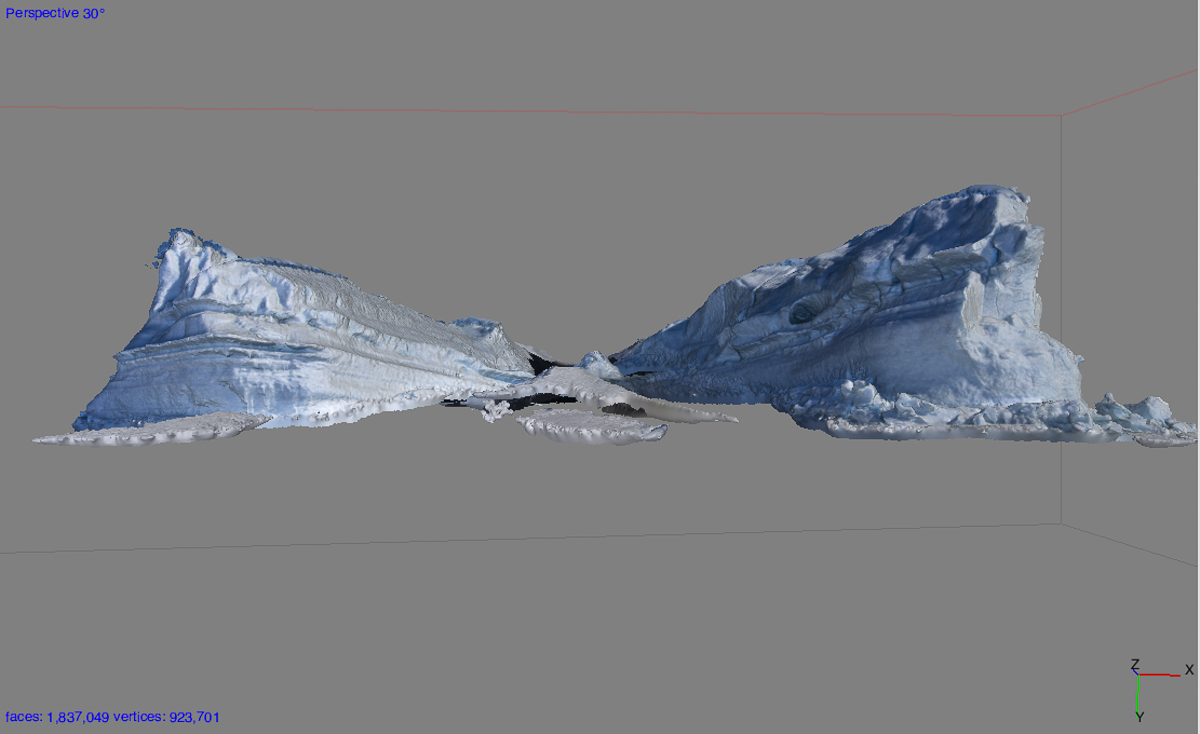
One of 162 photos I took while walking around an iceberg stuck in the sea ice near the Dellbridge Islands.
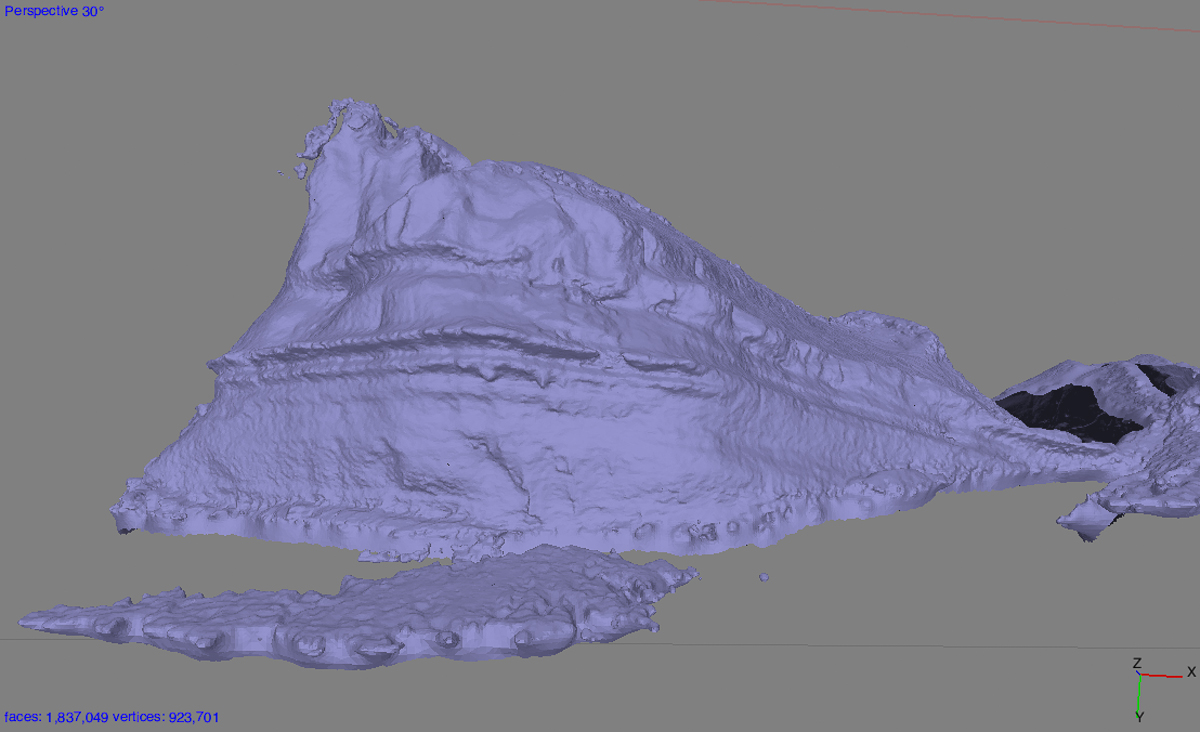
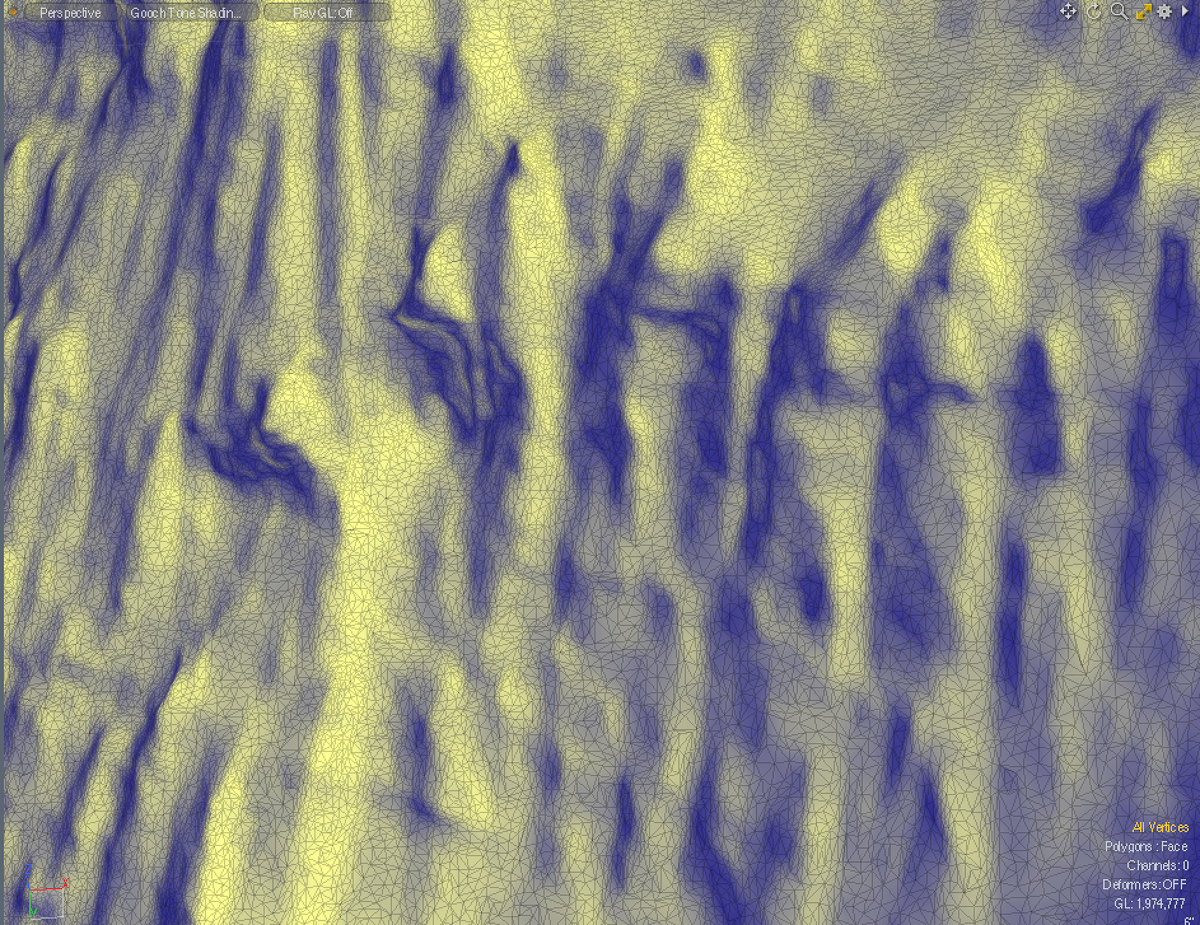
Screenshot of PhotoScan 3D file, with the “texture layer” (the colors from the original photos).Close-up of the left half, just showing the form without the texture layer. Gaps will be filled in later in Modo, the 3D editing program I use. Gaps are areas the software can’t resolve. I think that some may not have been visible from the angles I photographed, while others were rather flat and didn’t offer enough cues for the software to match points between photos. But those are minor issues to fix.
Part of my project here involves capturing forms in 3D. There have been plenty of photographs taken in Antarctica, within and outside the Antarctic Artists and Writers Program, but relatively little sculpture, and the sculpture that has been done has been more inspired by the landscape than an attempt to capture the specifics of the marvelous forms and textures produced by the interaction of wind and water in this unusual environment. My method for doing so involves taking a series of overlapping still photos of an object or scene from different angles and processing them with photogrammetry software into a 3D file. I edit that file in 3D design software and then fabricate it as a sculpture generally using a CNC router at Fab Lab Baltimore, though they can also be 3D printed. The three photos above show stages in processing my most ambitious capture thus far completed: 162 photos of a large iceberg stuck in the sea ice near Inaccessible Island in McMurdo Sound that I shot on December 1st. I blogged about that day in an earlier post — Evan and I went out there in a Haagland tractor and this iceberg was our first stop. There’s no way it would be possible to make a 3D capture like this with an iceberg floating in the water. Also when you’re in a zodiac boat near a floating iceberg, you have to keep your distance because it can flip without notice, causing dangerous waves. This photo gives you an idea of the scale:
Me and my iceberg. It’s stuck in the sea ice near Inaccessible Island (my favorite island name in Antarctica — sounds so…remote). When the ice around it melts, it probably will start floating again eventually. See the diagonal lines, especially noticeable on the left side? Those are earlier float lines. As icebergs melt in open water they shift position, sometimes tilting, sometimes doing an abrupt flip. You wouldn’t want to be this close to it if that happened. But stuck in six feet of sea ice this one wasn’t going anywhere!
Up until recently I used Autodesk 123D Catch to create the 3D files, which is very good free software. Right before leaving for Antarctica, I purchased Agisoft PhotoScan Standard, which can handle larger files, and, I hoped, the larger number of images and greater detail I intended to throw at it with my Antarctic images.
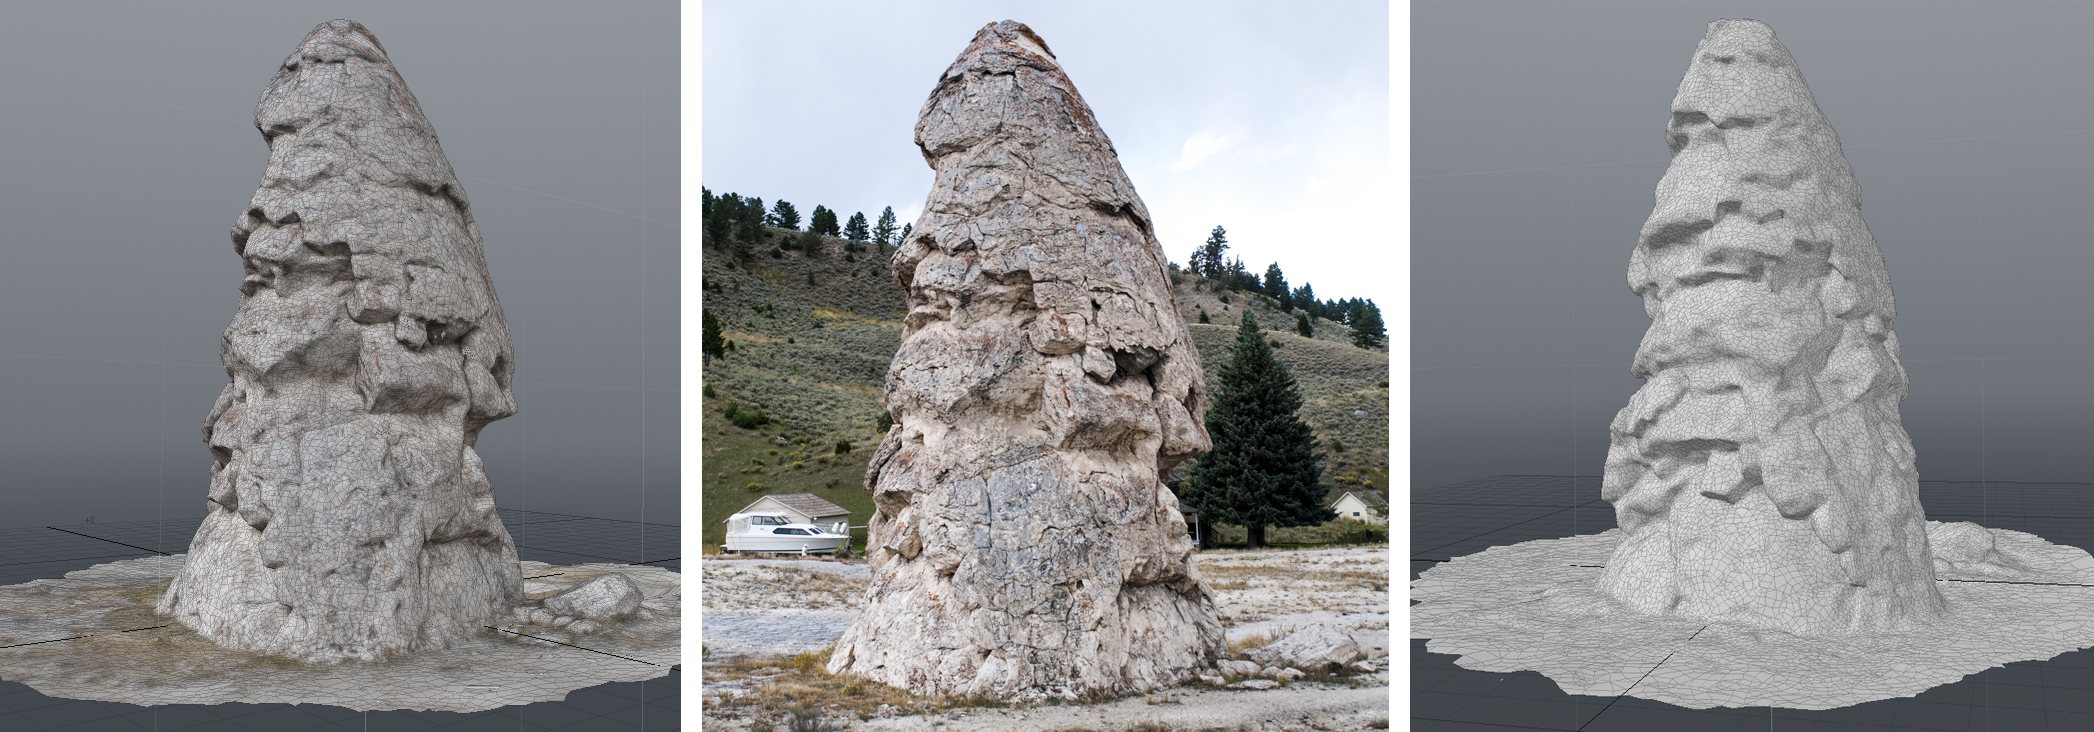
The largest object I’d ever processed a 3D file of before was the Liberty Cap at Yellowstone. One of the source photos is in the center, with two views of the 3D file in Modo on either side.
Turns out PhotoScan is up to the task, although it takes several hours of cranking away in the background for the 3D captures to process. That’s why I haven’t processed that many yet. But I wanted to try a few to make sure it would work. Up until now, the largest natural object I’ve made a capture of is the Liberty Cap, a rock formation called a hot spring cone in Yellowstone National Park that’s 37 feet high. I made that file with 123D Catch and it came out so well I was reasonably confident that the formations would, too.
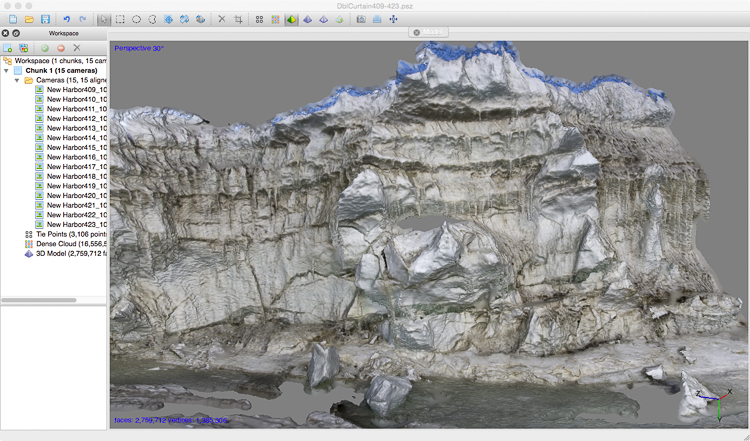
I started with this pressure ridge by the Double Curtain Glacier, which I also talked about in an earlier post. It wasn’t a huge number of photos, but extraordinarily complex. I was excited to get this result:
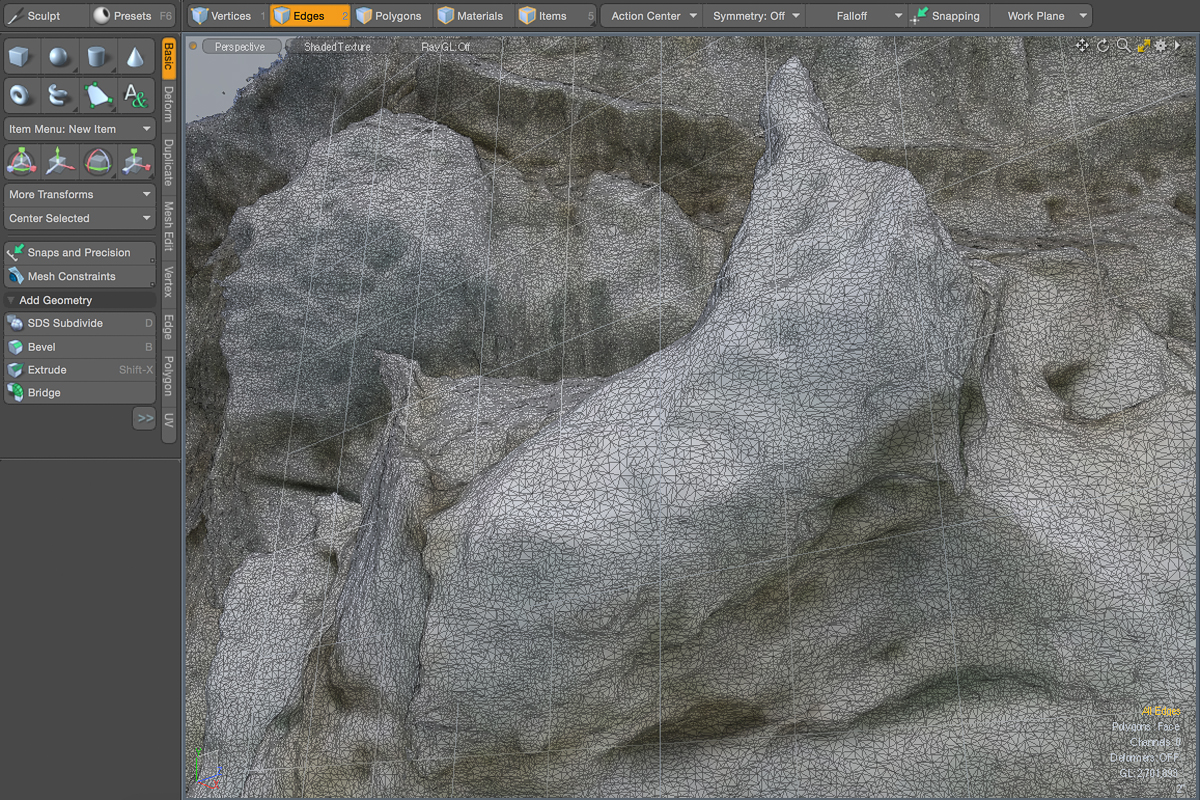
PhotoScan was able to process the elaborate quasi-Baroque facade of this pressure ridge.This Modo screenshot shows a detail of the center of the above 3D file. You can see how photogrammetry software makes a polygon mesh, breaking the form into little triangles. These triangles can be moved, deleted, or otherwise edited.
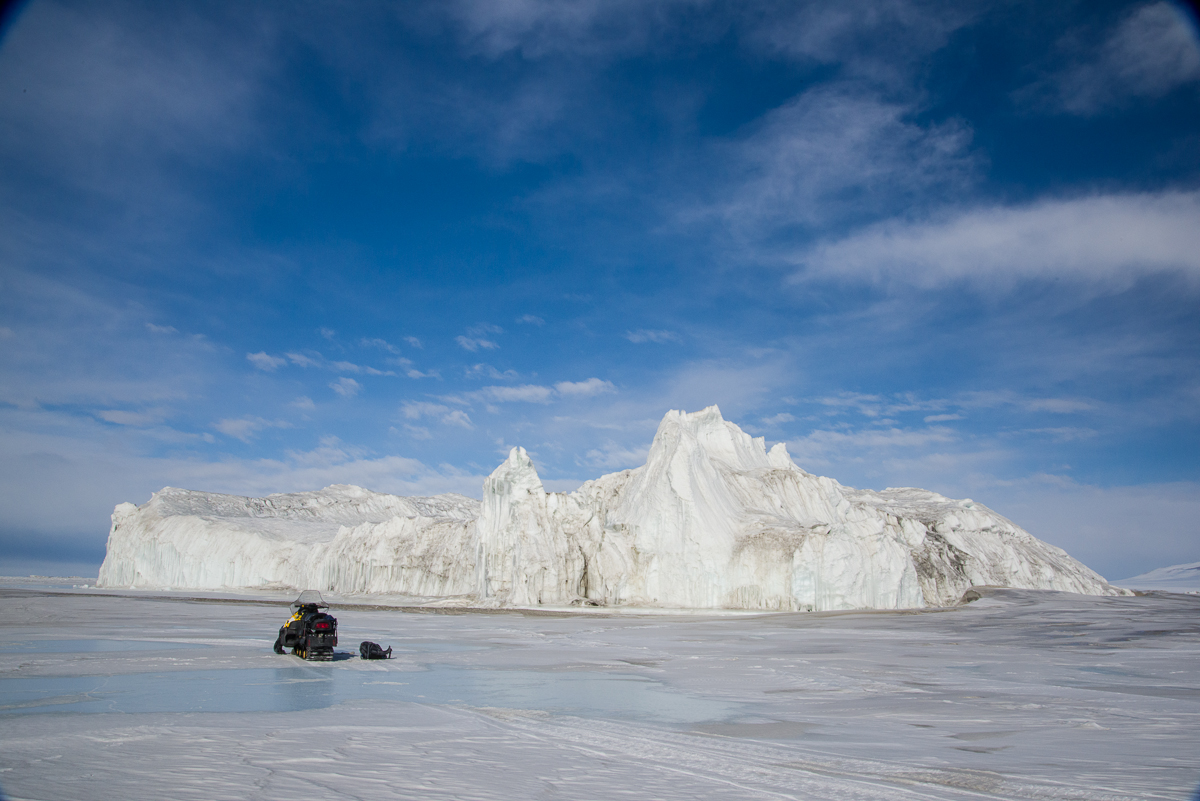
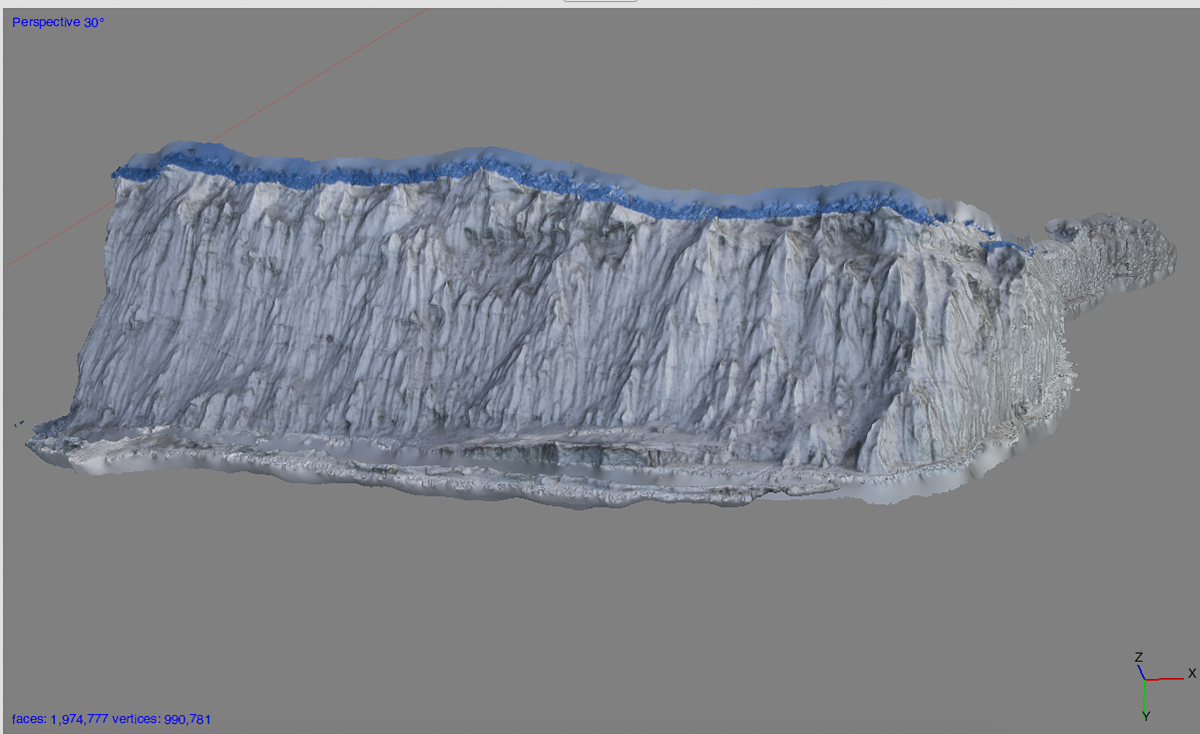
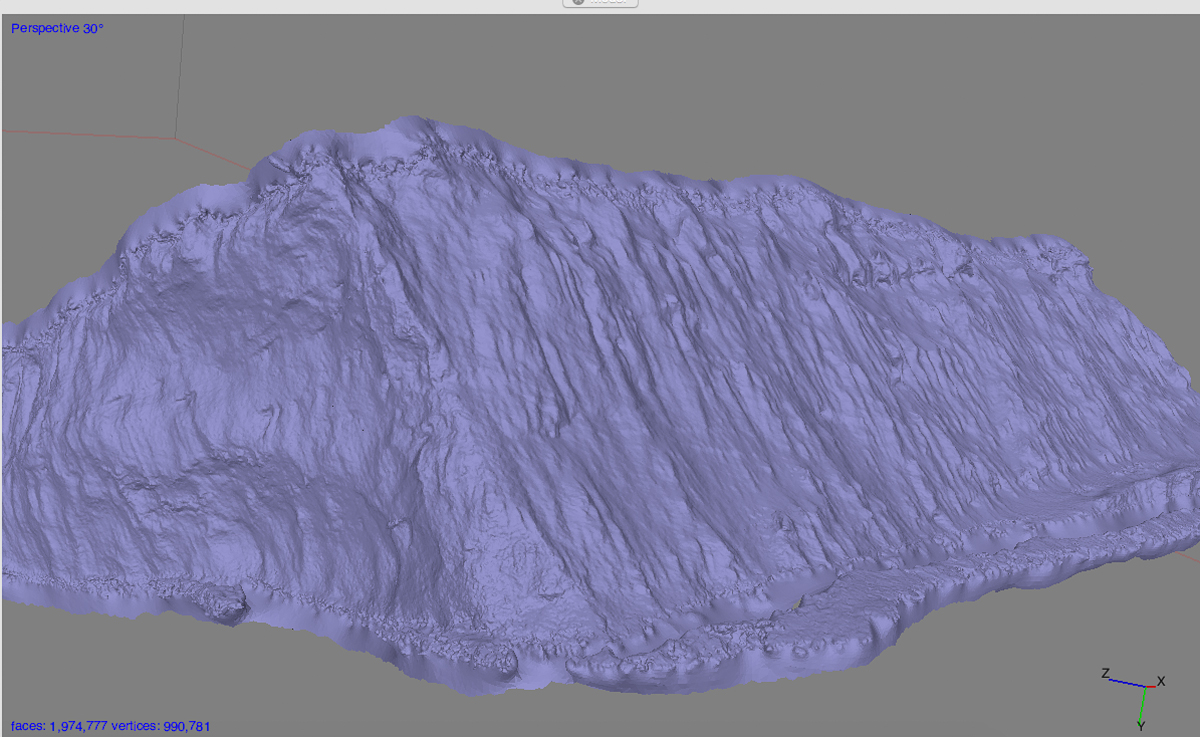
Before tackling the iceberg at the top of this post, I tried processing a portion of an enormous iceberg stuck in the sea ice that Laura Von Rosk and I traveled by snowmobile to see. I wasn’t sure if anything that large could be processed, so although I spent a half hour taking about 170 photos of it from every angle, I only processed 44 of the photos of one side and a bit of its adjacent sides. Here are some screenshots from that experiment. Check out the amazing detail captured from this huge object:
This is an iceberg stuck in the sea ice between New Harbor and Cape Bernacchi. The snowmobile in the foreground gives you an idea of how enormous this iceberg is.PhotoScan processed 44 of the photos into an excellent 3D version of this portion of the iceberg. No gaps!Another side of the iceberg, shown without the texture layer.This is a Modo screenshot of a detail of the mesh of the above 3D file. Check out the detail!
I have many captures ready to process as 3D files, including the Scott Base pressure ridge, the Canada Glacier, Blood Falls, ventifacts, even a penguin subcolony (we’ll see if the penguins moved around too much to process). I’ll share them on this blog as I complete them, though it will be some time before I get to them all because it takes a few to several hours for PhotoScan to go through its paces. But I’m positive I’ll be bringing back many pieces of 3D Antarctica from this trip.
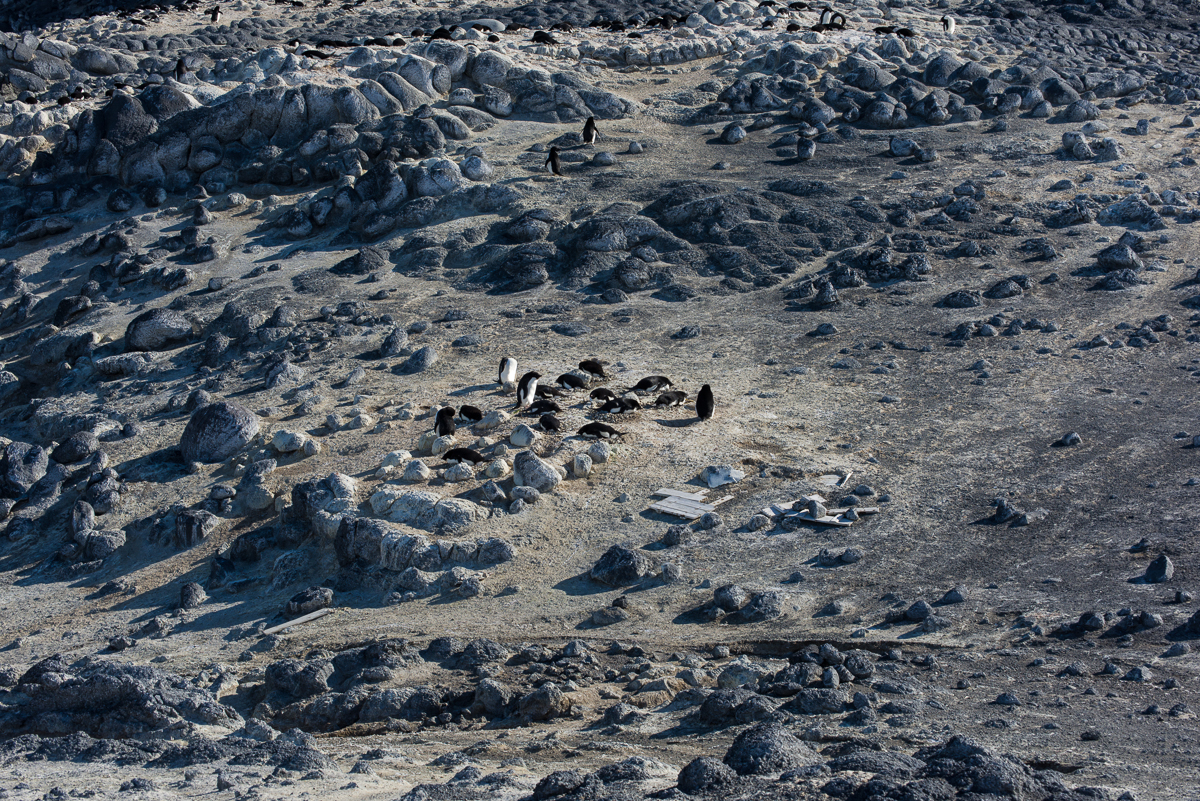
Off the beaten track: Most of the penguins hang out in the penguin colony, but a few wander further afield.
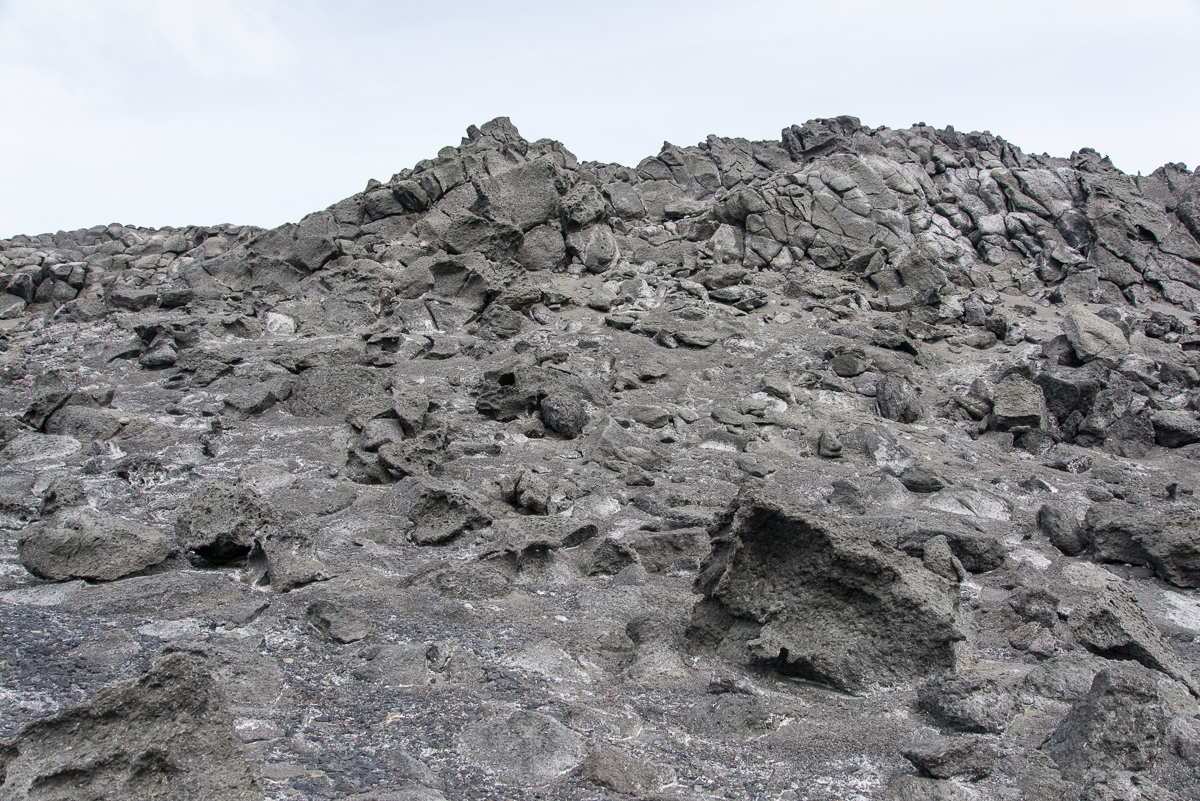
On Dec. 9th, I went via helicopter with Evan Miller (the mountaineer you met in previous blog posts) to the Adelie penguin colony at Cape Royds. At the Royds field camp, you are between Mt. Erebus and the Ross Sea. It’s a short hop via helicopter from McMurdo, about 15 minutes, but a completely different landscape. For one thing, McMurdo is still iced in with a thick layer of sea ice but Royds is beyond the sea ice edge, so there’s open water (which is typical for this time of year, though the sea ice broke out here before mid-November, which is on the early side). Erebus still looms in the distance, and you have more the feeling of being on the lower slopes of a volcano, since there are hills covered with black gravel and rounded stone formations they call volcanic pillows. The “pillows” have rounded protrusions so uniform in size it looks like an archaeological site where some ancient civilization had built stone walls by piling stones, but of course that’s not the case at all. Some of the structures that look like a wall made of a pile of stones are in face, one big rock.
Evan walks through a typical landscape around here, filled with black volcanic rock.
Evan was sent to accompany me for the first 24 hours to explore the site so I knew where I could orient myself so I could walk safely on my own for the rest of my stay. So on that very windy afternoon when we arrived, after lunch we set off on a walk toward the small lakes to the north and then looped back along a ridge that overlooks the coastline. The penguin colony itself we decided to save for the next day, since that’s terrain that I would not need the know-how of an experienced mountaineer to explore.
Right now there are two women working here, field camp manager and outreach educator Jean Pennycook and wildlife biologist Katie Dugger. Katie is leaving in the next few days, and her colleague David Ainley, the scientist who established this study, will take over her daily monitoring of the penguins. Jean makes sure the camp is supplied and is busy with outreach activities, making Skype calls to classrooms all over the world from the colony via her iPad, communicating with schoolteachers and updating the Cape Royds penguin project’s fabulous web site at penguinscience.com, which I highly recommend if you have any interest in learning more about penguins. There is information there for any level of education, from kindergarten to college. If you have kids, show them the site and tell their teacher about it! You’re probably saying, all right already, enough with the exposition, let’s see some penguins! So, even though this is out of order, here’s a quick peek. I promise more penguins up close and personal in the next post.
A portion of the main penguin colony at Cape Royds with scattered remains of one of Antarctic explorer Ernest Shackleton’s structures. One of his huts is here, and as with all the early explorers’ huts, any debris that is scattered around the grounds, even broken glass or bits of bones from their dinner, is left undisturbed and you are not supposed to touch it. Why is the ground tan? As Jean put it, “That’s about 10,000 years of penguin poop.”
Evan and I found the larger lakes:
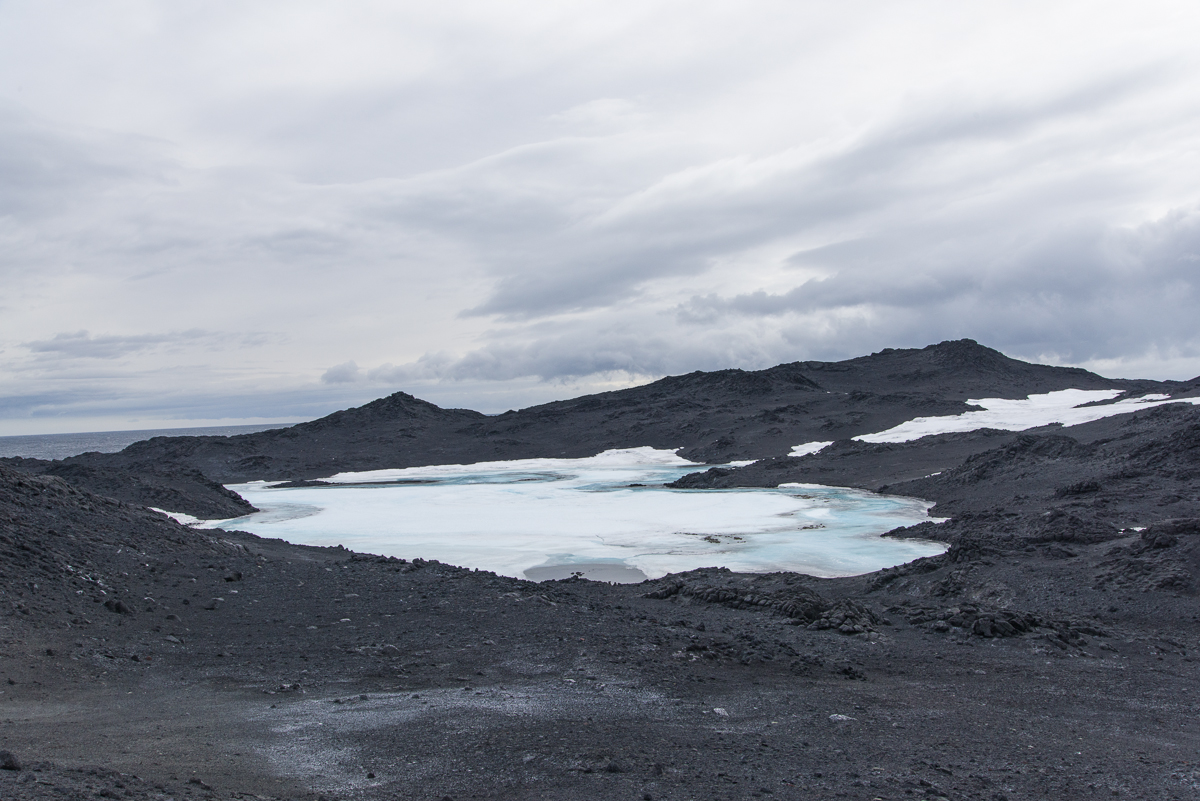
Clear Lake, one of the frozen inland lakes.
…and smaller ponds:
The penguin folks call this one Skua Lake, since skuas often hang out here. You can see Inaccessible Island out in the Ross Sea in the distance on the right.
And volcanic rocks worn by the wind, called ventifacts:
The vocabulary word of the day is “ventifacts.” These are rocks eroded by the wind into unusual and striking shapes.
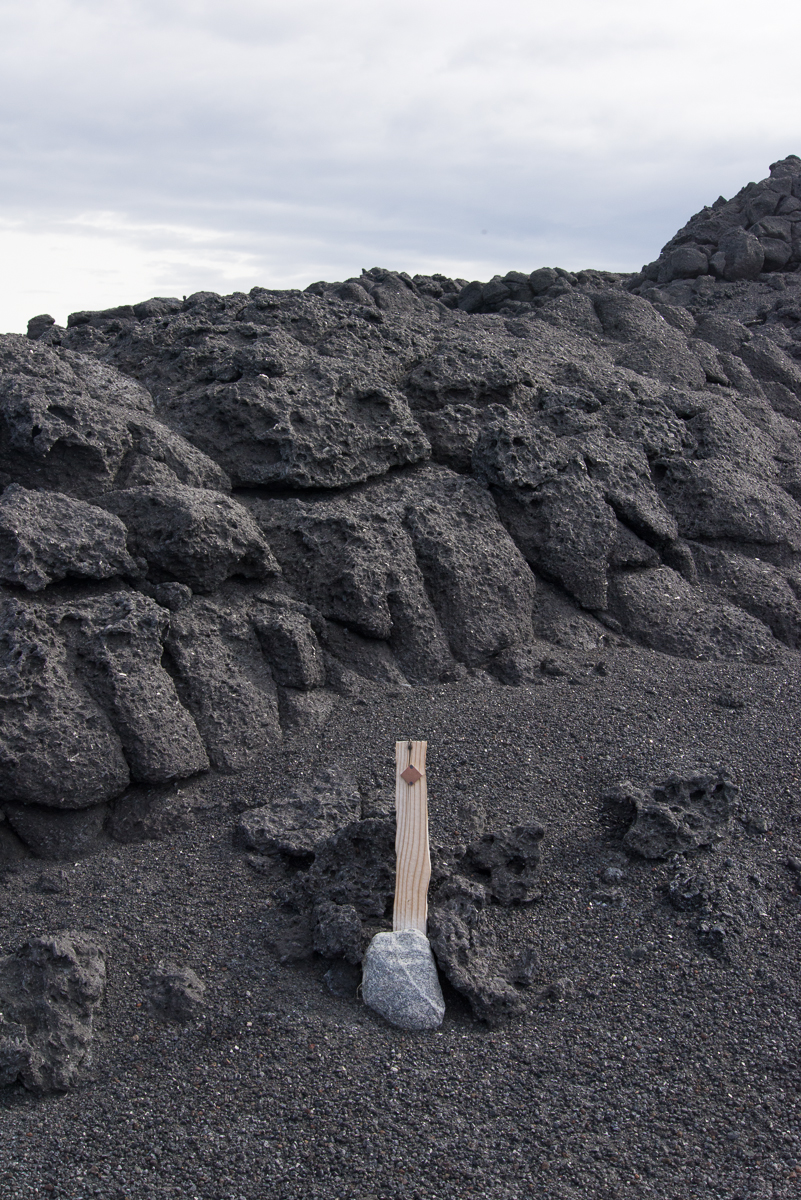
Evan and I also encountered this post on our walk. Jean didn’t recognize it. Maybe it’s a marker from a previous study. Anybody know what it is? Click image to enlarge it.
As we walked, Evan and I happened upon a nesting skua, sitting on an egg. She hyah-hyah-hyahed at us to warn us off for a while, and then stepped off the nest and took a few steps toward us as if to say, “Hey, I mean it, get the hell out!” So we made a big circle and ended up at a distance from the other side of the nest. Evidently that was good enough for her, and she walked back to her nest and settled back in, but we got a quick glimpse of the egg (photos below).
If you know what’s good for you, you’ll leave me and my egg alone!Good, they’re going away! Don’t worry, little egg, Mommy’s back to keep you warm.
We had, it turns out, inadvertently walked into a major skua nesting area. We kept seeing nesting pairs. Most either ignored us or squawked a little as we walked by but suddenly Evan was being dive bombed by a skua, who kept swooping down within a few feet of his head. Why it went after him and not me, who knows? Maybe because he was taller? But we walked faster and got out of there.
Coming over the ridge we saw the sea. The open water was a contrast to the unending vista of flat sea ice from McMurdo:
Our first day at Cape Royds, the wind was blowing from the south and beyond the pressure ridge was clear open water. See the pressure ridge formation a little to the right of center, where there’s a rectangular chunk with a hole in it and another piece with a little stalk to its right? Now look at the photo below from 24 hours later, after the winds had shifted.What a difference a day makes: 24 hours later, the winds had shifted, blowing in sea ice. See the formations from the previous photo, now on the left in the foreground? Notice all the ice that’s come in behind them.
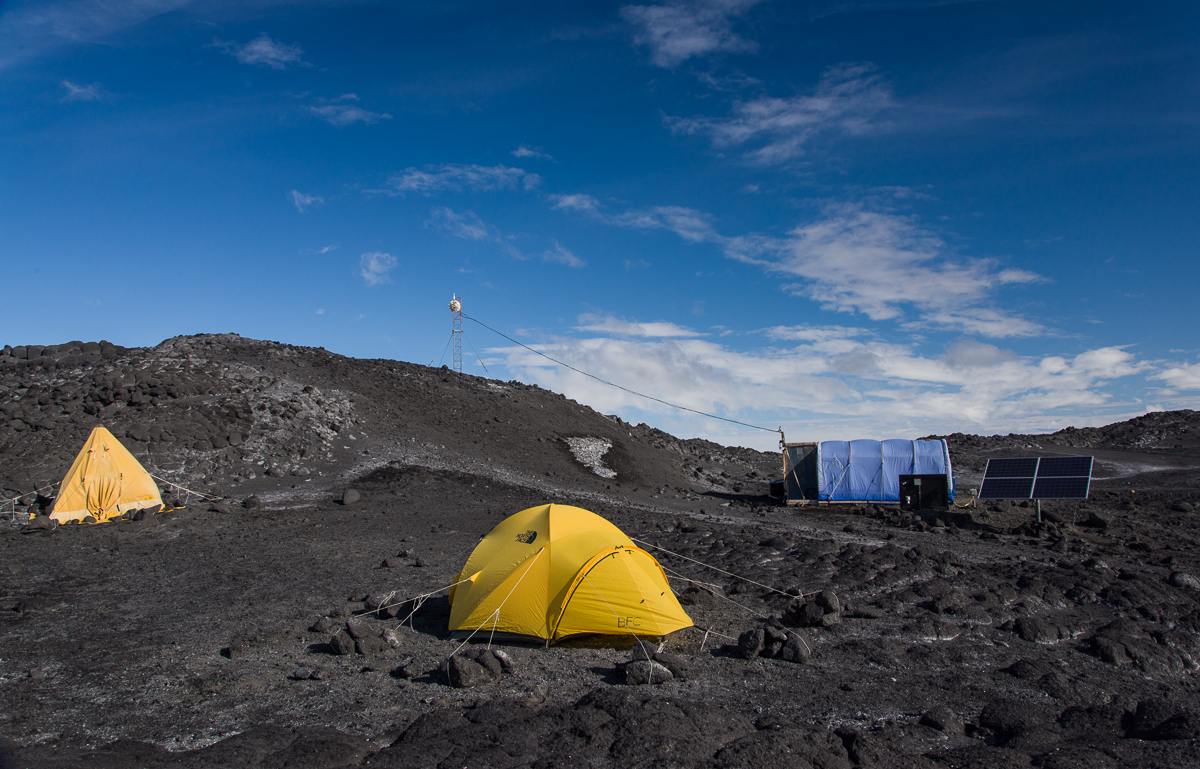
That’s my tent in the center, Jean’s on the left, and the main hut on the right, one roughly 9 x 15 foot room where we do all our cooking, working at our laptops, store the non-refrigerated food (a large picnic cooler set in the great outdoors serves as the camp “freezer”) and warm up if necessary — there’s a propane heater in the hut. The sleeping bags and fleece liners they gave us are incredibly warm and believe it or not, I’m completely comfortable sleeping in the tent in same short-sleeved PJs I wear at home, even though the tent is unheated and outdoors it’s probably been in the 20s with wind chill. An eyeshade is a must, though, as the bright yellow tent lets in the sunlight 24 hours a day.
The winds were blowing stiffly from the south all day. We kept waiting for them to calm down in order to set up my tent, but that wasn’t happening. So I got a one-on-one lesson from a certified National Outdoor Leadership instructor on best practices for setting it up in the wind.
A penguin stopped by while I was putting my belongings in my tent. Now there’s a sentence I’ve never written before.
However, Katie assured us that the forecast called for the winds to die down and shift direction after midnight. The next day we were surprised to see that indeed they had, and the sound had filled with sea ice blown in by the winds coming from the north. Giant slabs of ice were moving briskly along.
C the ICC: Another view of the sea ice that blew in overnight. Everything that’s clean and white beyond the dark ridge wasn’t there the day before.
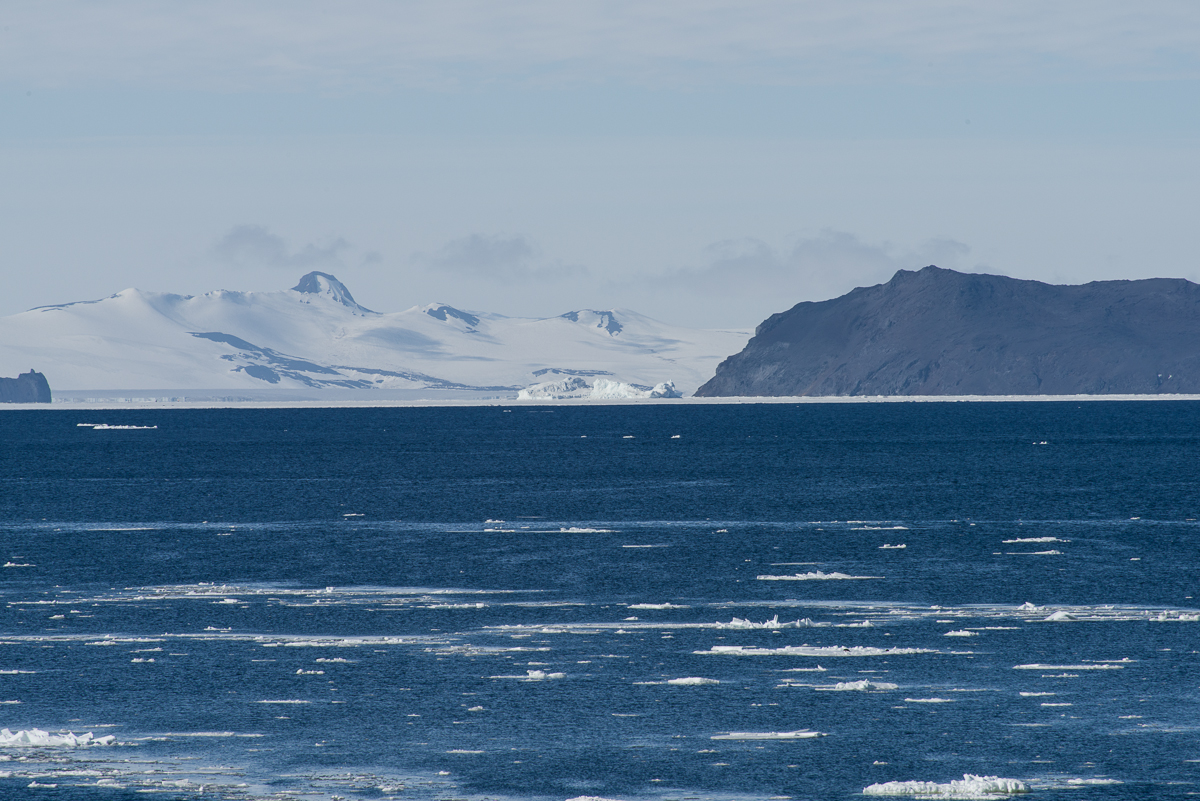
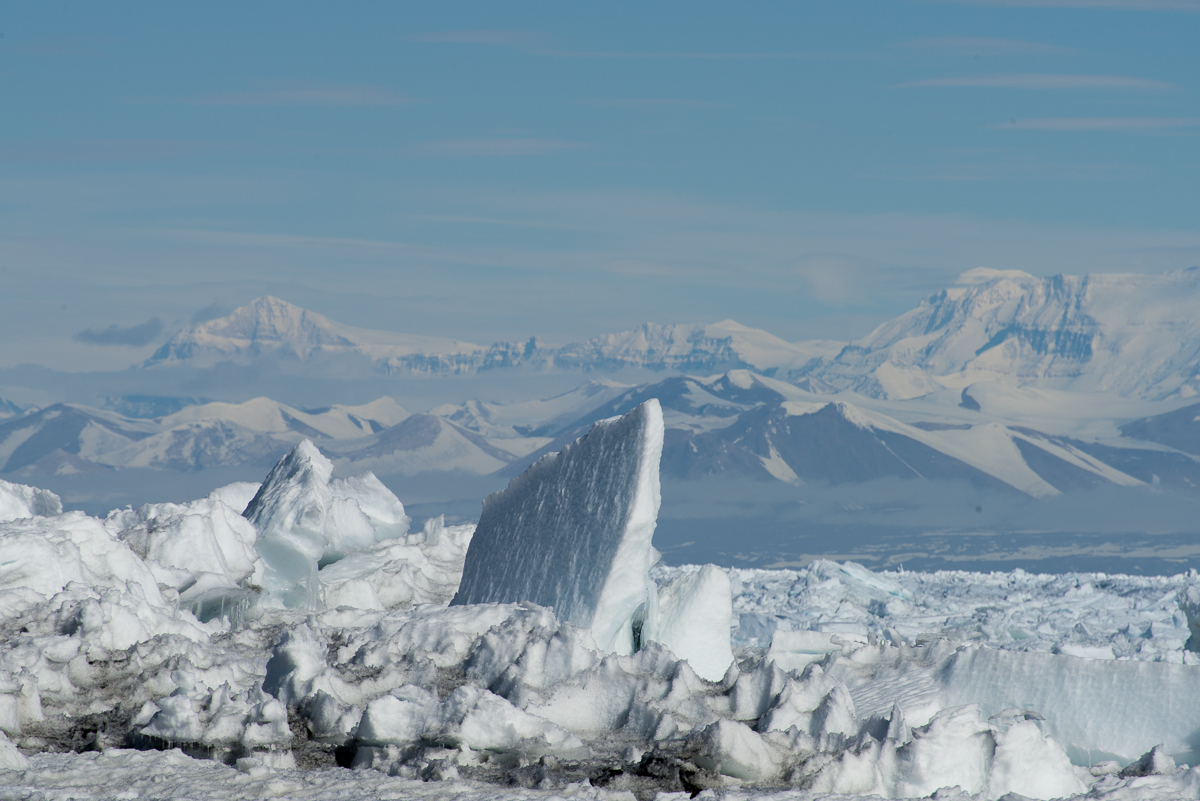
Earlier on the second day that we were here, when the above photo was taken, I also took one looking south. It was a nice sunny day and you could see the sea ice edge, and the very same iceberg I photographed on the excursion several days ago that I spoke about in an earlier post:
The sea ice edge, Inaccessible Island, and the iceberg I photographed several days before were visible in the distance from Cape Royds.
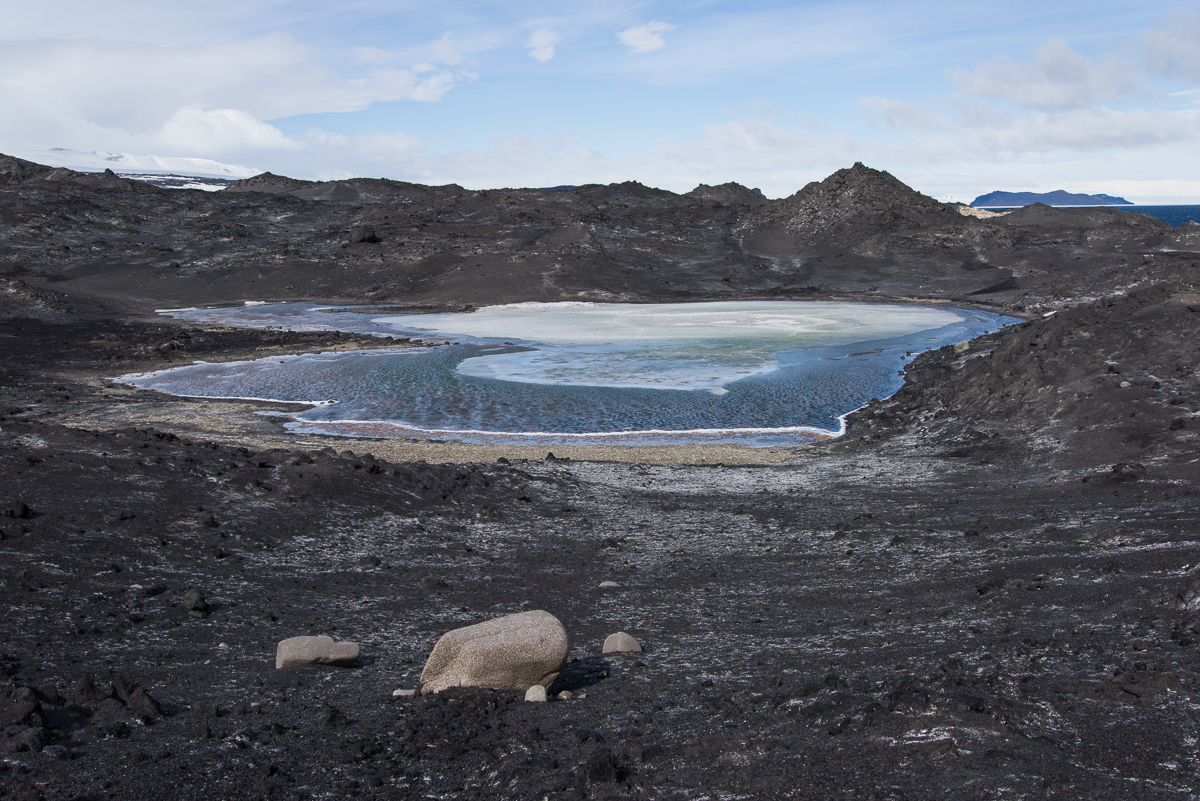
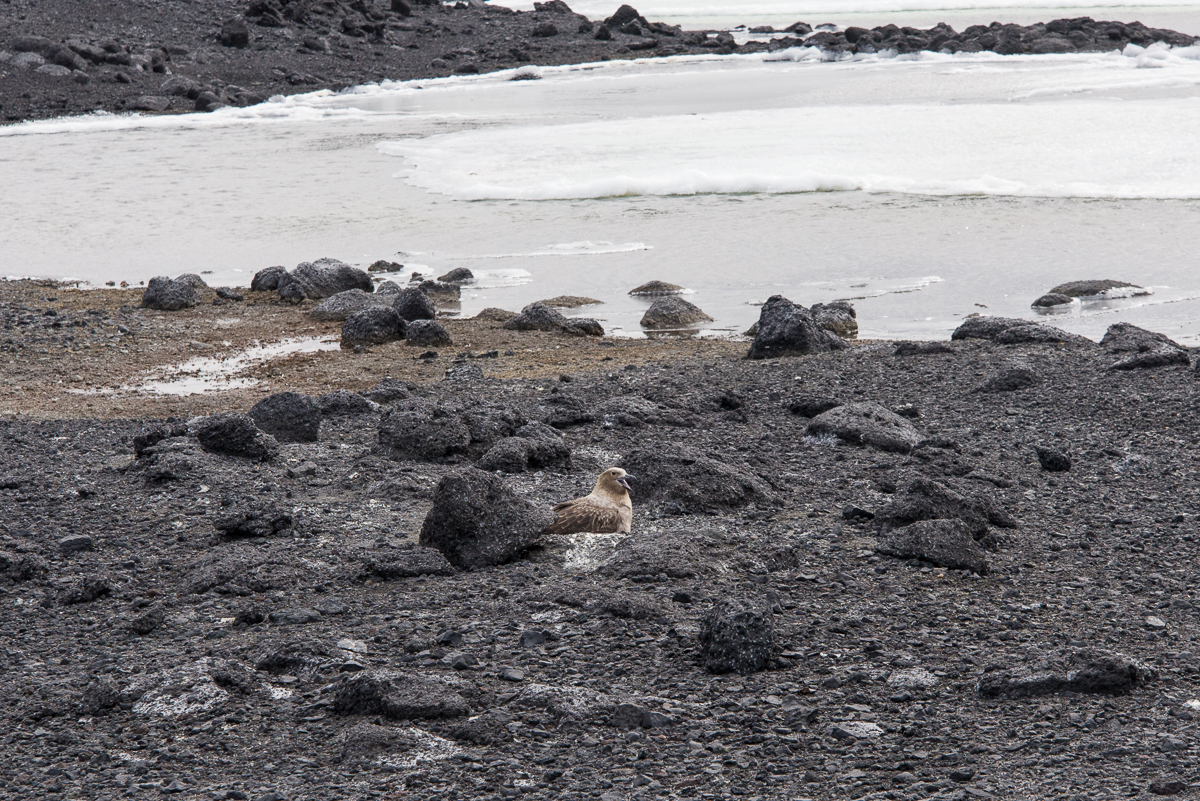
On that second day’s walk, we also walked down the steep slope to a black sand beach. We encountered the lone penguin you see in the first picture in this blog post. Walking along the beach are interesting snow and ice formations, big and small. I’ll end this post with a couple more:
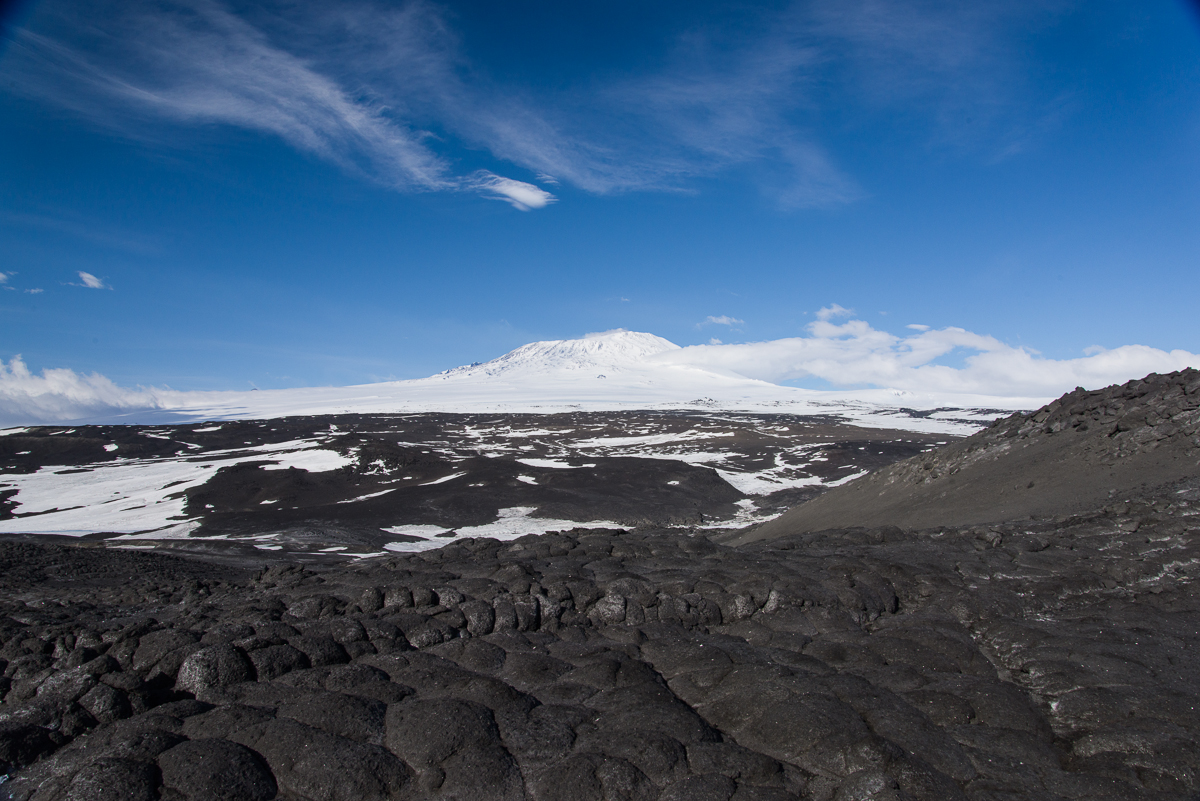
Looking up from the black sand beach.I never get tired of pressure ridges! Across the sound are the mountains.The view I wake up to: lava pillows and Erebus. It’s an austere place, but a wonderfully peaceful one.
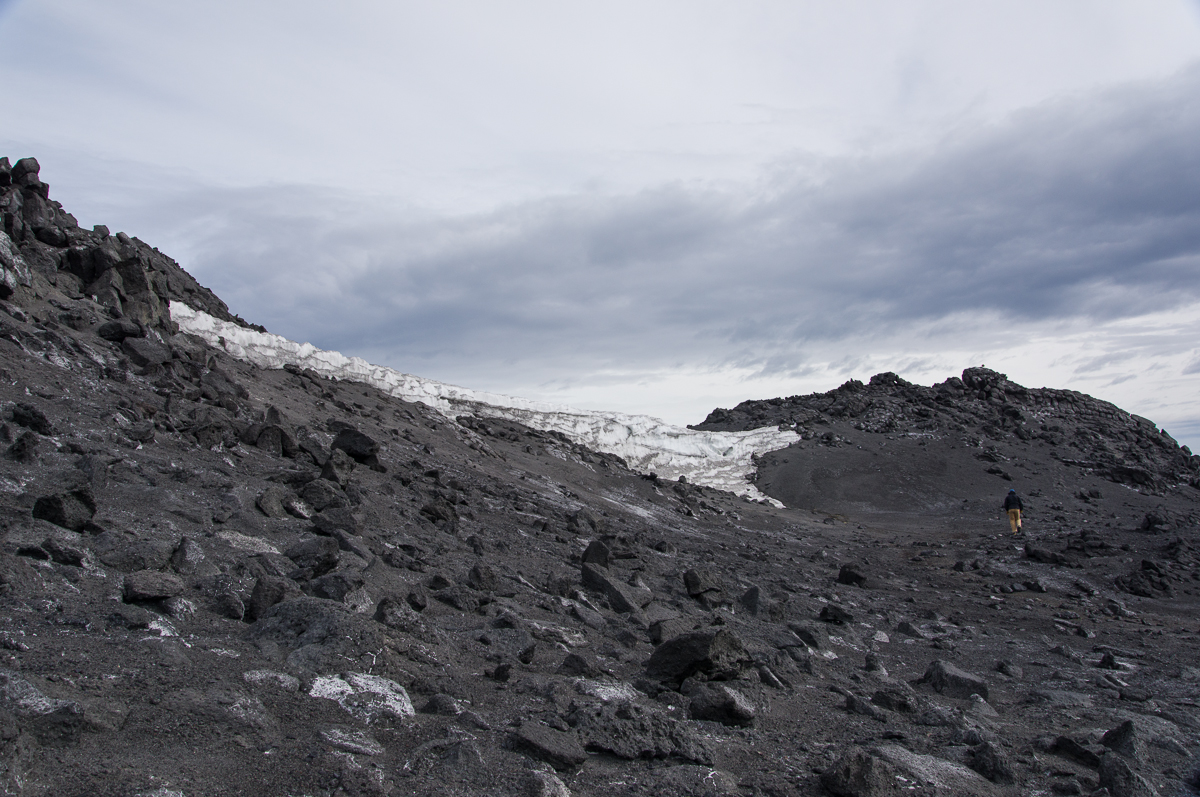
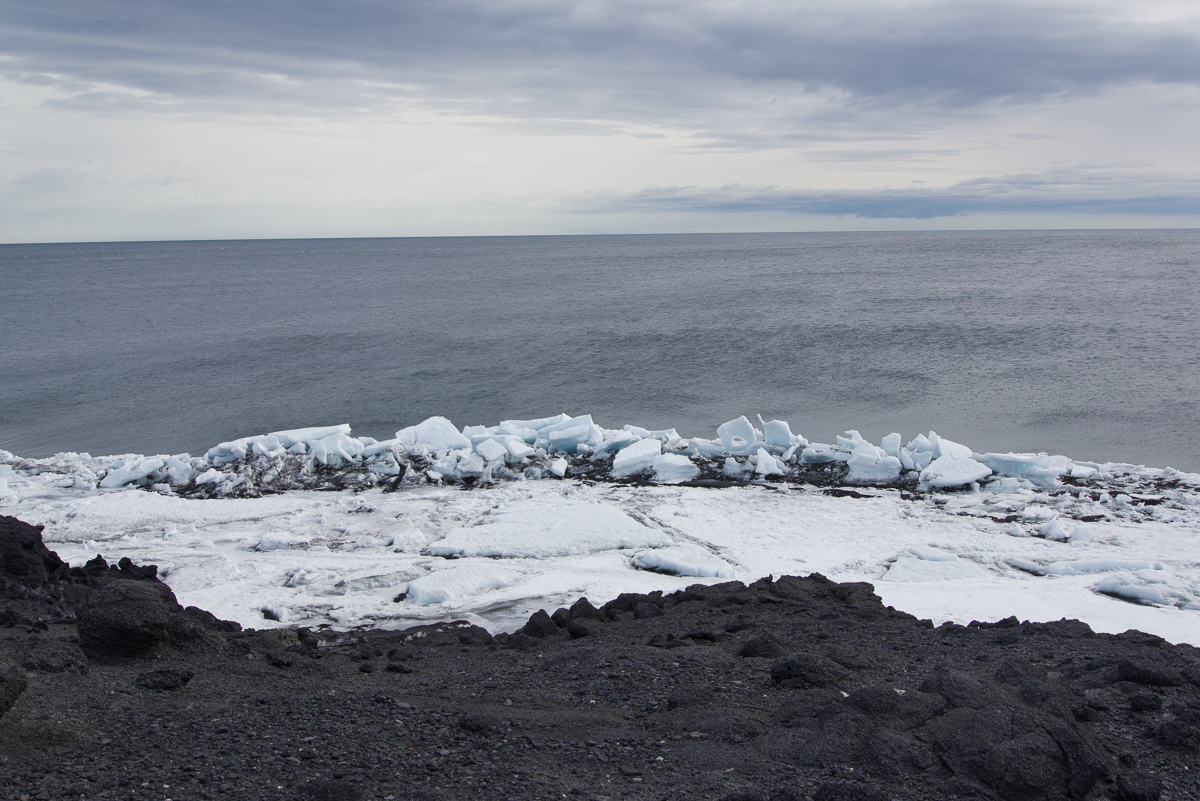
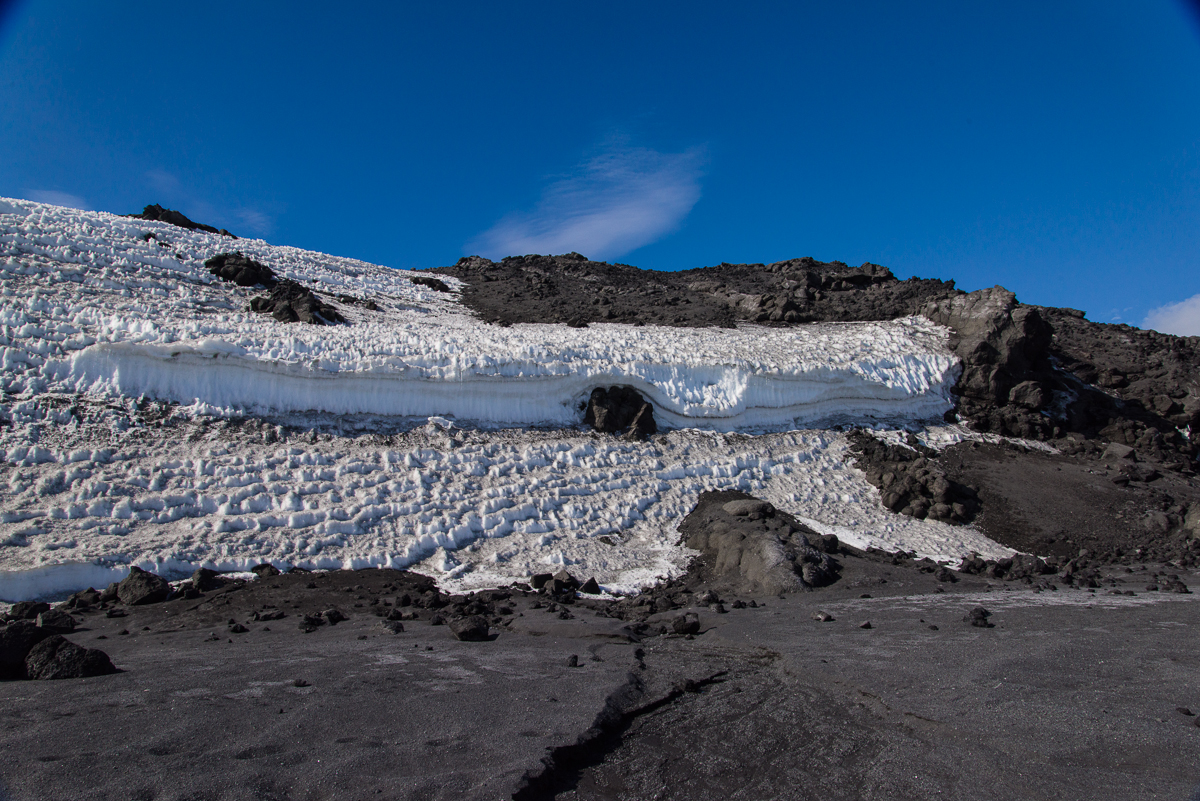
On December 1st, before visiting the Erebus ice cave, Evan and I went to see some icebergs that are stuck in the sea ice near the Dellbridge Islands. The Dellbridge Islands include Tent Island, Big Razorback and Little Razorback. The iceberg I photographed first is nearest to the island in the group with my favorite name, Inaccessible Island, named by the famous British Antarctic explorer Robert F. Scott because it was hard to reach. Of course, he didn’t have a Haagland tractor, which made the trip much easier. Not that a Haagland is a luxury vehicle by any means, but it’s great for traveling on ice and it gets warm inside. Big Red (as everyone calls the heavy parkas we were issued) comes off when you get in a Haagland. You’ll see the islands in the background of some of these photos. Also nearby was Mt. Erebus, but it’s so huge (over 13,000 ft.) that Erebus seems nearby wherever you go around here. The angle of the sun showed up the large crevasses on its lower slopes.
It was so clear that even from a distance you could see the crevasses on Erebus’s lower slopes.
The plan was for me to circle the iceberg nearest Inaccessible Island, to take photos for a 3D file, which I did. I selected 162 to process and since there were so many, I carefully masked them in the software, which took several hours, and I’m processing the file as I type this. I’m optimistic it’ll come out, because the first stage of processing where I aligned the photos showed a generally recognizable shape, and the second stage, under way now, originally showed it would take a total of 12 hours, but it is now almost 60% finished and the estimated total is down to 7 1/2, so the fact that it’s going faster than the original estimate is a good sign. Stay tuned for the next post…
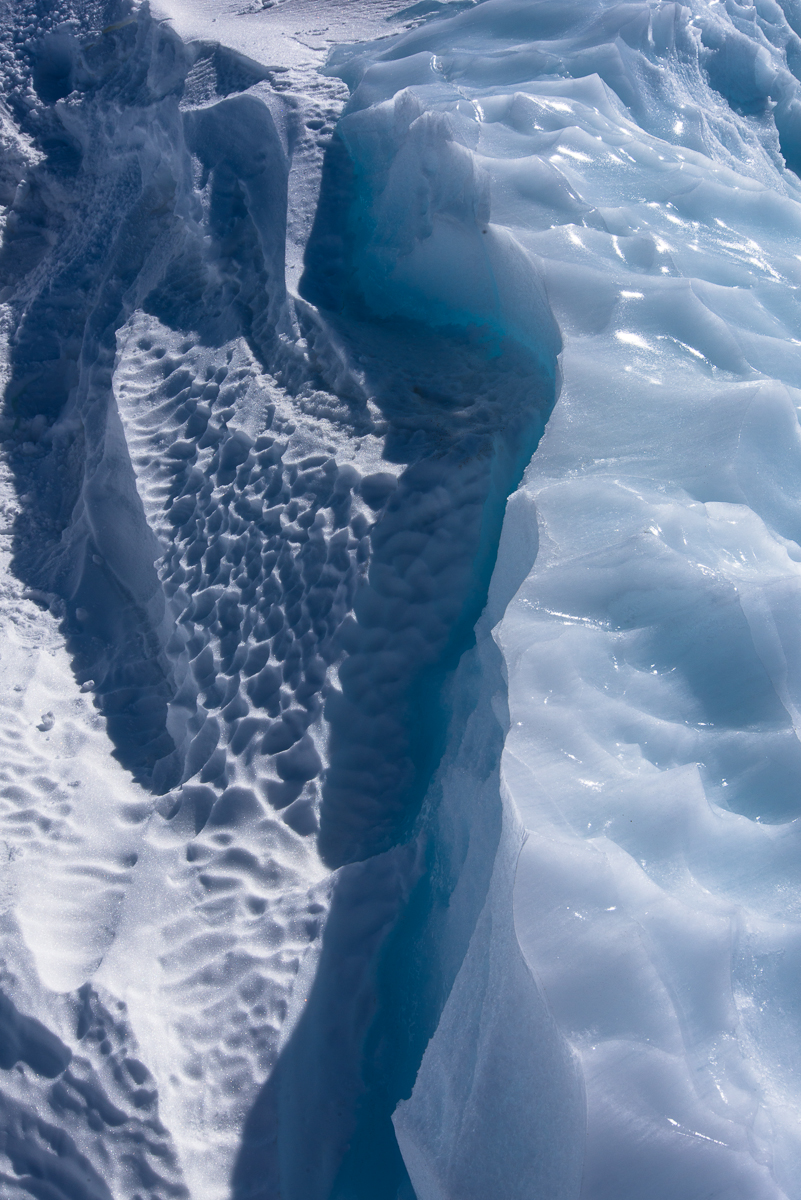
Two kinds of ice, matte and glossy, side by side. Click this and the other images to see larger views.
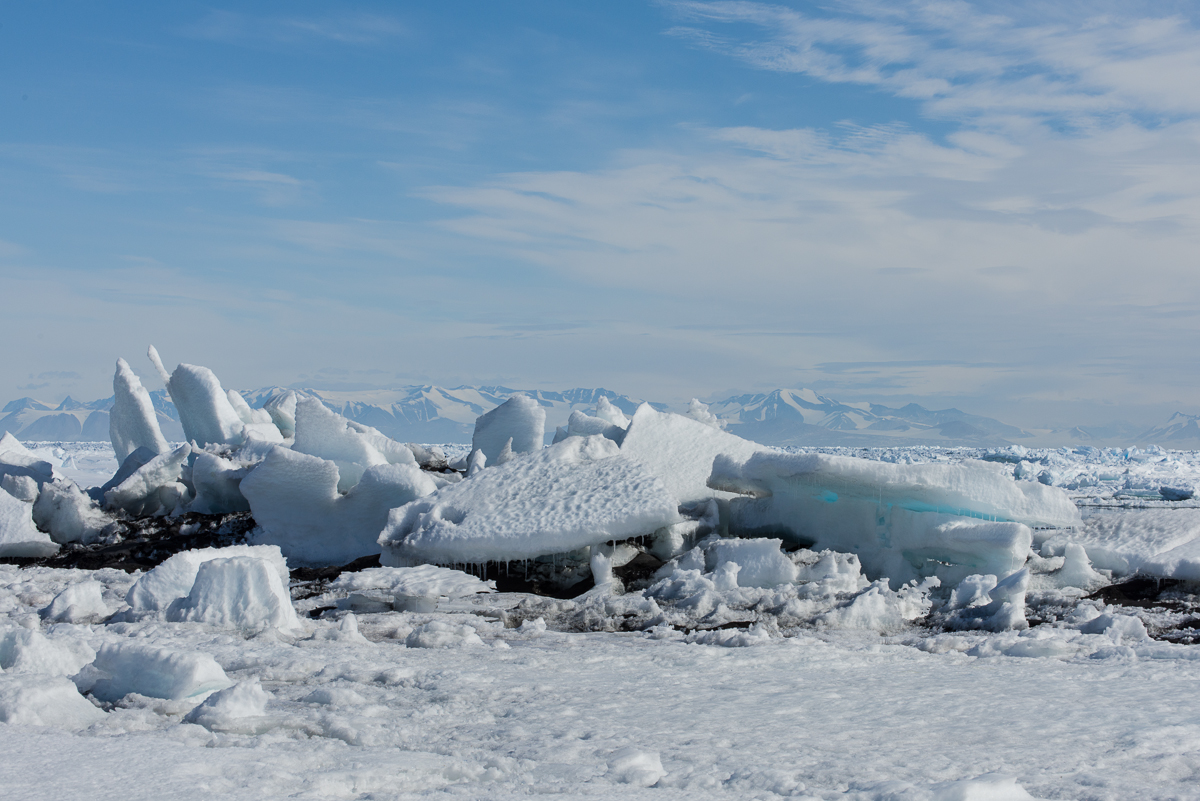
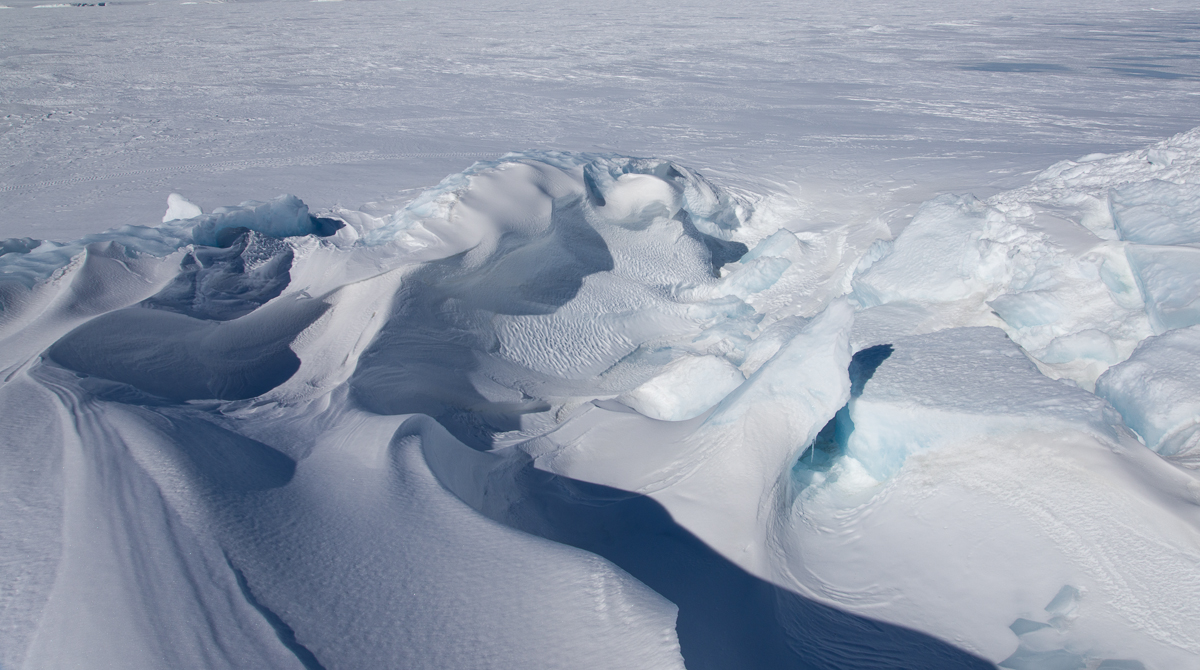
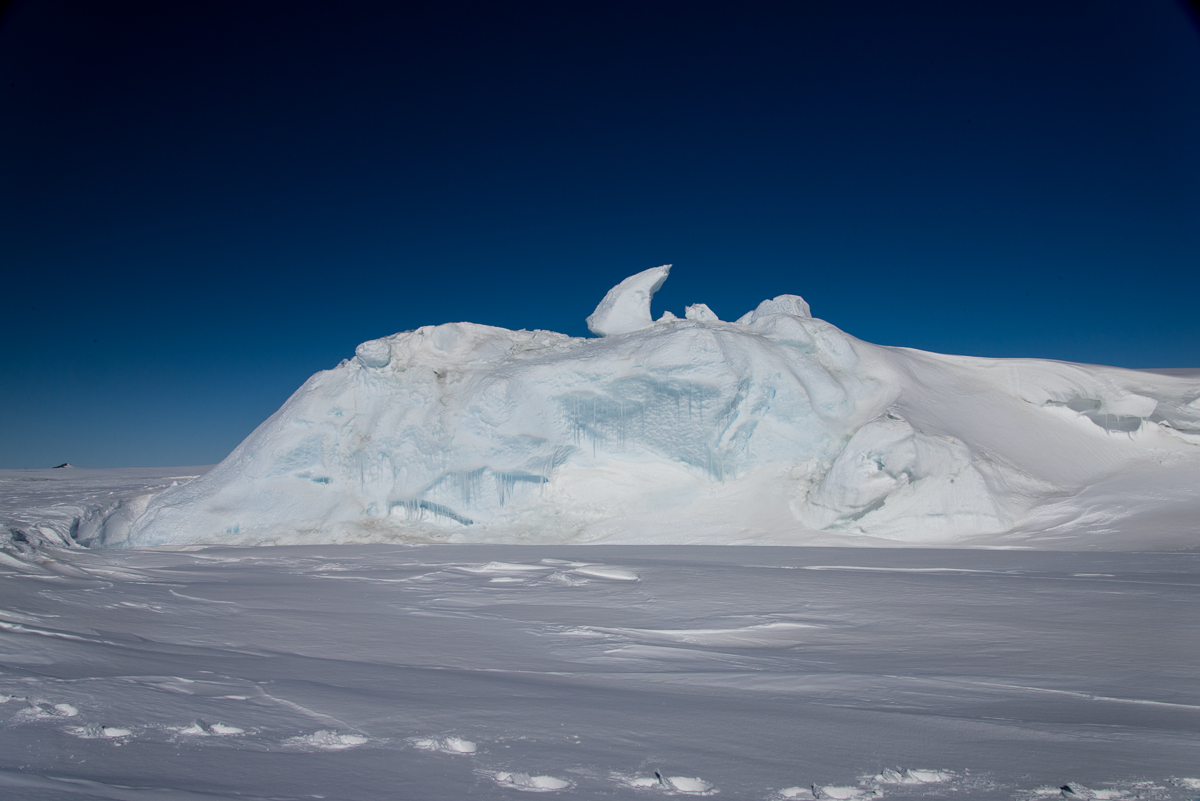
In the meantime, I’ll share with you photos I took after we left that iceberg and stopped at a spot where we could walk around a couple of smaller ones. One in particular had a lot of drifted snow around it, so I’m not sure if I’ll be able to get a 3D file of the whole thing, but it sure had a wide variety of ice formation and profiles that changed as you walked around it. The photos here show some of my favorite views.
A little pool of water had melted around one end. Our Haagland vehicle is in the distance on the right.Wind-whipped snow and ice.The drifting snow had curved into smooth, rounded forms.A slight change in perspective shows a different view than the one above, although you can see the same large forms on the left.But the opposite side of the iceberg looks totally different from the side catching the drifting snow.
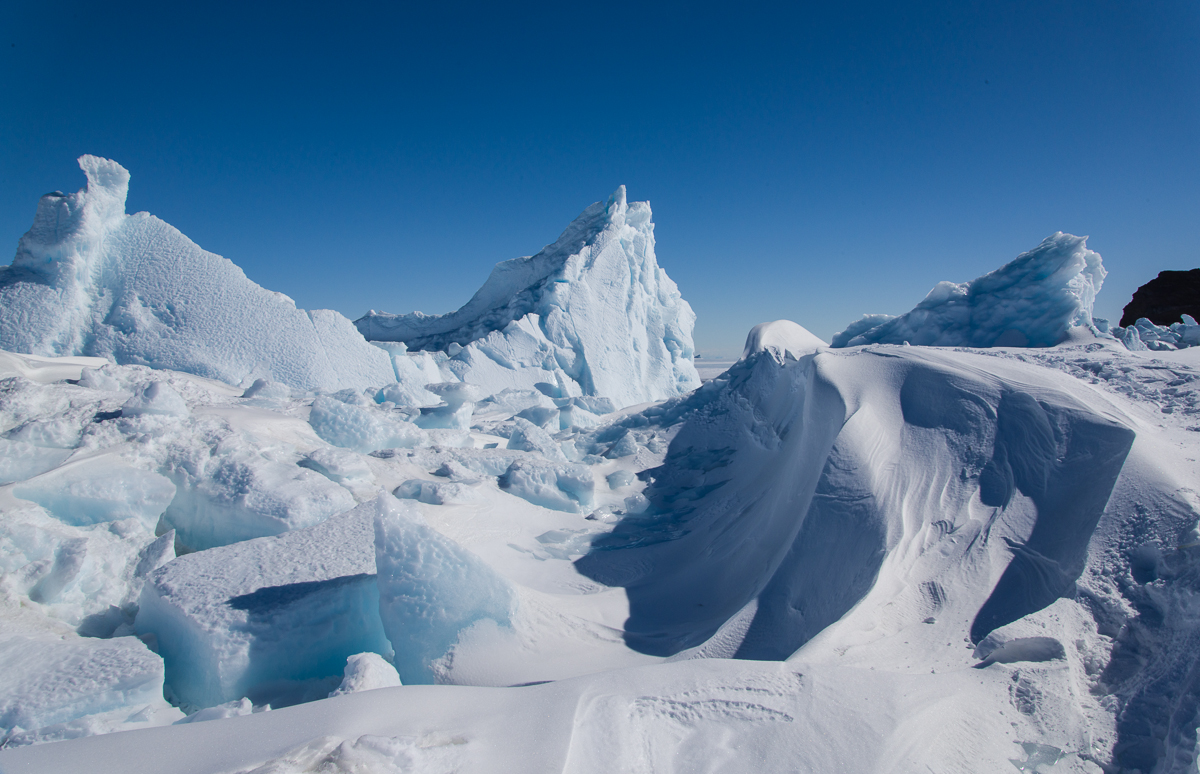
This is the only shot I’ve included of the smaller of the two icebergs, because it wasn’t as interesting, although the hook-shaped protrusion popping from the top in this view is certainly quirky.
The two smaller icebergs were closer to Little Razorback Island. You can see where pressure ridges have formed near the island.