Walking in Antarctica
Audio Tour

To begin playback of each track:
Mobile: Click on “Listen in Browser.”
Desktop: Click on the circular orange button.

Stop 1: Introduction

A Walk Over the Canada Glacier

Stop 2: Arriving at the Canada Glacier

Stop 3: Lake Hoare Field Camp

Stop 4: Canada Glacier from Lake Hoare

Stop 5: Panorama of Canada Glacier from Lake Fryxell, Antarctica

Stop 6: Mummified Leopard Seal near Canada Glacier, Antarctica

Stop 7: Lake Fryxell Field Camp, Antarctica

Stop 8: Rowboat on Pulley, Lake Fryxell, Antarctica

Stop 9: Canada Glacier from Lake Fryxell

Stop 10: In the Surrealist Sculpture Garden

[YouTube Video Link: Capturing Antarctic Geology in 3D: “Bird” Ventifact]

Stop 11: The Road to Double Curtain Glacier (back long wall)

Stop 12: Walking on Sea Ice at Scott Base Pressure Ridge

[Video Link: Frozen South – Ice Breakout 4K by Anthony Powell]

Into the Erebus Ice Tongue Cave

Stop 13: Cloudburst, Erebus Ice Tongue Cave

Stop 14: Fractal Arch, Erebus Ice Tongue Cave


Walking on Lake Ice

Stop 15: A Look Inside the Miniature Ice Palace

Stop 16: Looking Down at Ice Designs

Stop 17: A Midnight Ramble Around Lake Hoare

Walking on a Cape Royds Lake

Stop 18: Walking on Mysterious Ice

Walking Among Penguins

Stop 19: Walking with Penguin Scientists

Stop 20: Penguin Watching at Cape Royds

Stop 21: Into the Ocean, Cape Royds

Stop 22: Penguin Yoga, Cape Royds

Stop 23: In Search of the First Chick of the Season, Cape Royds

[YouTube Video Link: Newborn Penguin Chick at Cape Royds]

Stop 24: Conclusion to the Journey

Links to More Information

Artwork at HelenGlazer
More Antarctica Photos on my Flickr page
Antarctica Journal: Scroll the menu here or search for topics to read the original blog entries.
Cape Royds Penguin Research
Bravo! 043 Facebook Page for Sam Bowser’s Research Team
McMurdo Dry Valleys Long Term Ecological Research

Credits and Acknowledgements

Recording Engineer: Rick Delaney

Special thanks to everyone who directly assisted with the production of this exhibition: Laura Amussen, Exhibitions Director at Goucher College; Rick Delaney; Jowita Wyszomirska; the digital production staff at Open Works Baltimore; Full Circle Photo; the Otis College of Art Summer Residency Program; and Nicole Atkinson, Push to Start, Inc. And in Antarctica: Peter West from the National Science Foundation Office of Polar Programs; field camp researchers and personnel Sam Bowser, Laura Von Rosk, David Ainley, Jean Pennycook, Katie Dugger, Andrew Fountain, Rae Spain, Dave Van Horn, Renee Noffke, and Amy Chiuchiolo; mountaineers Forrest McCarthy and Evan Miller; and especially Elaine Hood of Lockheed Martin, who organized the complex logistics to get me to these special places. Thank you to my “Artists U Working Group”: Zoë Charlton, Alex Heilner, Nate Larson, Tony Shore, Marcia Wolfson-Ray, Olu Butterfly Woods and Jowita Wyszormirska, for the inspiration to add sound recordings to this exhibition and for your ongoing feedback as I developed this project, to the hardworking staff at the Greater Baltimore Cultural Alliance and to the Puffin Foundation. And I am especially grateful to my husband Joel Marcus for his invaluable support while I was “on the ice” and throughout the exhibition preparations.

Funding for this exhibition has been made possible in part by the Puffin Foundation and by the Rubys Artist Project Grants, a program of the Greater Baltimore Cultural Alliance conceived and initiated with start-up funding from the Robert W. Deutsch Foundation.
Capturing Antarctica in 3D

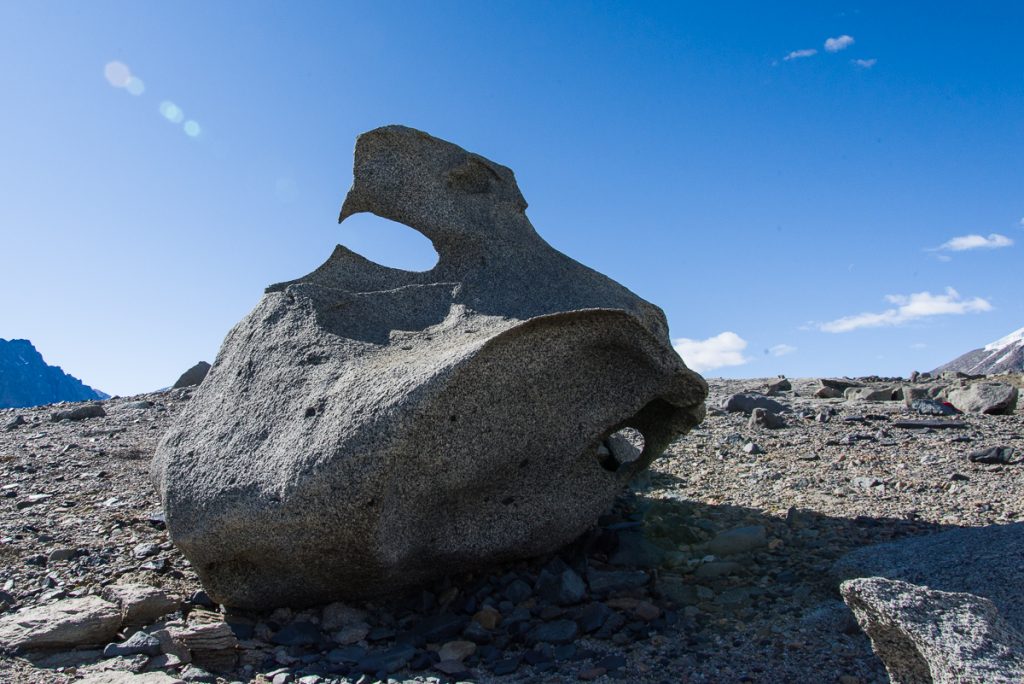
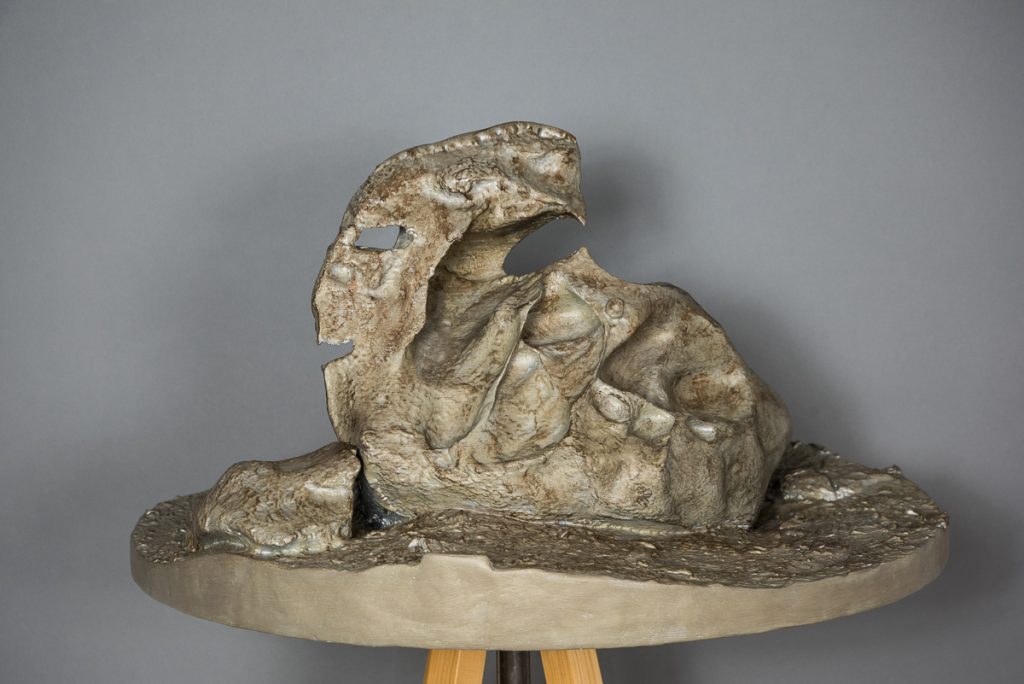
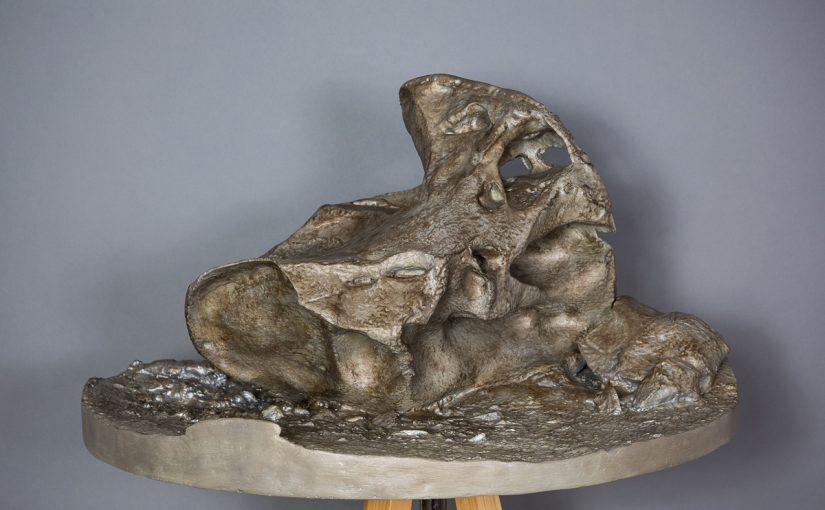
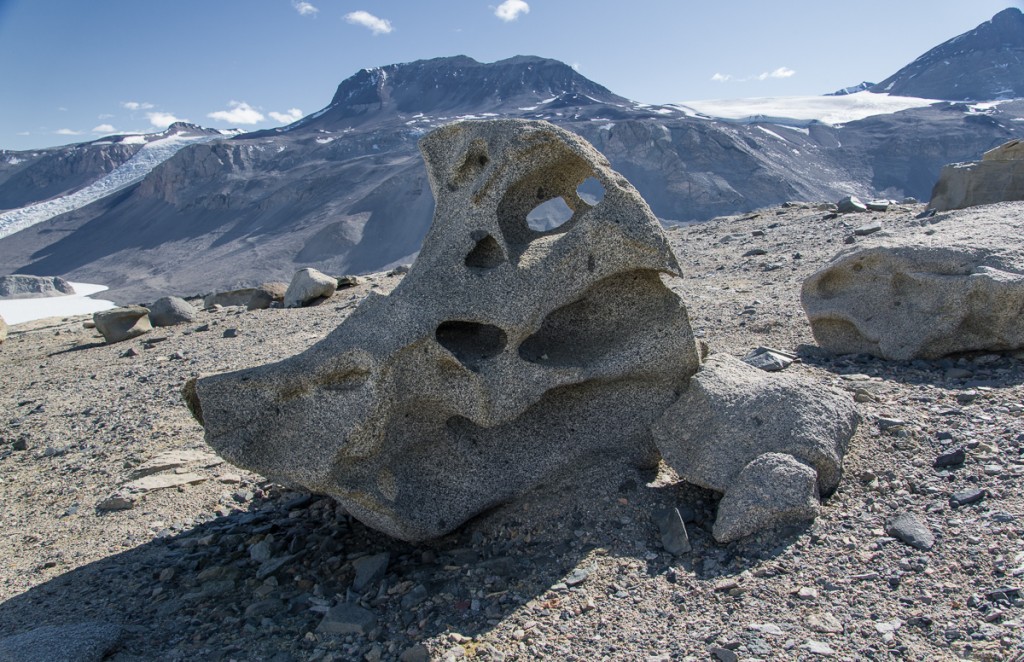
I’ve finished two sculptures made from 3D scans of the Antarctic landscape so far. This latest one is of a ventifact — wind-eroded boulder — that I photographed in the McMurdo Dry Valleys, a trip I recounted in an earlier blog post. I call it the “Bird” Ventifact because from certain angles, it looks like a giant beaked bird with a crest.

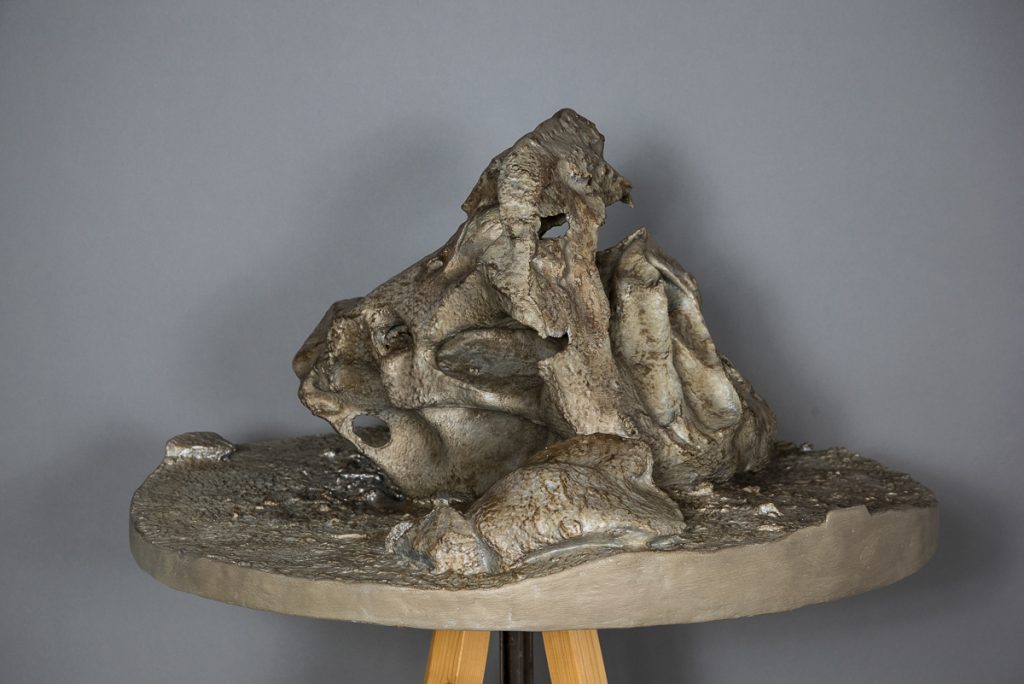
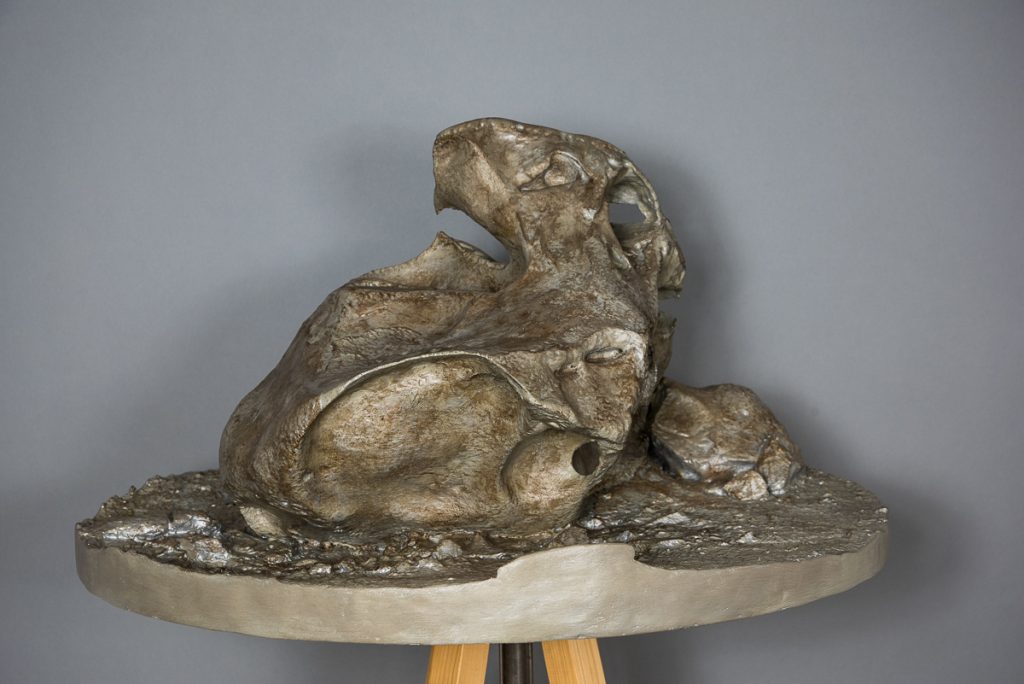
In addition to its lively, birdlike presence, part of what attracted me to this form was its concavities and holes, worn by the abrasive action of volcanic gravel carried by fierce Antarctic winds. If a successful sculpture is judged by how it transforms as one walks around it and takes it in from different vantage points, this ventifact certainly works as sculpture. By capturing it in 3D, I’ve “brought it home” for others to experience as an object and not just as a series of flat photographs. Looking at one side hardly predicts what you’ll find on other sides:

Ventifact, Antarctic Dry Valleys
Ventifacts and figures: granite boulders at the top of the ridge above Lake Bonney have been sculpted into strange shapes.
"Bird" ventifact
The “Bird” ventifact looks completely different from another angle. I took 31 photographs from different angles to make the 3D file.

In order to capture the complexity of the form, with all its undercuts and hollows, I chose 3D printing over CNC routing, because the router bit only moves up and down in one direction, and does not tilt to get other angles. 3D printing, by contrast, is additive, and builds the form in layers, preventing the undercuts from collapsing during the printing process with temporary supports that can be broken off once the print is finished. Since the 3D printers that I have access to only have a capacity of about 8 x 8 x 11 inches, and my finished sculpture is 16 x 29.25 x 29.25 inches, I had to print it in sections, epoxy it together, and smooth the joints between the pieces before painting it. However, I was able to assemble the 25-odd pieces into a seamless whole. I’ve made this short video of the process. Watch it full screen and see it come together:

Bird Ventifact Sculpture
The “Bird” Ventifact from another side. The finished sculpture is 16 x 29.25 x 29.25 inches.
Bird Ventifact Sculpture
Bird Ventifact Sculpture, alternate view.

How to Capture an Iceberg, or Photos into 3D

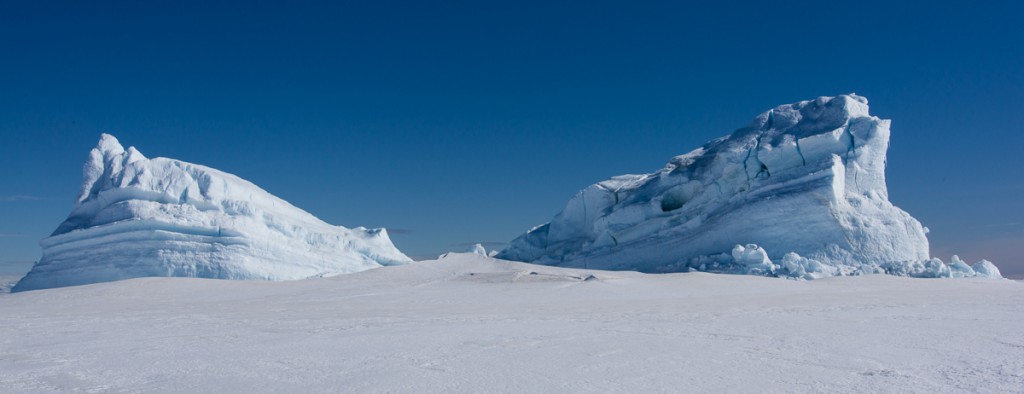
Iceberg source photo
One of 162 photos I took while walking around an iceberg stuck in the sea ice near the Dellbridge Islands.


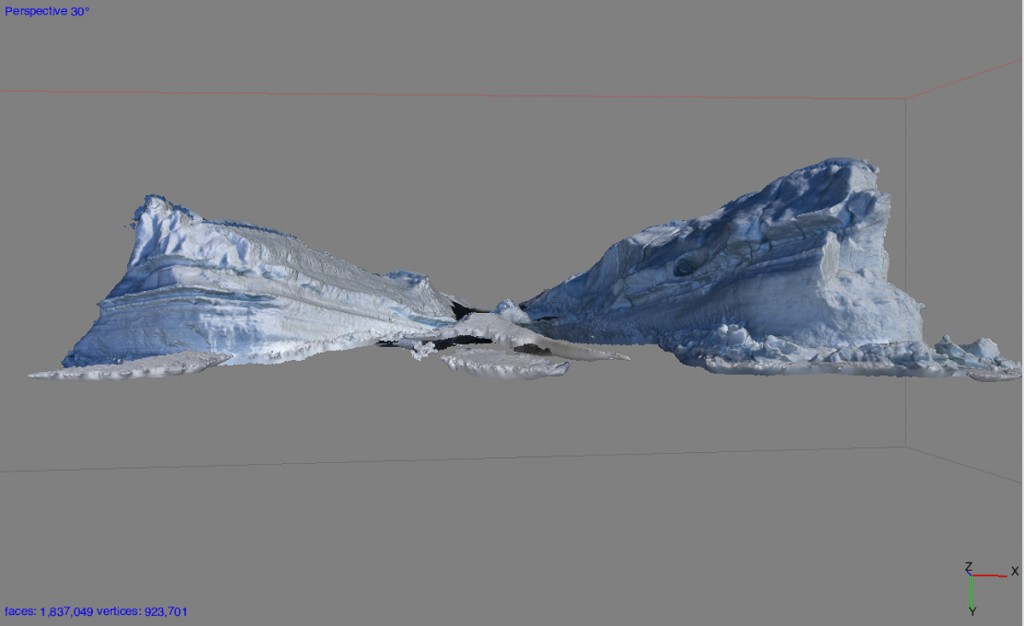
Iceberg after 3D processing
Screenshot of PhotoScan 3D file, with the “texture layer” (the colors from the original photos).
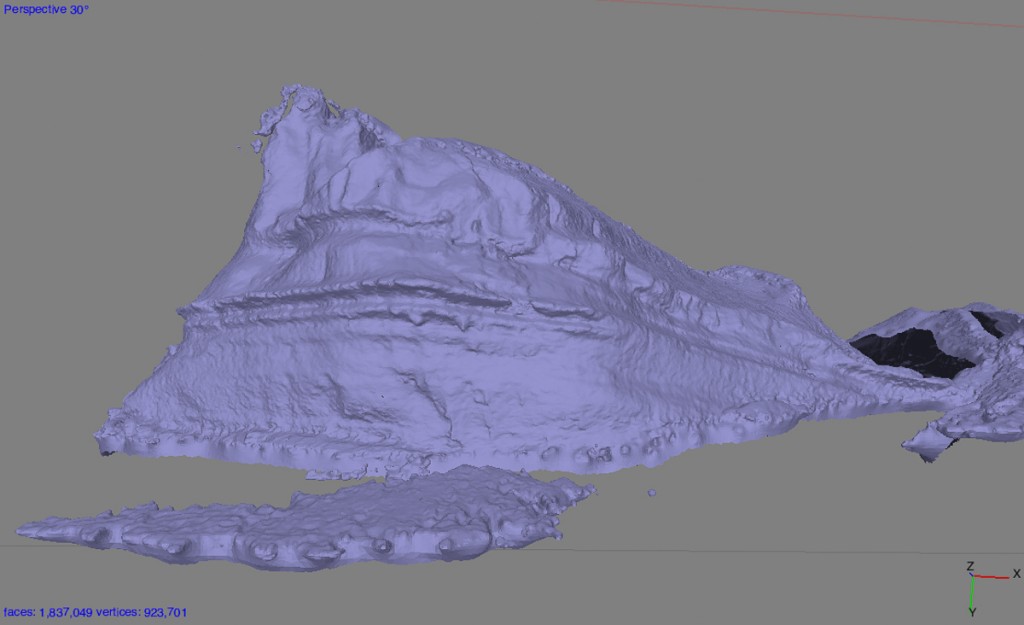
Iceberg 3D form
Close-up of the left half, just showing the form without the texture layer. Gaps will be filled in later in Modo, the 3D editing program I use. Gaps are areas the software can’t resolve. I think that some may not have been visible from the angles I photographed, while others were rather flat and didn’t offer enough cues for the software to match points between photos. But those are minor issues to fix.


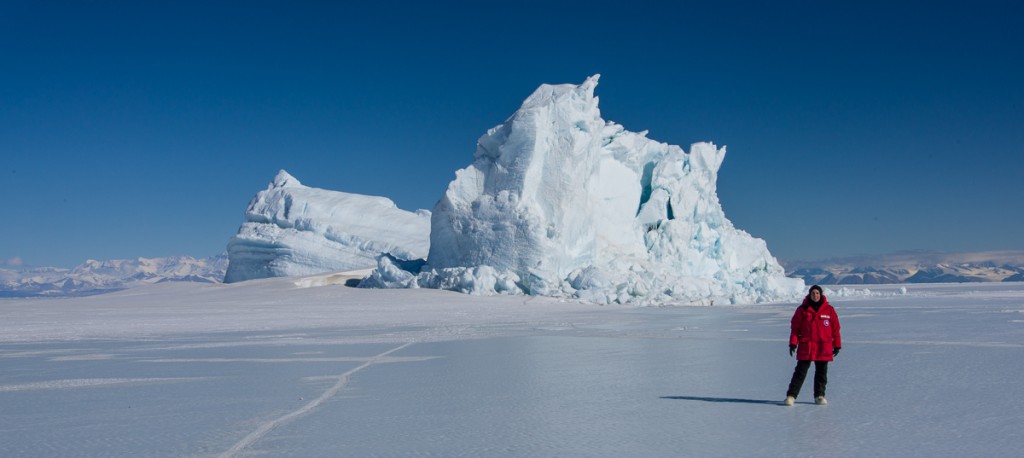
Part of my project here involves capturing forms in 3D. There have been plenty of photographs taken in Antarctica, within and outside the Antarctic Artists and Writers Program, but relatively little sculpture, and the sculpture that has been done has been more inspired by the landscape than an attempt to capture the specifics of the marvelous forms and textures produced by the interaction of wind and water in this unusual environment. My method for doing so involves taking a series of overlapping still photos of an object or scene from different angles and processing them with photogrammetry software into a 3D file. I edit that file in 3D design software and then fabricate it as a sculpture generally using a CNC router at Fab Lab Baltimore, though they can also be 3D printed. The three photos above show stages in processing my most ambitious capture thus far completed: 162 photos of a large iceberg stuck in the sea ice near Inaccessible Island in McMurdo Sound that I shot on December 1st. I blogged about that day in an earlier post — Evan and I went out there in a Haagland tractor and this iceberg was our first stop. There’s no way it would be possible to make a 3D capture like this with an iceberg floating in the water. Also when you’re in a zodiac boat near a floating iceberg, you have to keep your distance because it can flip without notice, causing dangerous waves.  This photo gives you an idea of the scale:

Me with the iceberg
Me and my iceberg. It’s stuck in the sea ice near Inaccessible Island (my favorite island name in Antarctica — sounds so…remote). When the ice around it melts, it probably will start floating again eventually. See the diagonal lines, especially noticeable on the left side? Those are earlier float lines. As icebergs melt in open water they shift position, sometimes tilting, sometimes doing an abrupt flip. You wouldn’t want to be this close to it if that happened. But stuck in six feet of sea ice this one wasn’t going anywhere!

Up until recently I used Autodesk 123D Catch to create the 3D files, which is very good free software. Right before leaving for Antarctica, I purchased Agisoft PhotoScan Standard, which can handle larger files, and, I hoped, the larger number of images and greater detail I intended to throw at it with my Antarctic images.

Liberty Cap
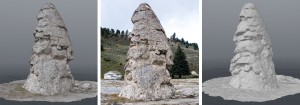
The largest object I’d ever processed a 3D file of before was the Liberty Cap at Yellowstone. One of the source photos is in the center, with two views of the 3D file in Modo on either side.

Turns out PhotoScan is up to the task, although it takes several hours of cranking away in the background for the 3D captures to process. That’s why I haven’t processed that many yet. But I wanted to try a few to make sure it would work. Up until now, the largest natural object I’ve made a capture of is the Liberty Cap, a rock formation called a hot spring cone in Yellowstone National Park that’s 37 feet high. I made that file with 123D Catch and it came out so well I was reasonably confident that the formations would, too.

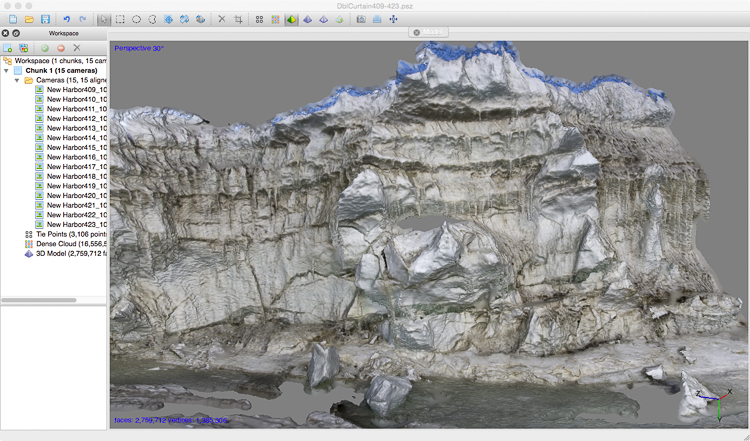
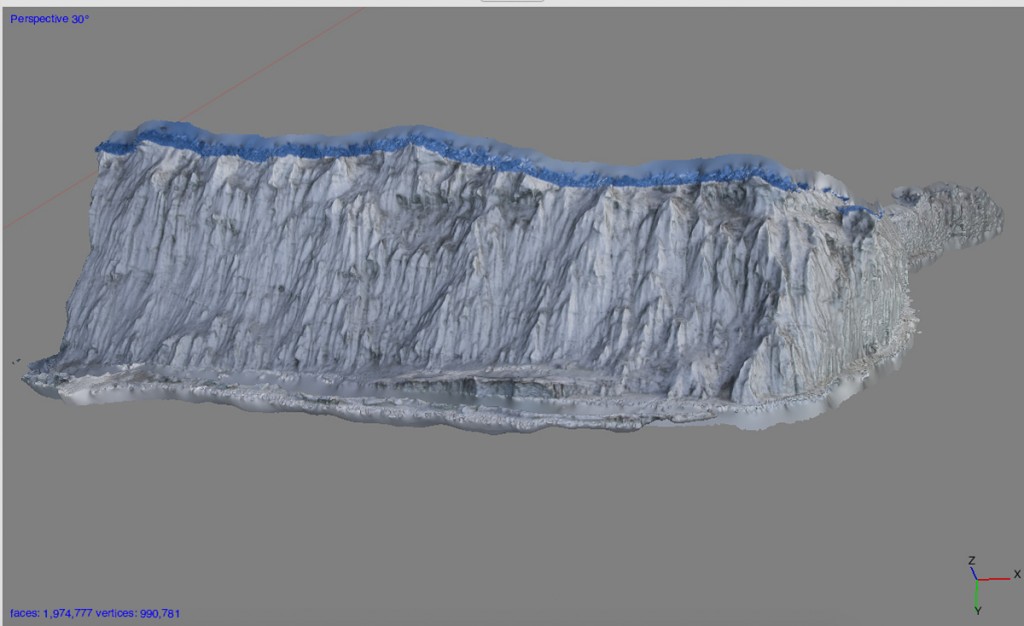
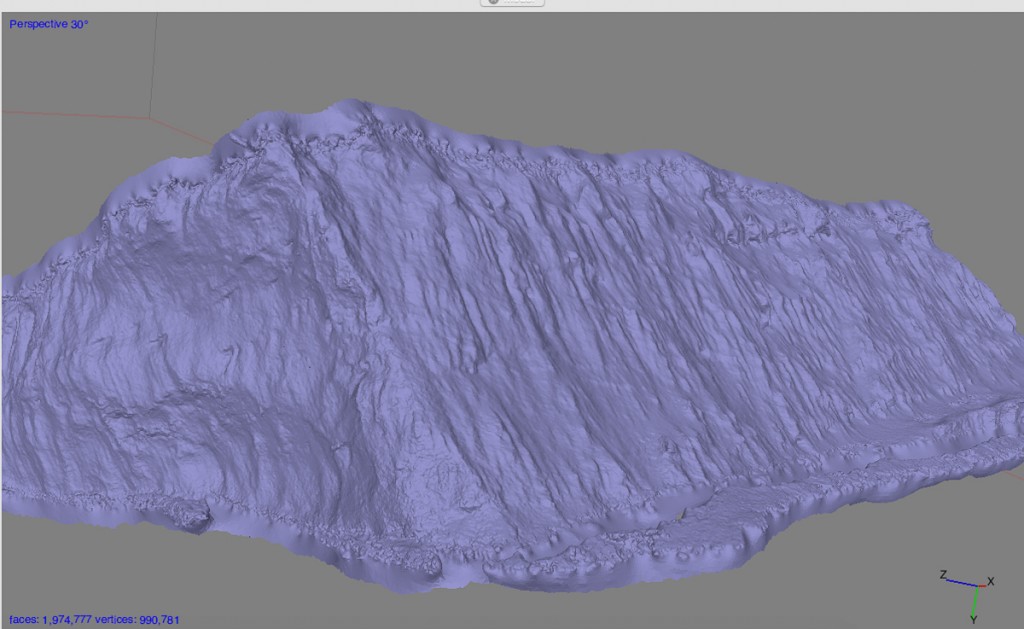
I started with this pressure ridge by the Double Curtain Glacier, which I also talked about in an earlier post. It wasn’t a huge number of photos, but extraordinarily complex. I was excited to get this result:

Pressure ridge 3D file
PhotoScan was able to process the elaborate quasi-Baroque facade of this pressure ridge.
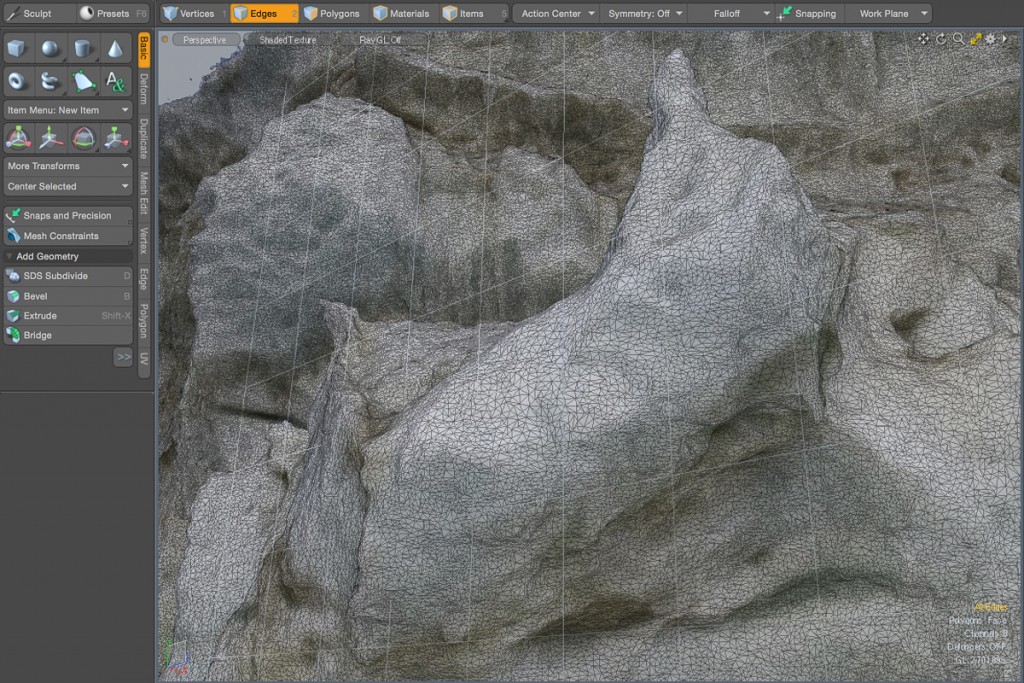
Modo screenshot
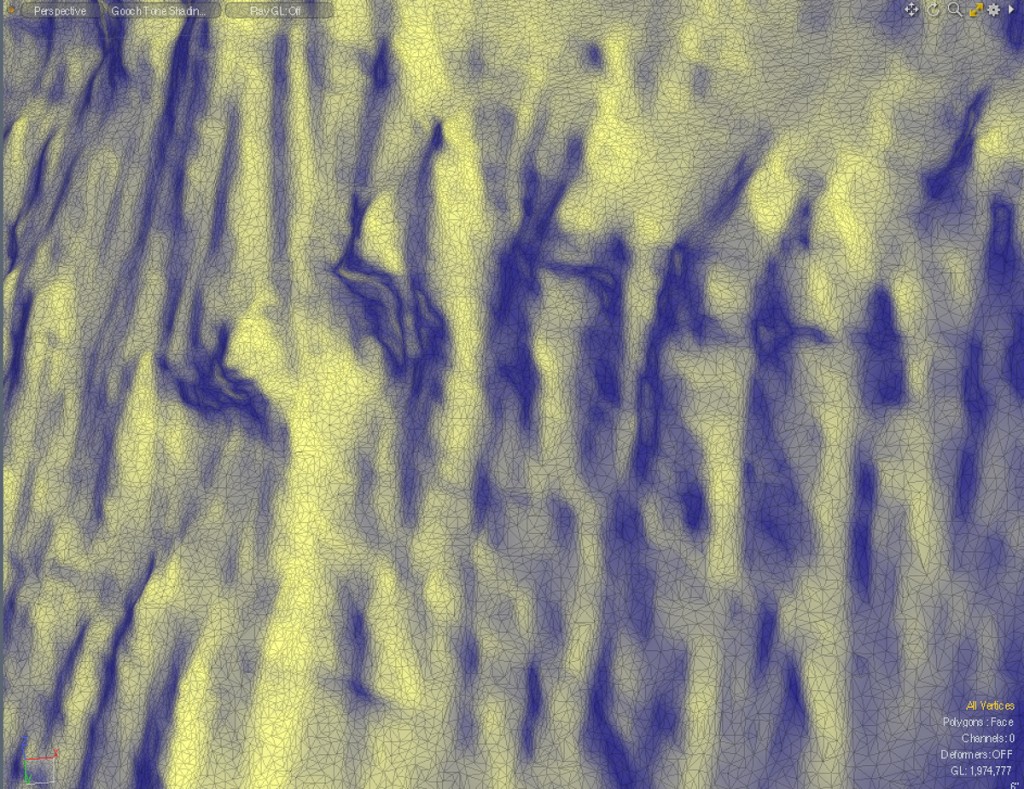
This Modo screenshot shows a detail of the center of the above 3D file. You can see how photogrammetry software makes a polygon mesh, breaking the form into little triangles. These triangles can be moved, deleted, or otherwise edited.

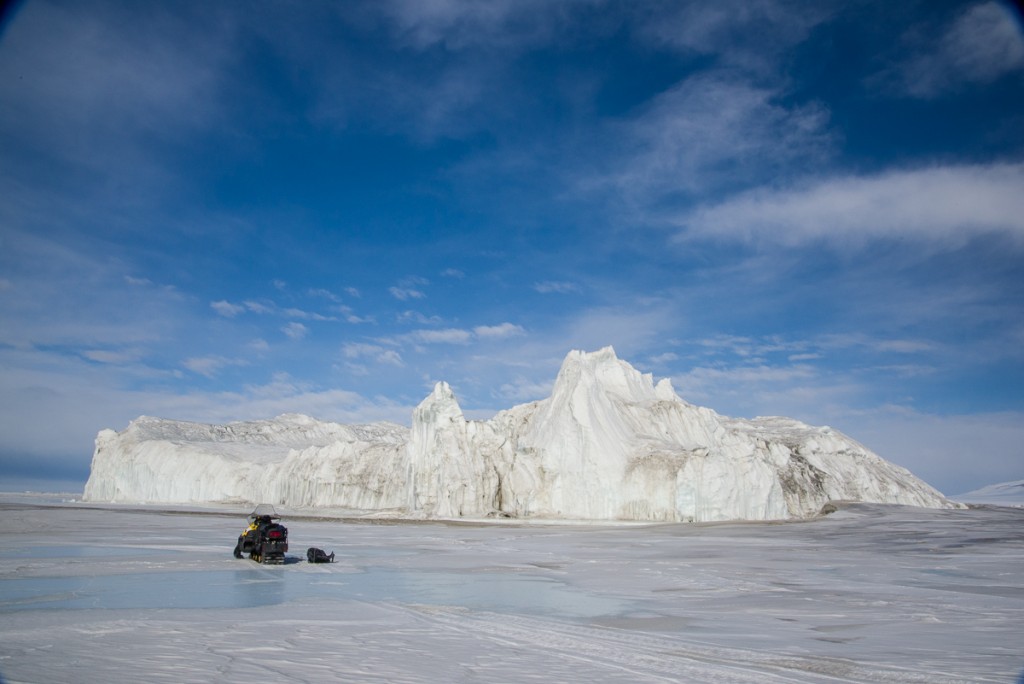
Before tackling the iceberg at the top of this post, I tried processing a portion of an enormous iceberg stuck in the sea ice that Laura Von Rosk and I traveled by snowmobile to see. I wasn’t sure if anything that large could be processed, so although I spent a half hour taking about 170 photos of it from every angle, I only processed 44 of the photos of one side and a bit of its adjacent sides. Here are some screenshots from that experiment. Check out the amazing detail captured from this huge object:

Iceberg near New Harbor
This is an iceberg stuck in the sea ice between New Harbor and Cape Bernacchi. The snowmobile in the foreground gives you an idea of how enormous this iceberg is.
PhotoScan capture of iceberg
PhotoScan processed 44 of the photos into an excellent 3D version of this portion of the iceberg. No gaps!
Iceberg, different view
Another side of the iceberg, shown without the texture layer.
Modo screenshot
This is a Modo screenshot of a detail of the mesh of the above 3D file. Check out the detail!

I have many captures ready to process as 3D files, including the Scott Base pressure ridge, the Canada Glacier, Blood Falls, ventifacts, even a penguin subcolony (we’ll see if the penguins moved around too much to process). I’ll share them on this blog as I complete them, though it will be some time before I get to them all because it takes a few to several hours for PhotoScan to go through its paces. But I’m positive I’ll be bringing back many pieces of 3D Antarctica from this trip.