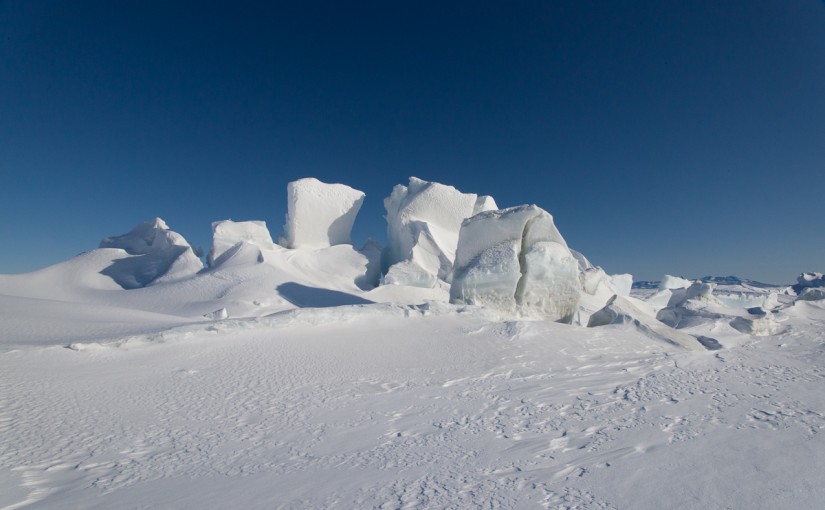
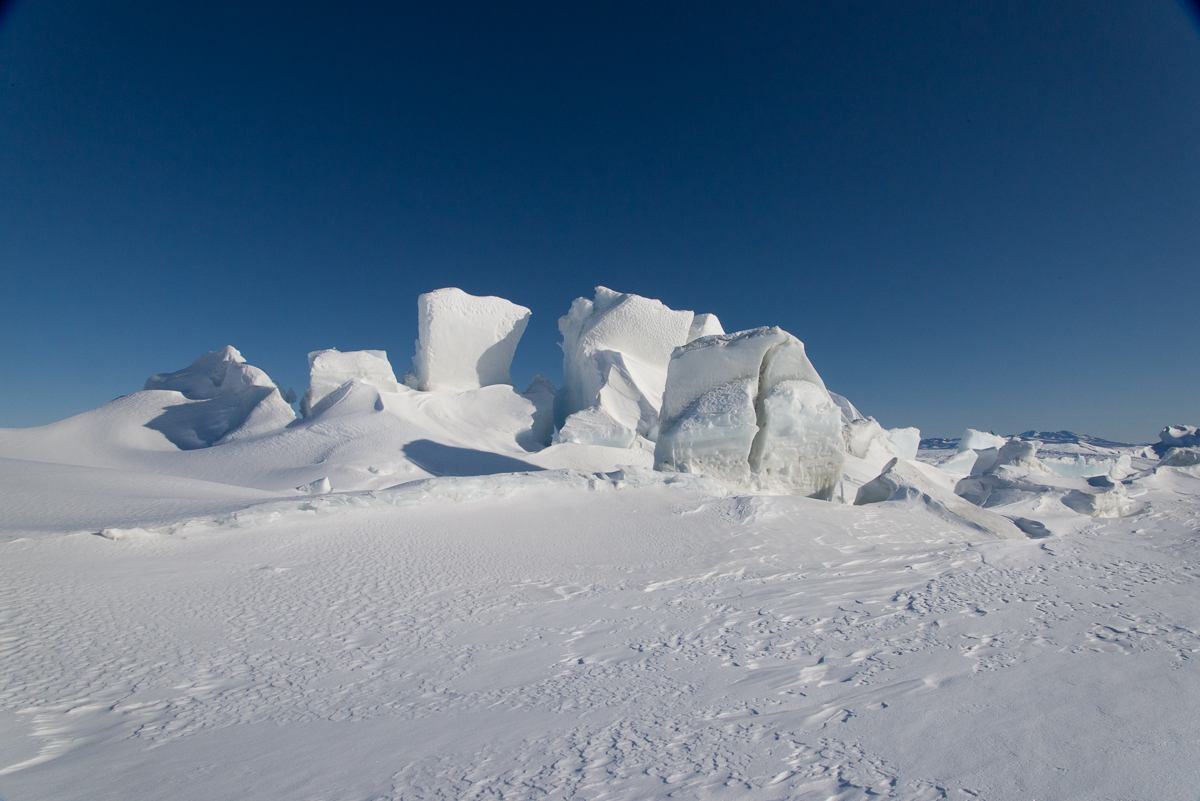
The Antarctic & Arctic Data Consortium has included two of my photos in its 2017 wall calendar (shown above and below). 7,000 calendars were printed; 3,500 were distributed at the 2016 American Geophysical Union Meeting in San Francisco. The remainder were shipped out to other organizations and collaborators.
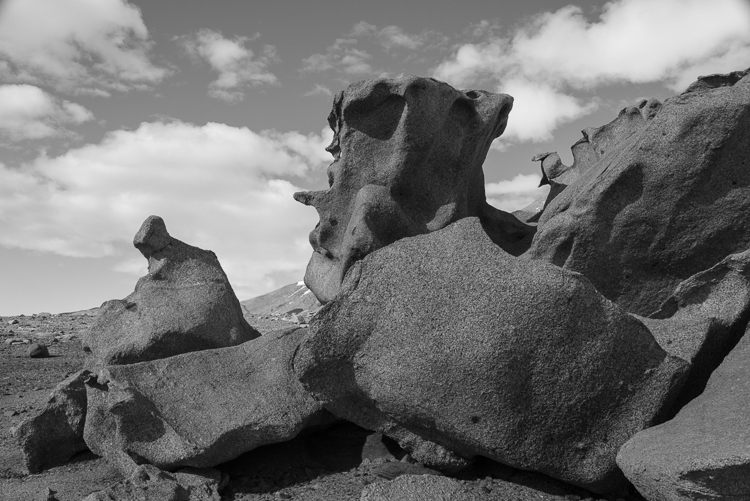
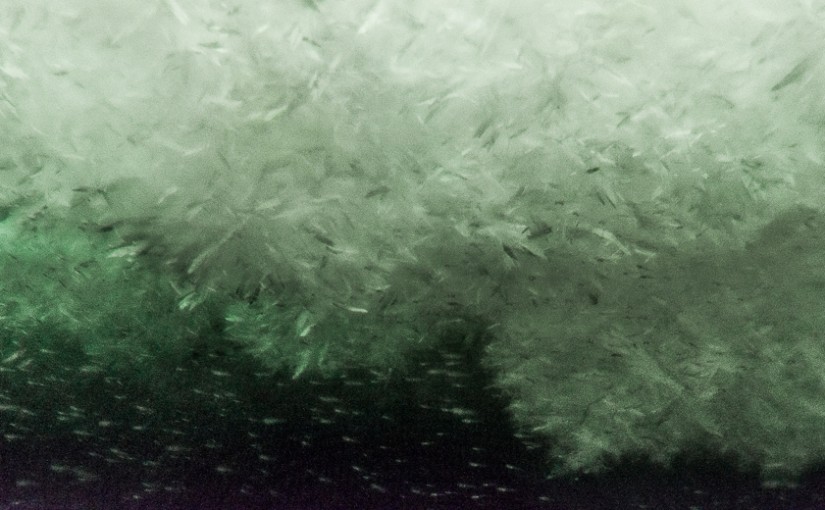
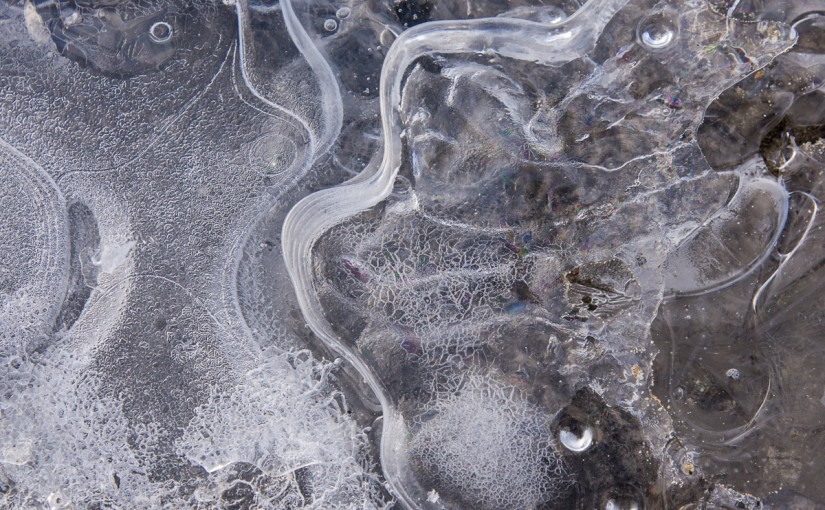
Both of the photos were taken in the McMurdo Dry Valleys when I spent a week there in December 2015. The photo above is of a ventifact field above Lake Bonney that I called the Surrealist Sculpture Garden (more about that here). The one below is a close-up of delicate ice designs that had formed over sediment atop the frozen surface of Lake Hoare (more photos here).
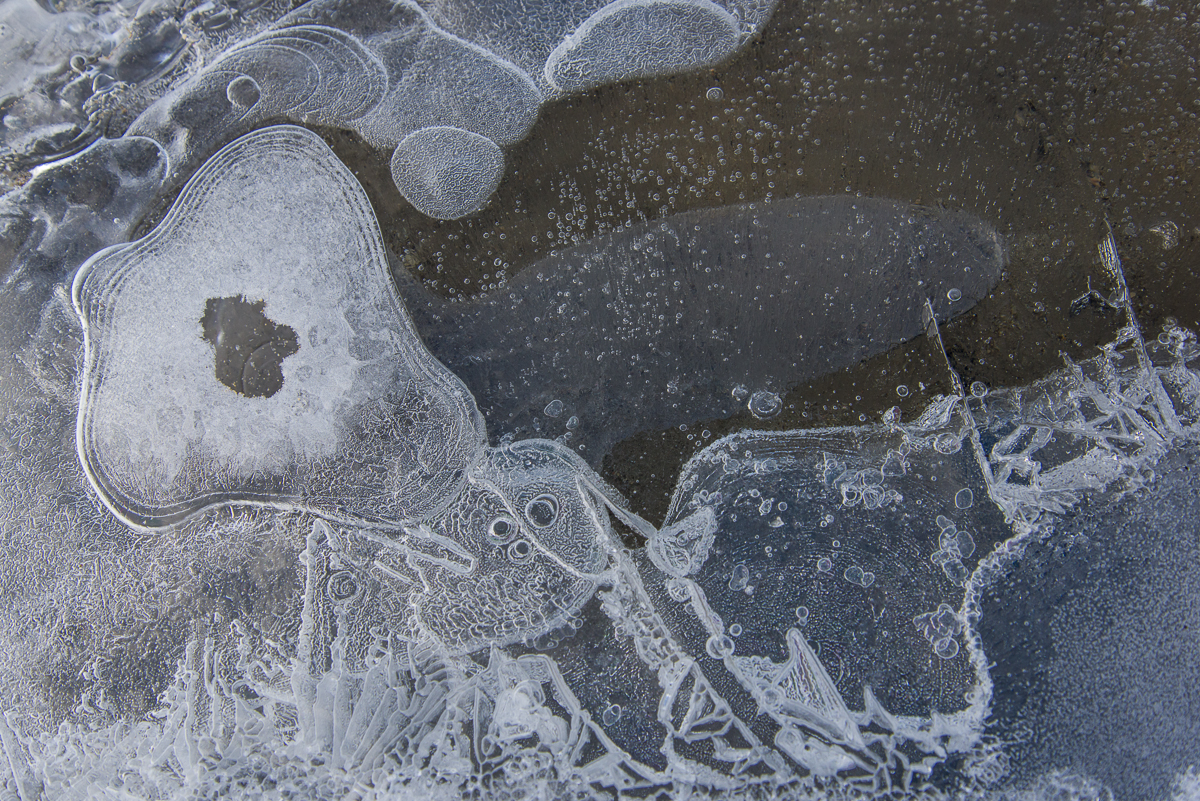
The surface of Lake Hoare near the field camp has an elaborate network of ablated ice structures. When the weather warms enough to melt them in December, they form intricate “drawings” in thin sheets of ice over the sediment that has blown there. This one reminded me of a skua, a gull-like bird seen along the Antarctic coast.
The a2dc (as they render their acronym) “was initiated to provide a centralized resource for scientists to submit, use, and discover polar data. The participating organizations provide the expertise and tools to support fellow polar researchers.” When I was in Antarctica, I met staff from two of the ten organizations, UNAVCO and the Polar Geospatial Center (PGC). Both organizations had offices in the Crary Science Labs at McMurdo, where their staff provided crucial mapping and geophysical data for the scientists. The PGC is based at the University of Minnesota and specializes in aerial views, assembling detailed maps from satellite photos of remote locations and have dozens of Antarctic maps online. UNAVCO works on the ground, doing GPS surveys, terrestrial laser scanning, and other kinds of measurements. An example is this two-year study which tracked the erosion of an ice cliff in the Dry Valleys and concluded that it was melting faster than anticipated due to climate change.
2017 Antarctic and Arctic Data Consortium Calendar
Biologists who study the creatures that live on the ocean floor in McMurdo Sound do their work during the first part of the summer research season. That’s when the sea ice is strong enough to support the heavy tractors that tow the dive huts onto and off the ice. Huts on the sea ice are removed by mid-December, when air temperatures warm and cracks in the ice widen and deepen. In a previous blog post, I’ve already written about my stay at Sam Bowser’s field camp at New Harbor, which is across the sound from McMurdo at the edge of the Dry Valleys. Other scientists collect samples right by the base, from a dive hut set up on the sea ice that’s a short downhill walk from the Crary Lab and the helicopter pad.
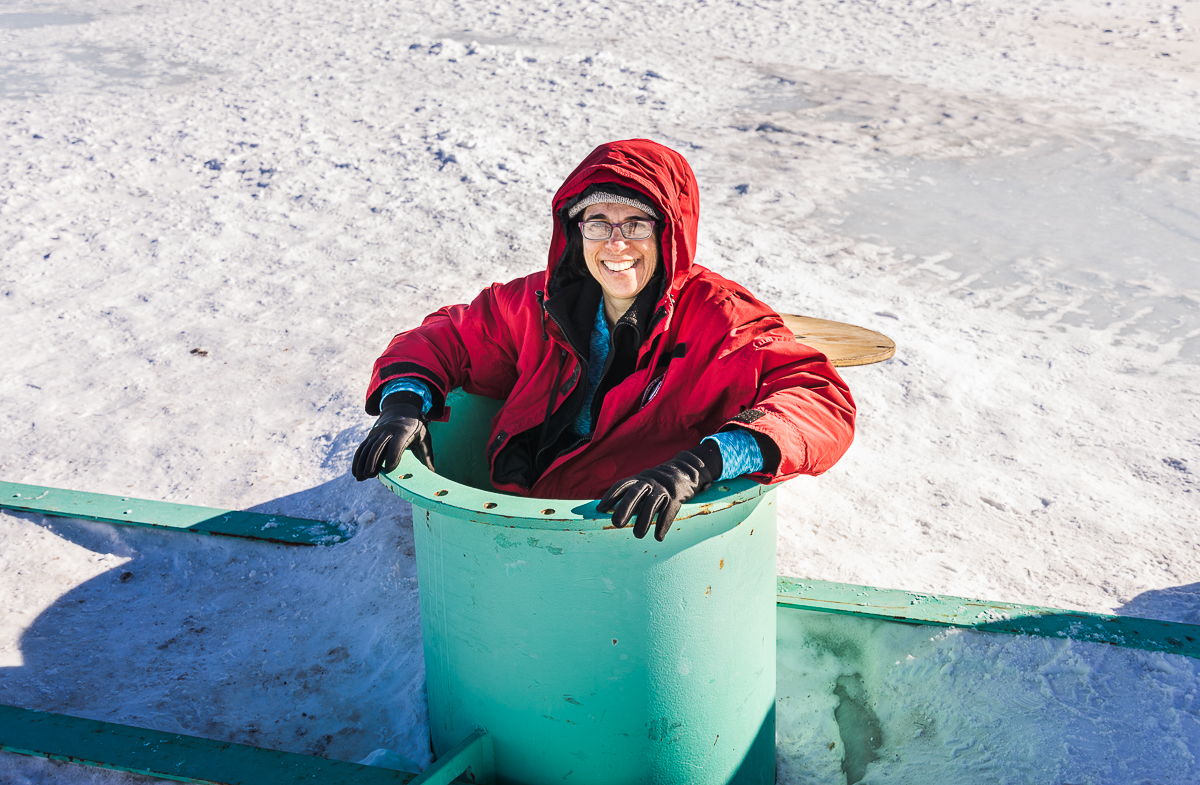
Ready to climb inside the Ob Tube. Photo: Shaun O’Boyle.
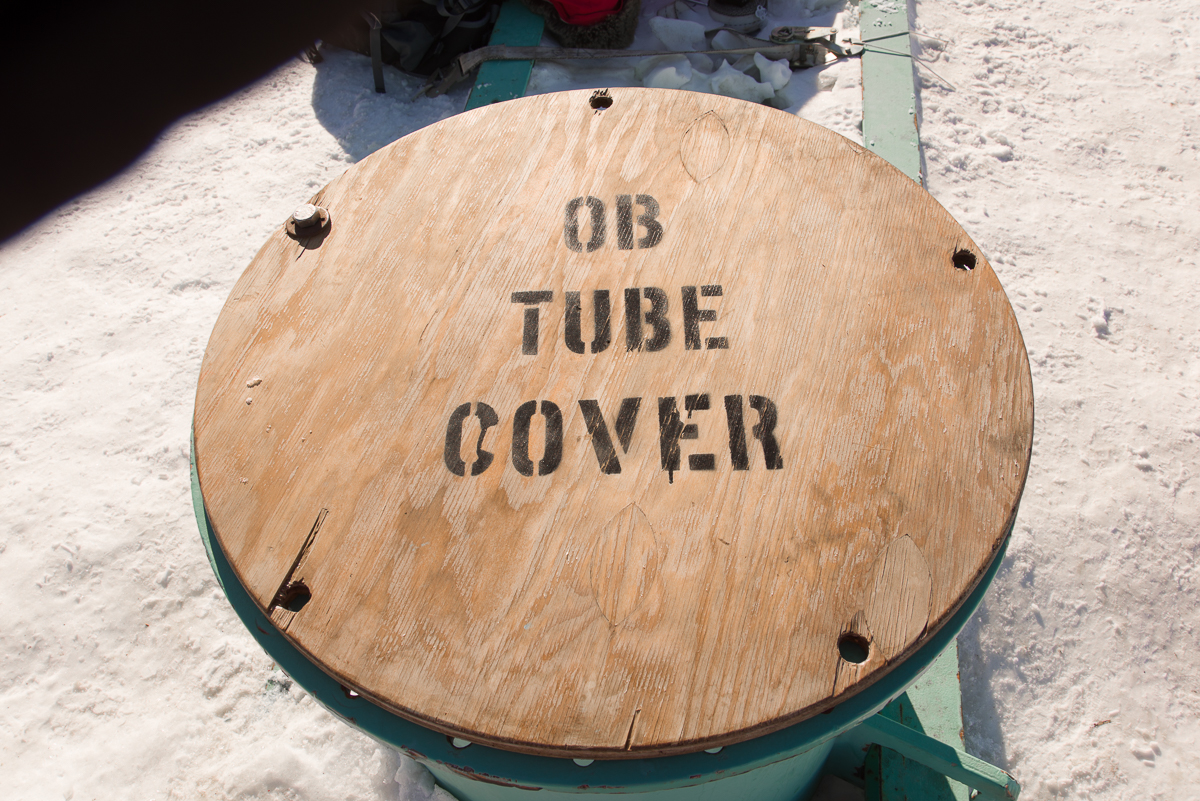
Near the hut, a smaller hole is drilled in the ice and the Observation Tube is installed. Known around town as the “Ob Tube,” it’s basically an underwater manhole with windows, dating back to the days when the U.S. Navy ran McMurdo. Anyone living on the station is permitted to go to the station firehouse any time of day or night and pick up the key, as long as they are accompanied by at least one other person. I went with Shaun O’Boyle, the other Antarctic Artists and Writers Program participant at McMurdo while I was there, on the morning of November 27th, timing our visit for a morning when we knew biologist Gretchen Hofmann’s dive team would be working there.
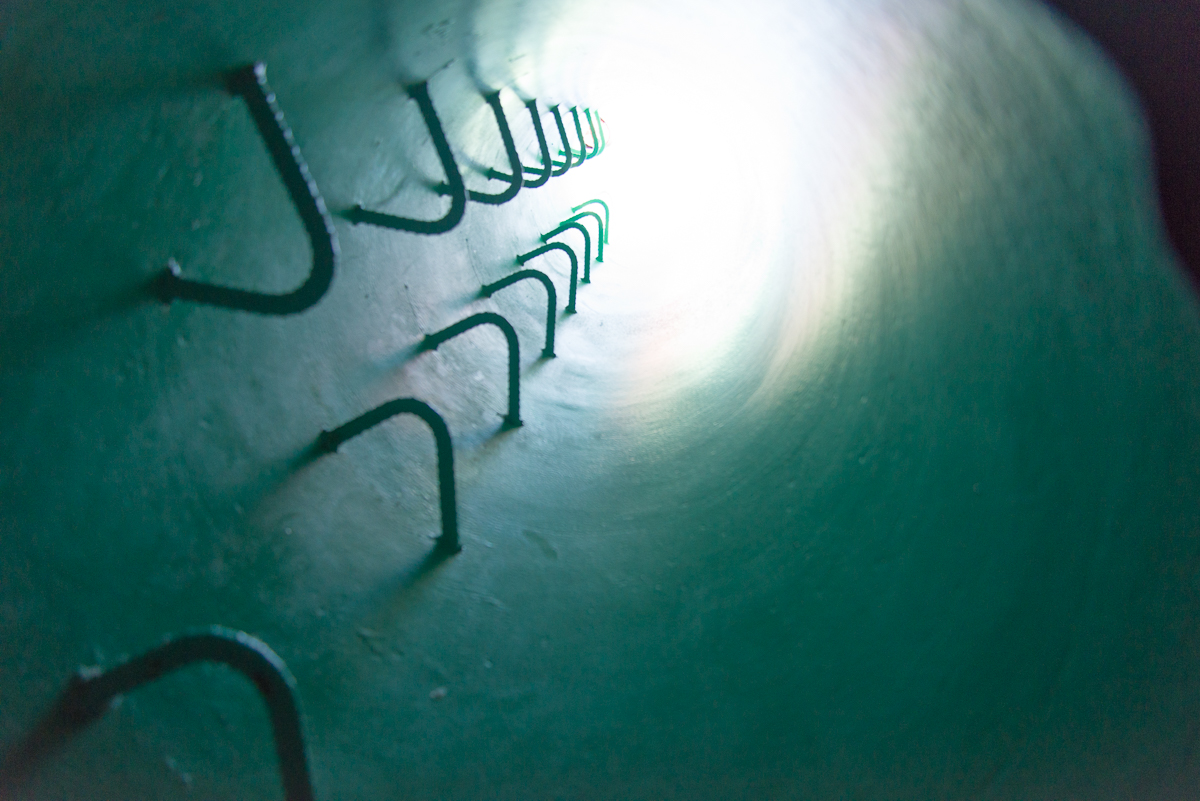
Getting down: looking up at the handholds inside the Ob Tube.
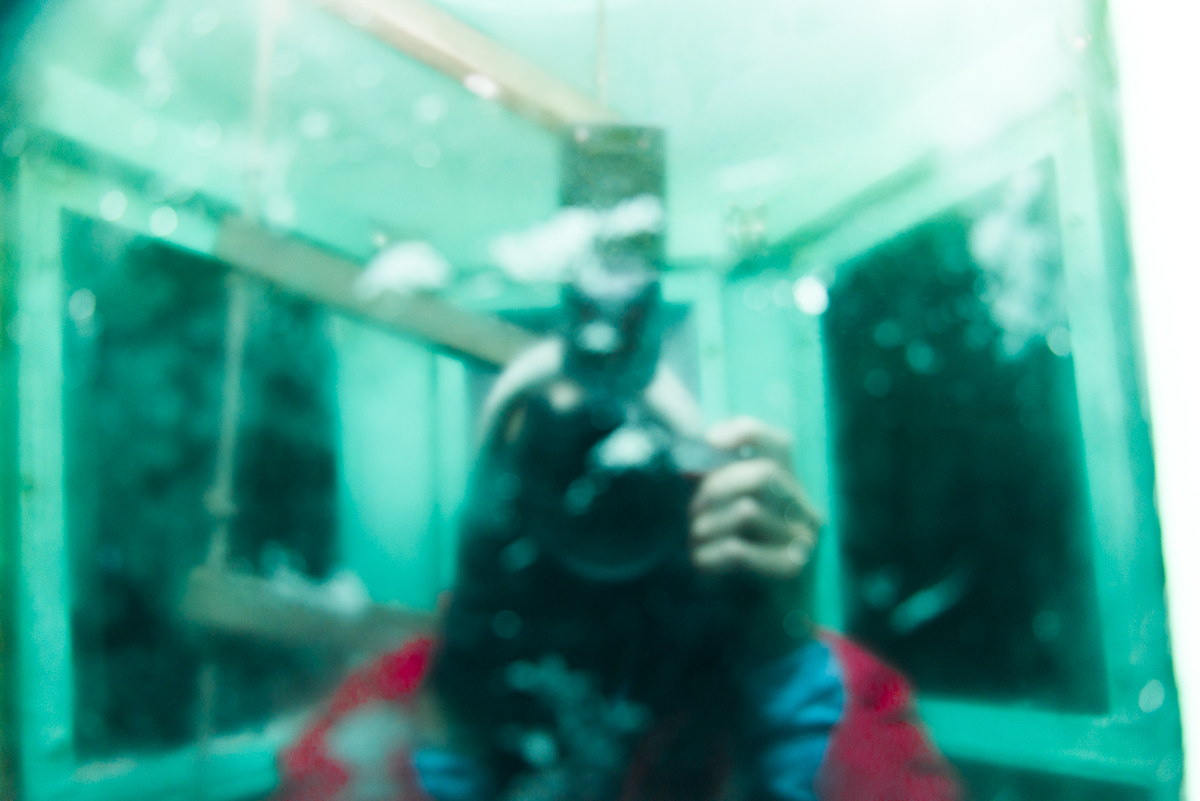
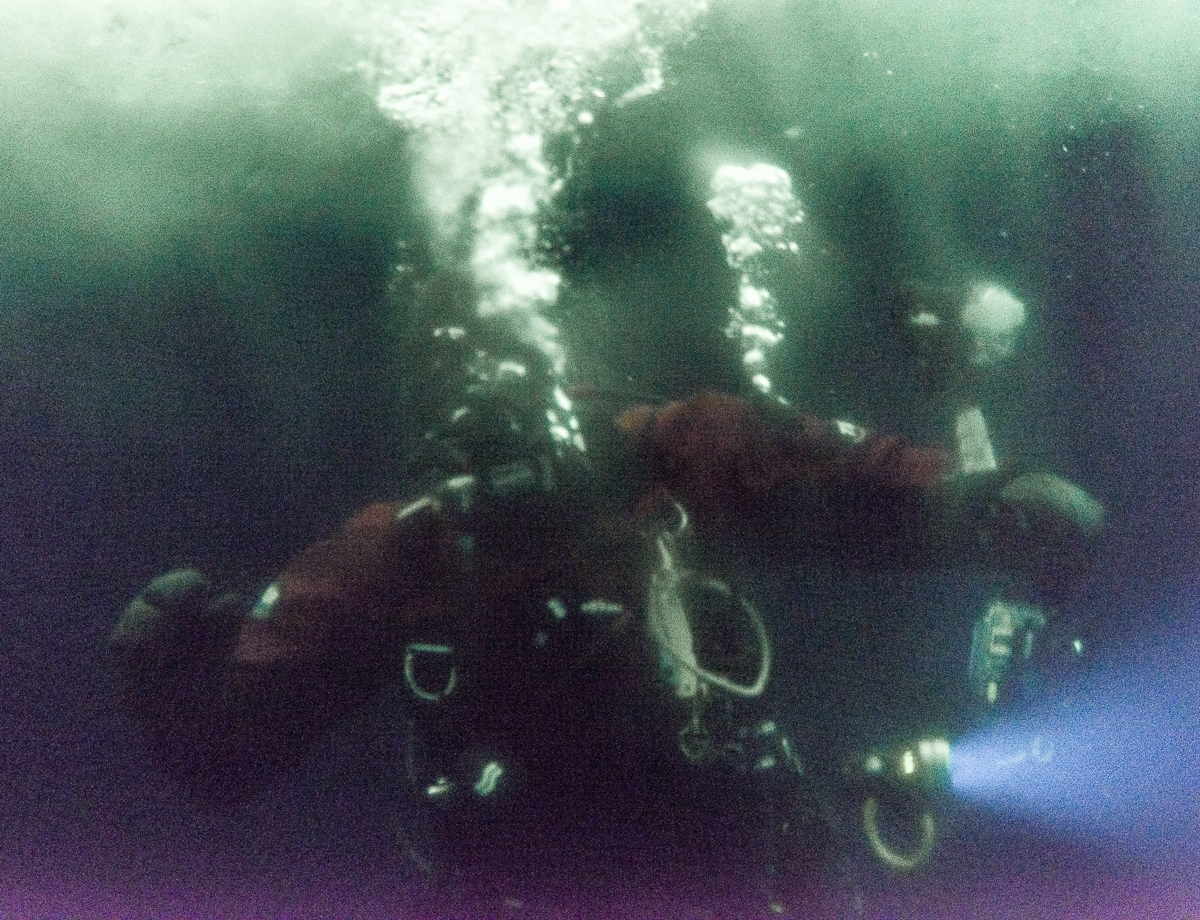
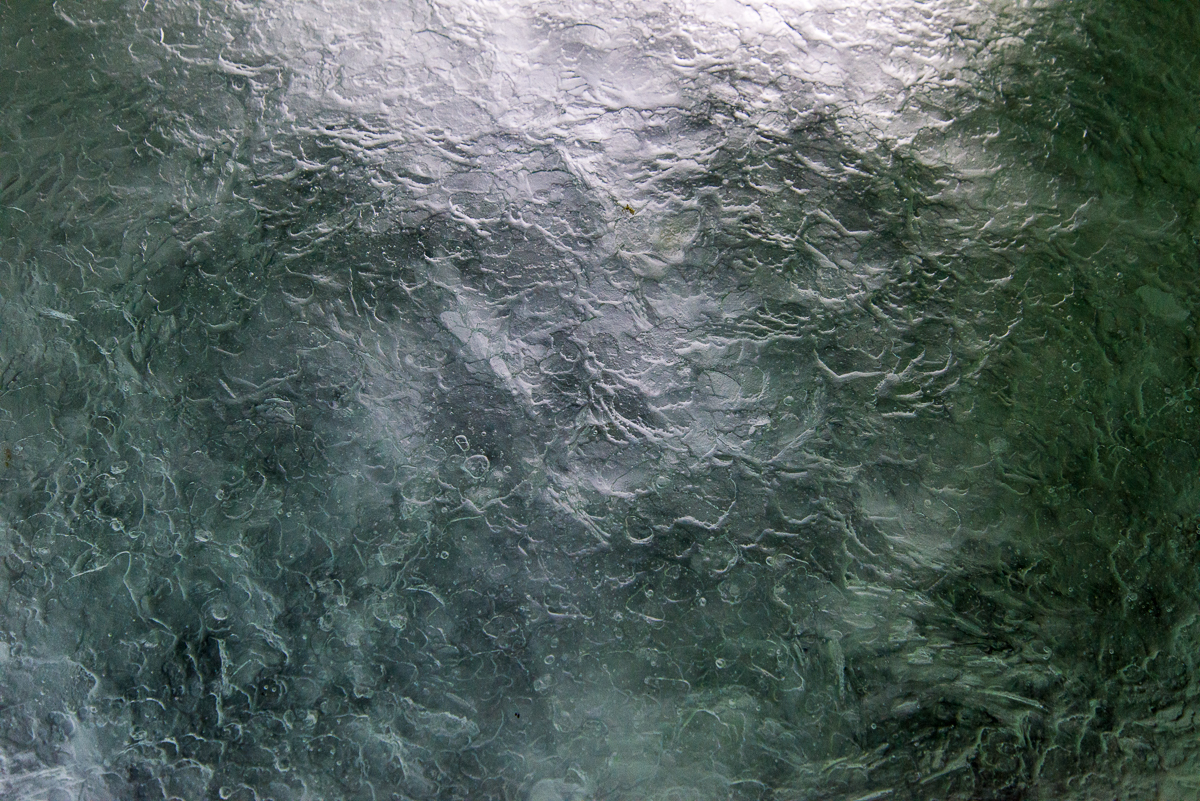
A visit to the Ob tube is not for the claustrophobic. I’m not a large person, but climbing down the tube via metal handholds while wearing a down parka didn’t leave much room to maneuver. You descend the last few feet via a rope ladder, which is visible in the background of my inadvertent selfie below. Standing at the bottom, you are surrounded by windows and looking up at crystal chandeliers of sea ice. Schools of tiny fish scoot past.
Inadvertent selfie: I tried using my flash, but just ended up with a photo of my reflection. Instead, I had to set the ISO to Auto and photograph by available light. You can see the rope ladder in the background.
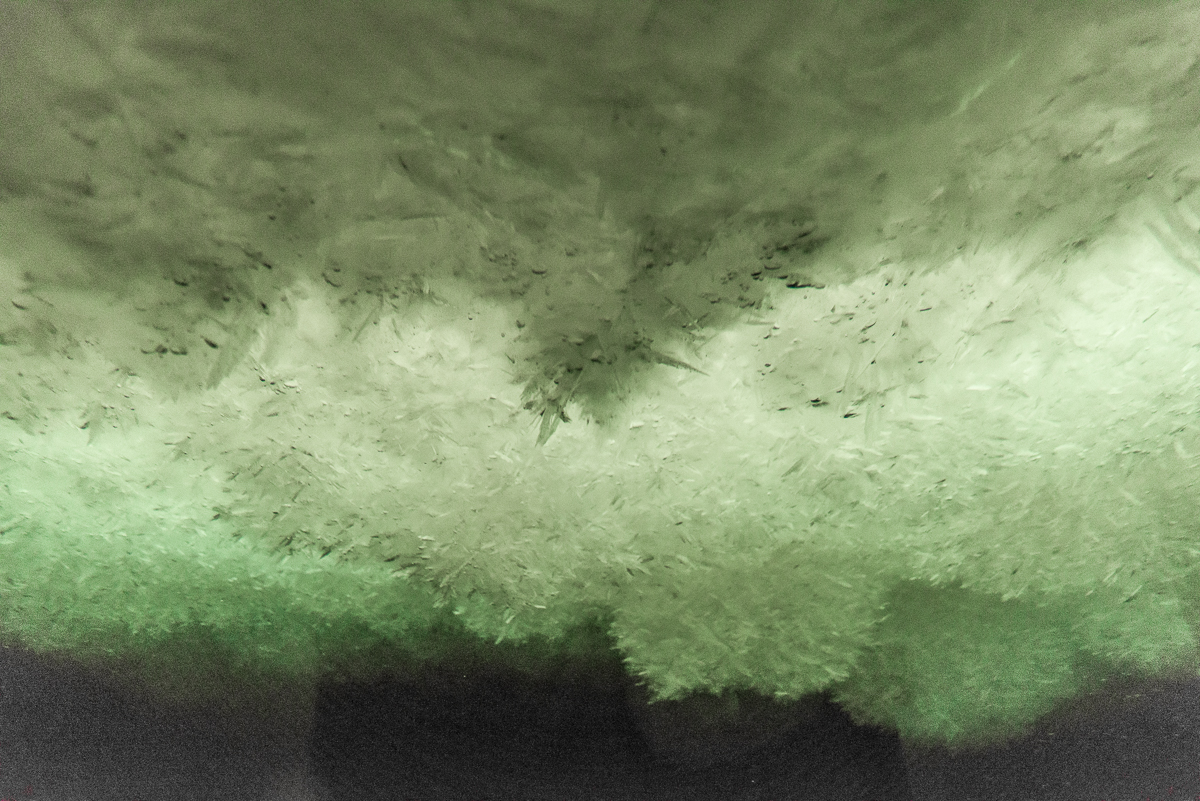
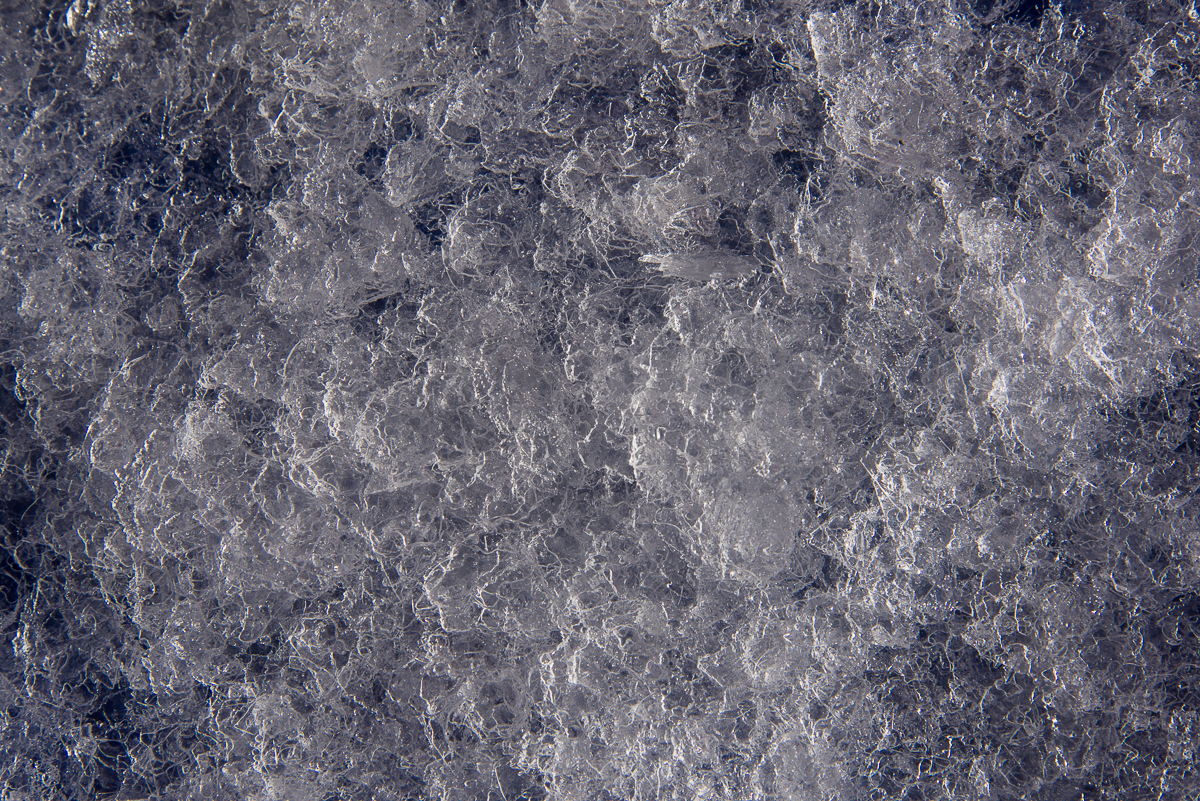
The Ob Tube provides a unique view of the underside of the sea ice, which is covered with mounds of platelet ice, clusters of thin, irregularly shaped slivers of ice, each a few millimeters thick and around one to four inches in diameter, that attach together at apparently random angles. Composed of 80% seawater and 20% fresh water, platelet ice is a peculiarly polar phenomenon that Encyclopaedia Britannica’s sea ice article calls “perhaps the most exotic form of sea ice besides marine ice.” A scientific paper based on research at McMurdo explains that these “semi-consolidated” layers of ice can be anywhere from a few inches to several meters thick and in Antarctica are “commonly observed beneath sea ice in regions adjacent to floating ice shelves.” Located not far from the ice shelf/sea ice border, the Ob Tube is perfectly situated to observe platelet ice.
Mounds of platelet ice have formed beneath the sea ice above the Ob Tube. Exotic? Encyclopaedia Britannica thinks so.
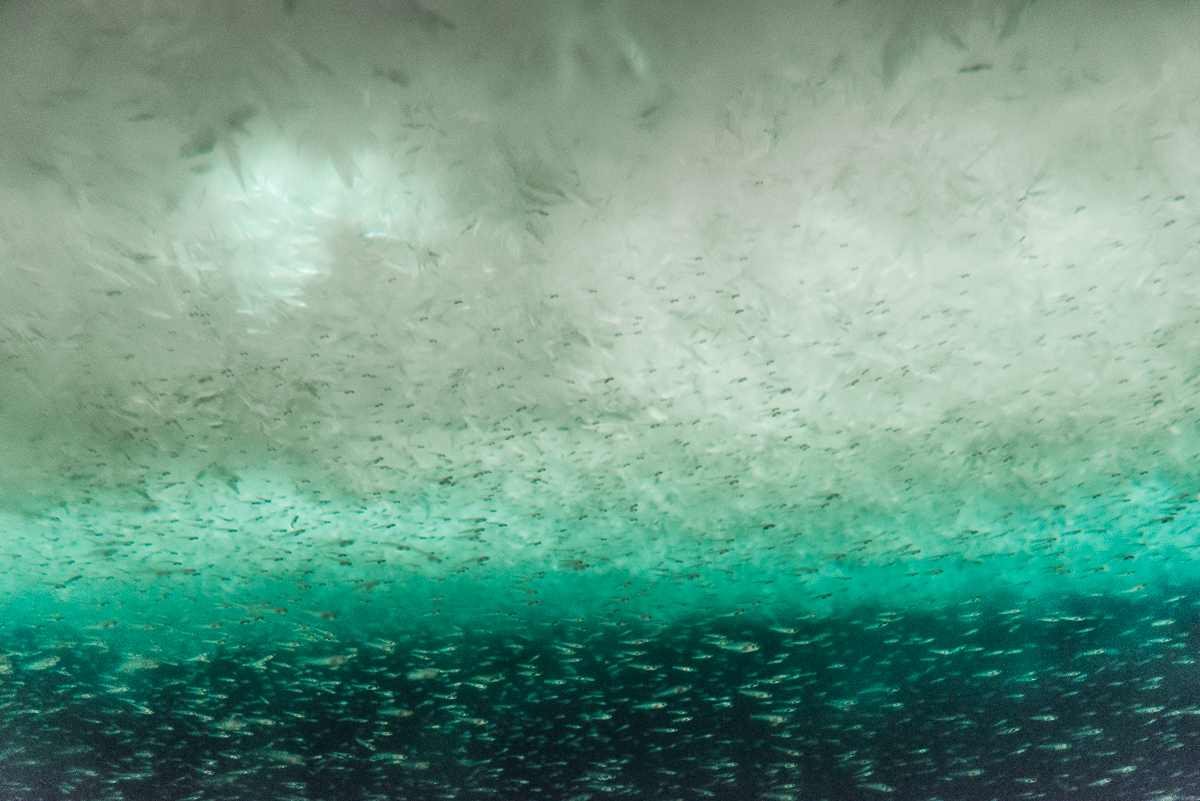
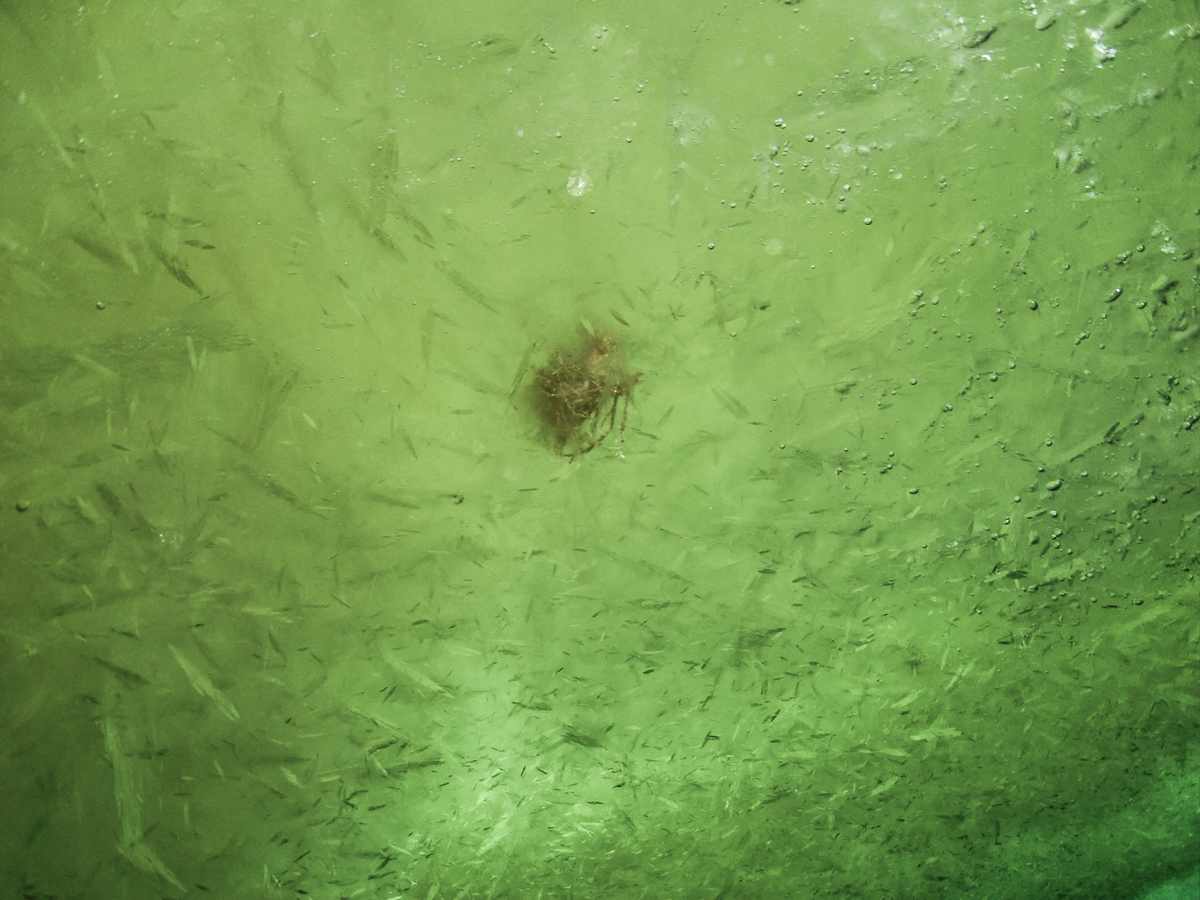
Outside the Ob Tube, large schools of tiny fish swam past.
Gretchen Hofmann is based at the University of California Santa Barbara and is studying the impact of ocean acidification on the Antarctic pteropod and the Antarctic sea urchin. (Read more about her research on the Hofmann lab page.) Umi, a doctoral student and member of her dive team, swam up to the Ob Tube and helpfully wiped the frostiness off the outside of the windows with his gloves, which did making it easier to see out!:
Umi, a doctoral student from UCSB, was diving for pteropods.
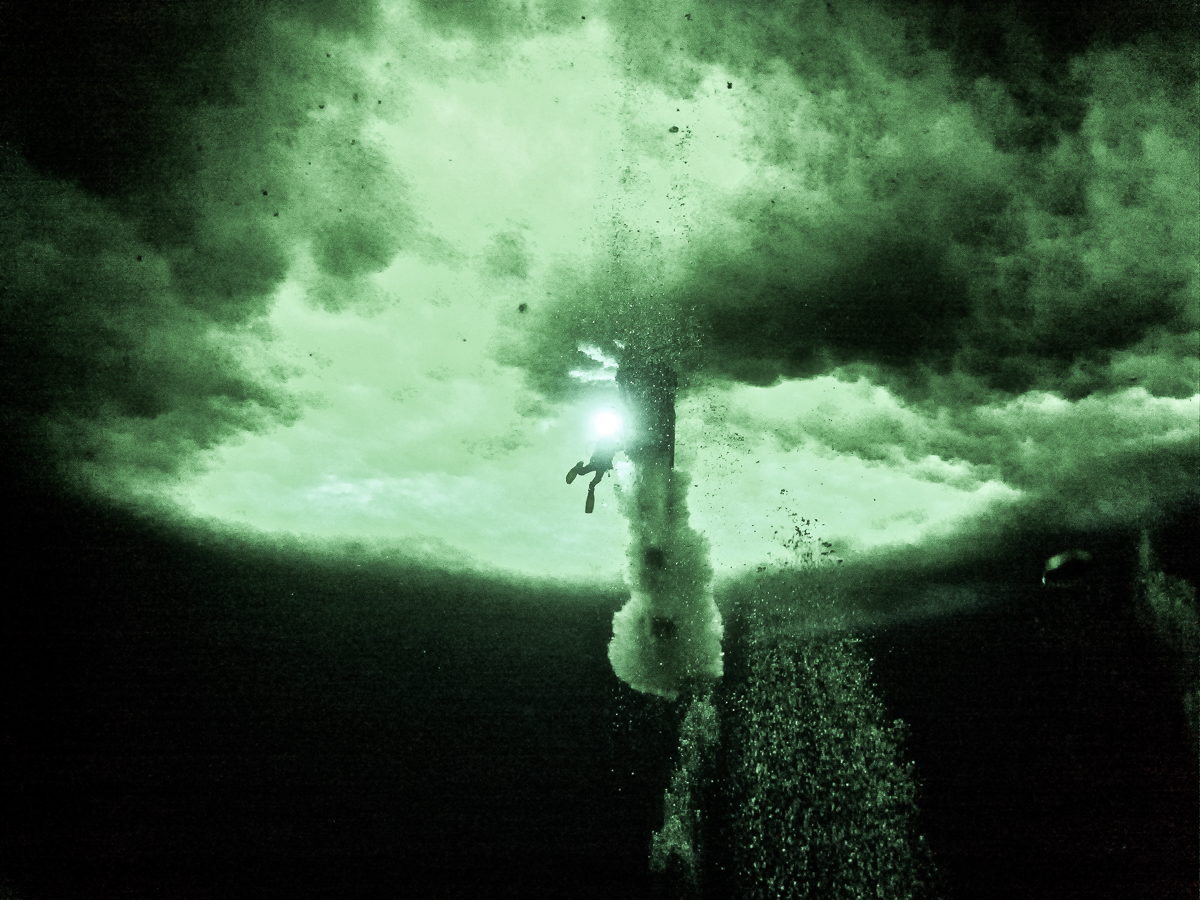
A pulsing, glowing form the size of a dinner plate drifted past — a jellyfish:
A passing jellyfish.
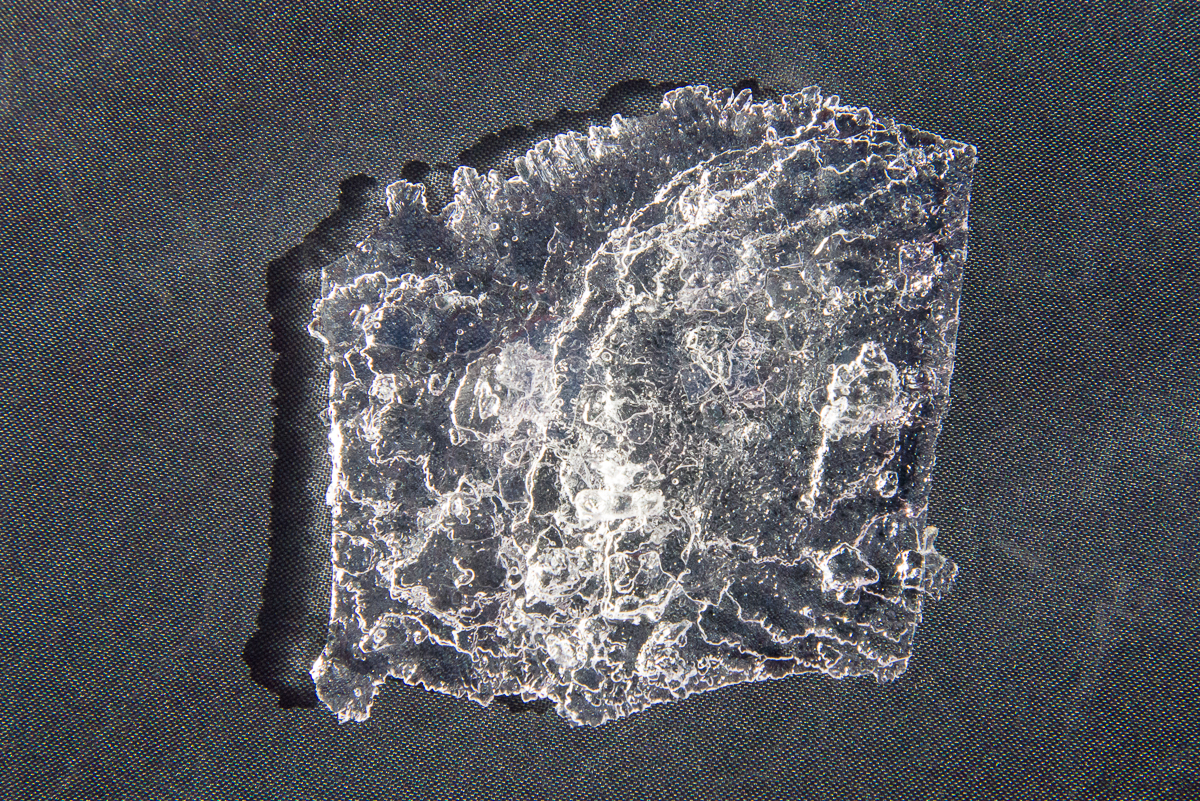
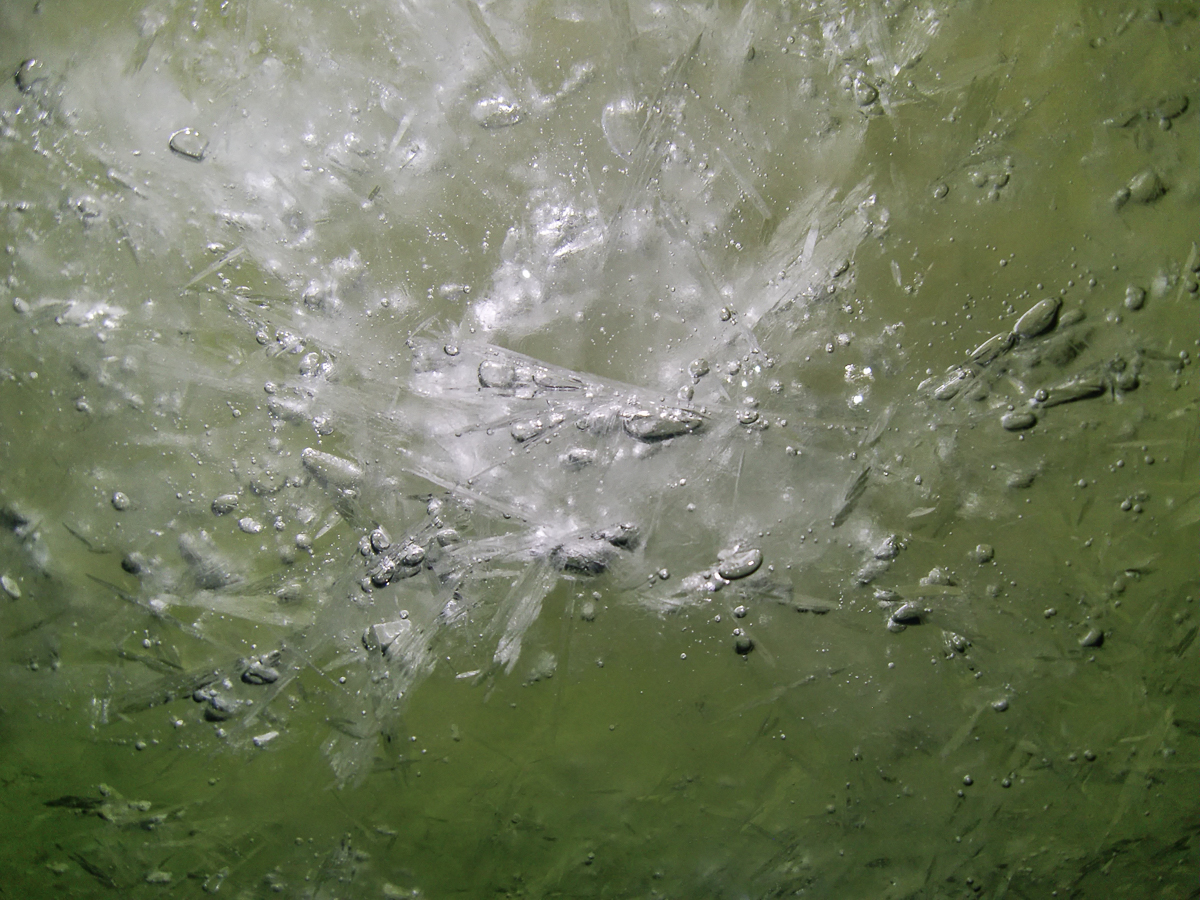
A closer look at a single platelet.
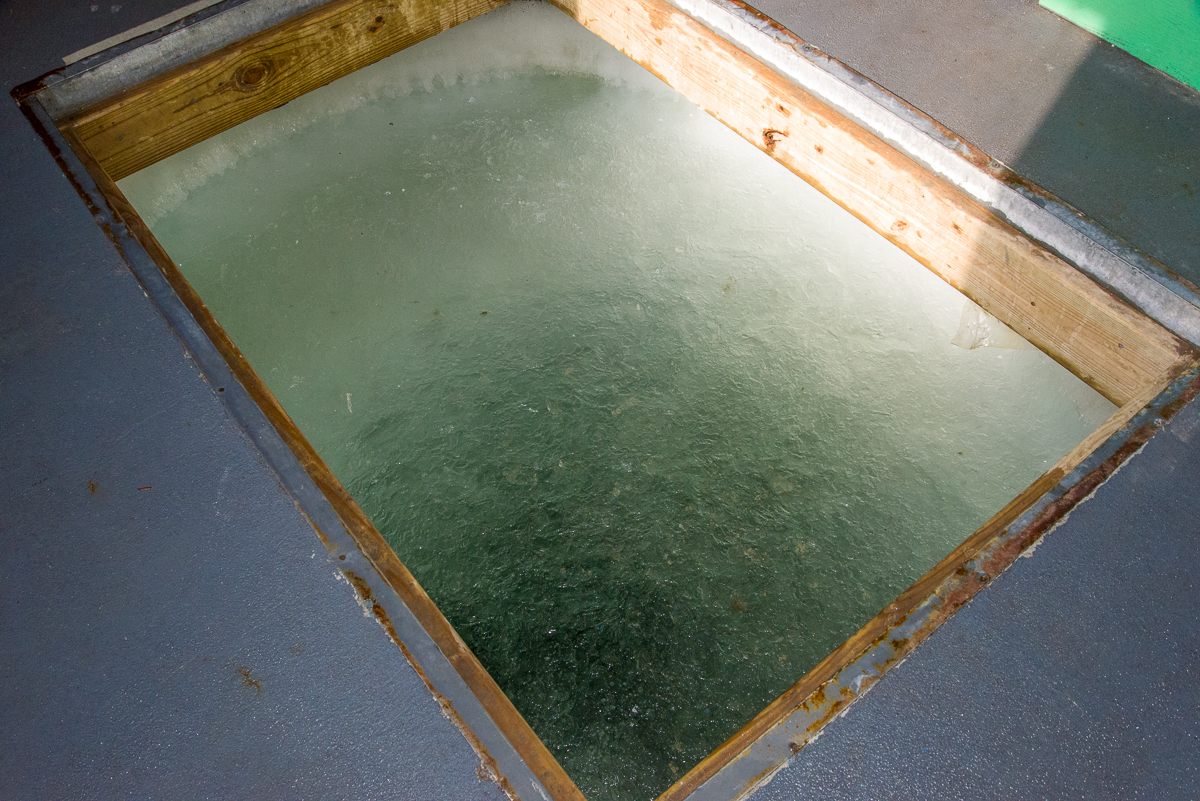
It’s a good thing Shaun and I got to the Ob Tube when we did, because a few days later, it was decided that it was time to pull it out and haul the dive hut back to dry land. I went back to dive area on December 5th, when Gretchen’s team was making their last dive. Steve Rupp, one of the two dive supervisors on staff at McMurdo each season, offered to take some photos of the outside of the Ob Tube for me, and to bring up some platelet ice for me to photograph up close. Elaine, my logistics coordinator, came along to help me. The plan was to scatter the platelets on some pieces of discarded tent fabric I’d borrowed from the McMurdo Craft Room as a backdrop, but periodic gusts of wind over 25 mph didn’t make that easy. What you can’t see in this photo is Elaine, who is truly a good sport, comically sprawled on her stomach holding down the fabric with both arms, while I scattered handfuls of platelet ice from a plastic bucket and took pictures.
A quantity of platelet ice spread out on a cloth.
After the dive was finished, I went inside the dive hut, and Steve leaned over the edge of the dive hole, shining underwater lights to illuminate the surface of loose, floating platelets for me, and throw them into low relief. These are a few of the photos I took inside the hut:
The dive hole inside the hut is where the scientific team divers enter and exit the water.Close-up of floating platelet ice inside the dive hole.More floating platelet ice, illuminated from below by a light Steve was holding, and resembling a palette knife painting.
During his dive, Steve took some photos of the outside of the Ob Tube for me, which give a diver’s-eye view:
Platelet ice also attaches to the bottom of the Ob Tube during the time it’s submerged. Photo: Steve Rupp.A grad student looks out the window of the Ob Tube. Photo: Steve Rupp.Not sure what this spiky ball stuck in the platelet ice is — a sea urchin? Photo: Steve Rupp.A closeup of the platelet ice beneath the sea ice surface. Photo: Steve Rupp.
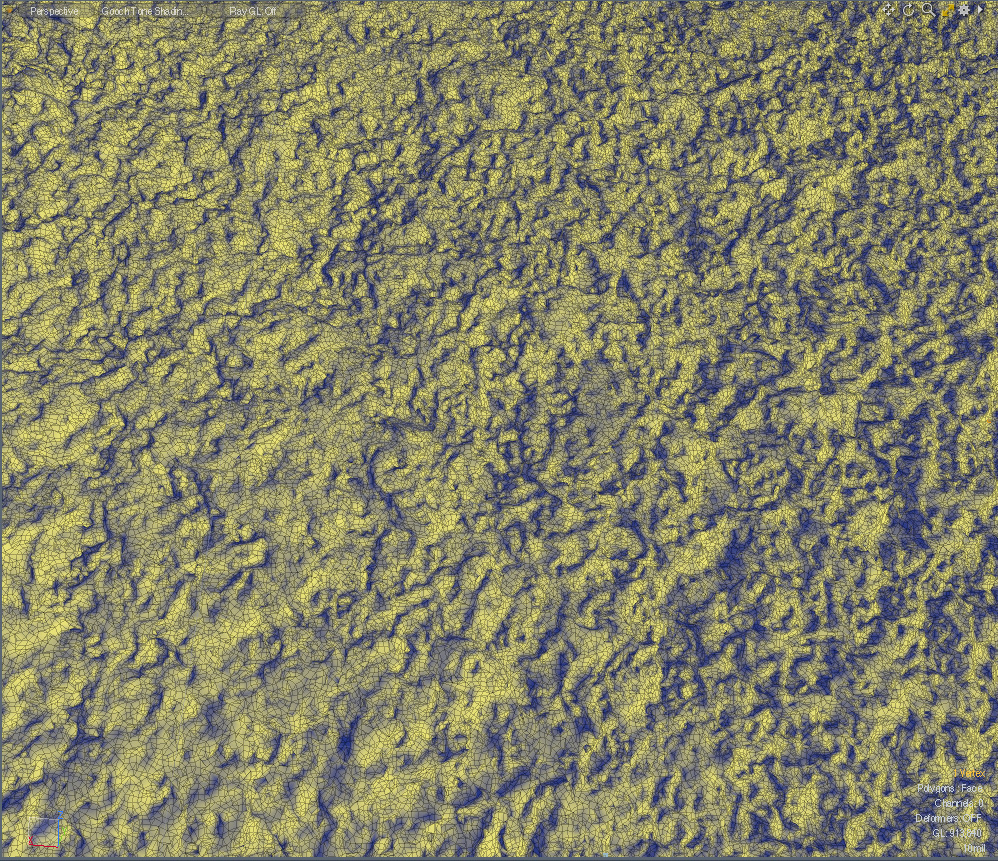
Steve tried to make a series of photos circling the outside of the Ob Tube for a 3D capture, but it proved too difficult for him to keep it in focus. However, I was able to take a series of photos of the surface of the platelet ice inside the dive hole while he held the lights underwater, and to make a 3D file from them. This is a screenshot of a detail of that file, rendered in yellow and blue shading to show the form:
3D scan of the surface of loose platelet ice.
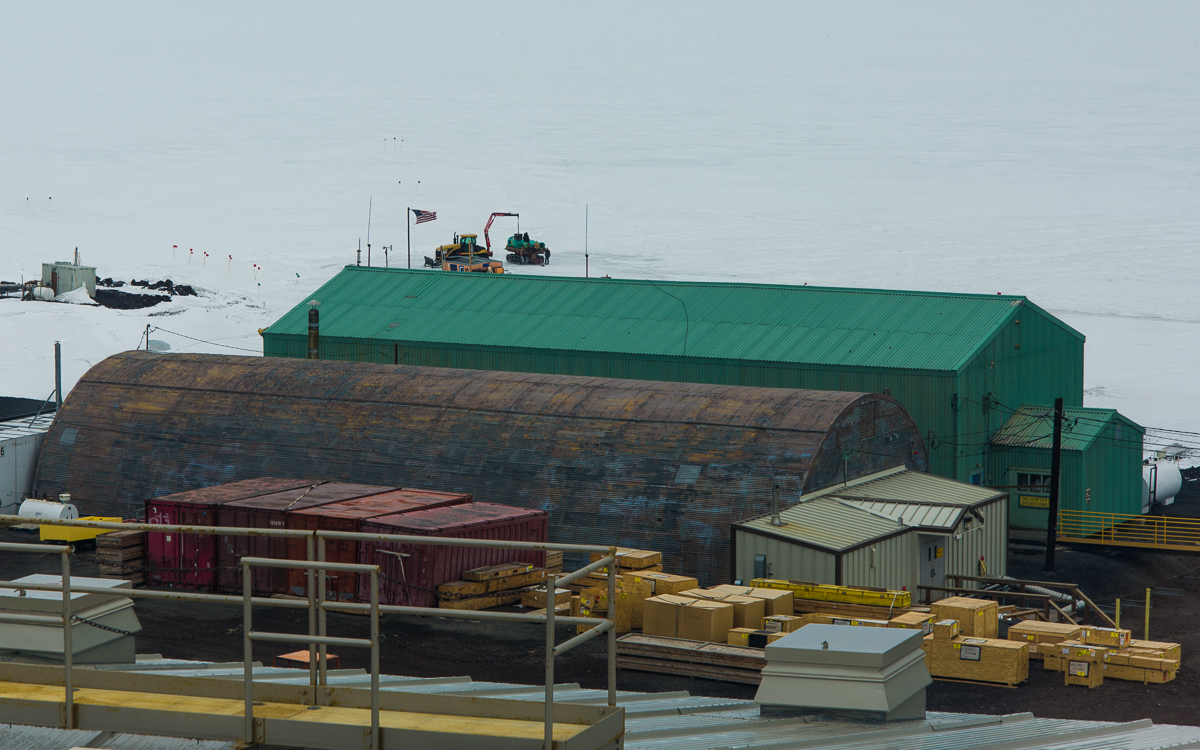
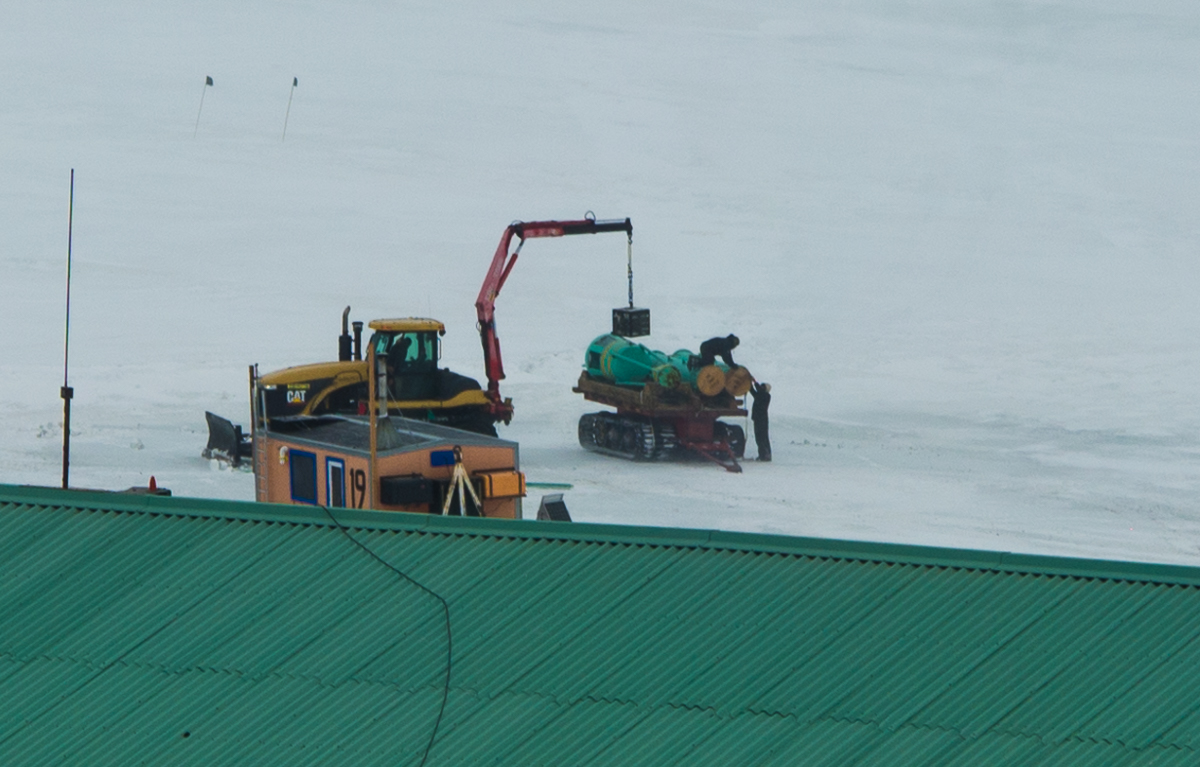
Three days later, I happened to be in the Crary Lab Library overlooking McMurdo Sound when I saw workers loading the Ob Tube onto a truck in sections. The orange dive hut had also been put on a trailer to be towed to the spot where it spends the offseason:
By December 8th, the sea ice was beginning to soften, so the observation tube at McMurdo Station was removed while they could still take heavy equipment onto the ice.Close-up of the Ob Tube removal. The orange dive hut is in the foreground.
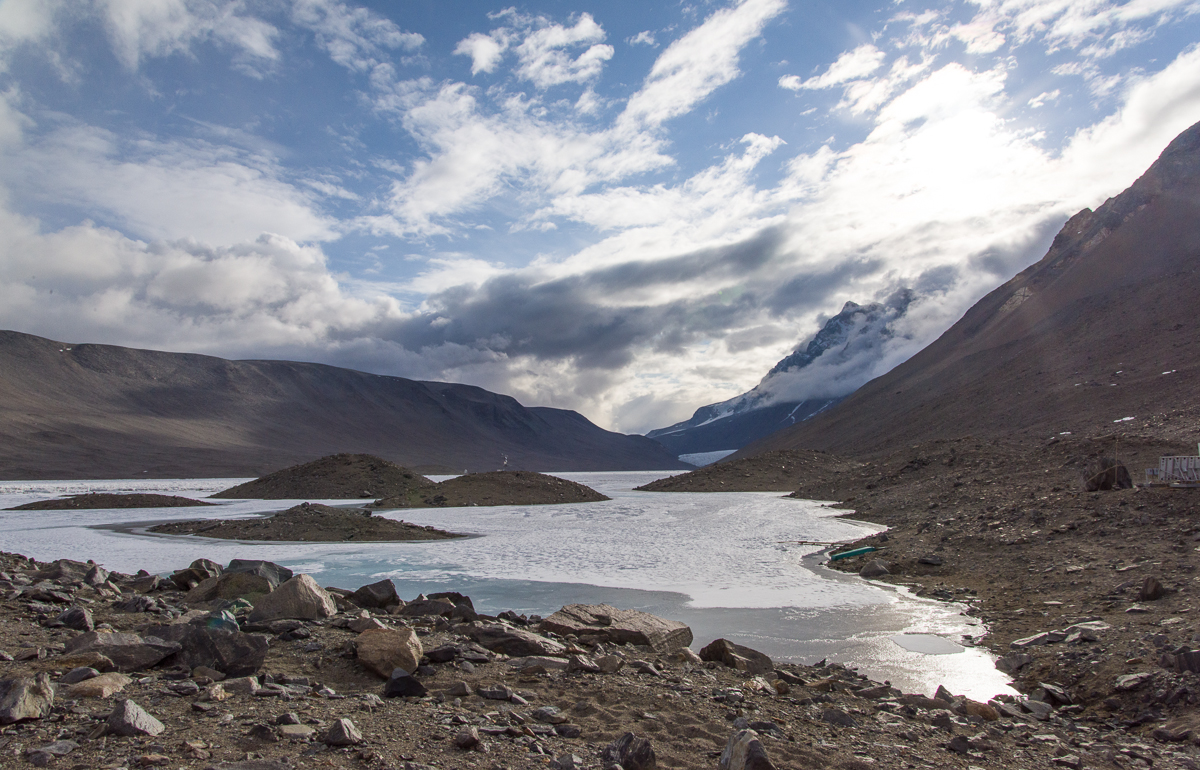
The Lake Hoare field camp in the McMurdo Dry Valleys, where I spent five days, sits at the east end of the lake right next to the immense Canada Glacier. At the opposite end of the lake is the smaller Suess Glacier. When I first heard the name, it would not have surprised me if a glacier in Antarctica had been named for the children’s book author Dr. Seuss, given the odd landscape features that resemble some of his fanciful illustrations. But no, the 1910-13 British Antarctic expedition led by Robert F. Scott named it for Professor Eduard Suess (1831-1914), a prominent Austrian geologist and paleontologist who helped lay the basis for paleogeography and tectonics.
View up Lake Hoare from the field camp. The tiny inverted white triangle at the end is the Suess Glacier.
One day I hiked there accompanied by Mari, a young woman who normally worked at McMurdo in the field camp supply center, but was spending a couple of weeks at the Lake Hoare camp assisting camp manager Rae during a particularly busy period of the research season. There are many people in their twenties who work 10-hour shifts, six days a week at McMurdo during the austral summer as dining hall workers, supply staff, janitors, cargo loaders, etc., but their opportunities to travel beyond the base are limited. So Mari was thrilled to be in the Dry Valleys and enthusiastic about hiking to the Suess. We followed a path of sorts that had evolved from the walks of other researchers, which wound around the perimeter of the rocky north shore of the lake (on the right in the photo above).
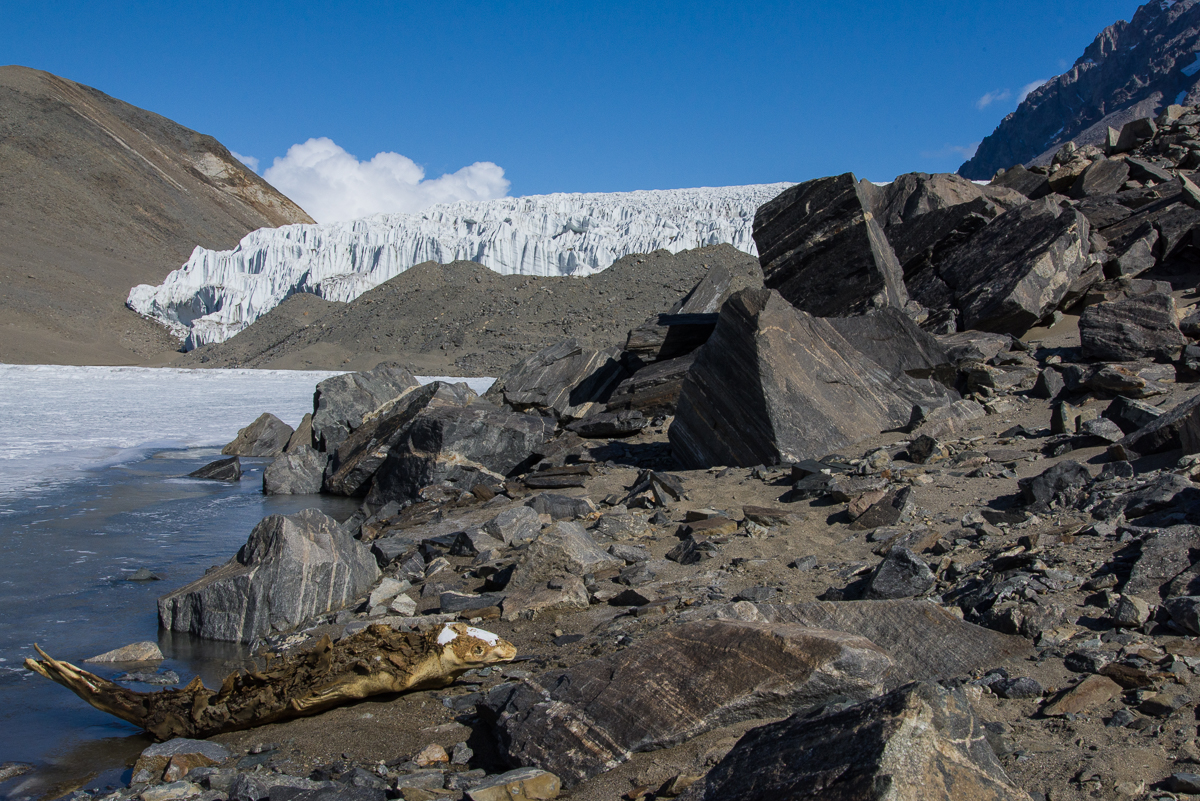
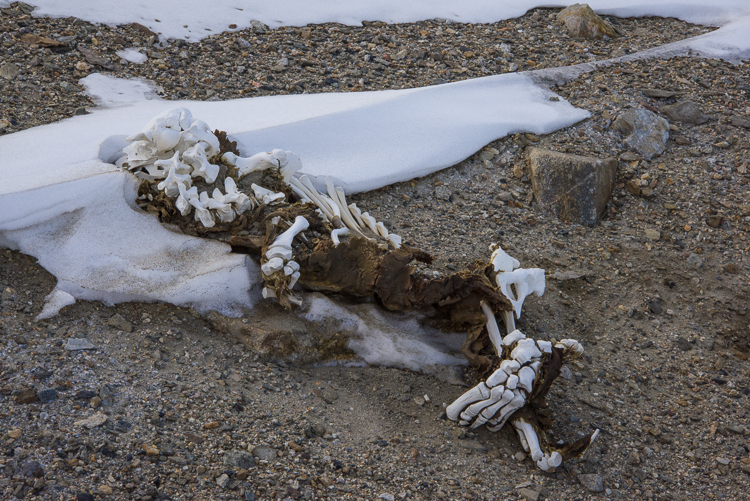
As we approached the Suess Glacier, we came upon a mummified seal.
After about an hour, we came across a mummified seal. Positioned on its belly rather than laying on its side made it look curiously animated, as if it was in the process of clambering out of the water. The mummified seals strewn throughout the Dry Valleys are an enduring mystery, and one I plan to write more about in a future blog post. Suffice to say, the icy climate and lack of organisms to break down dead animals keeps them in a state of preservation such that it’s difficult to know if that seal has been there a few years or a few hundred.
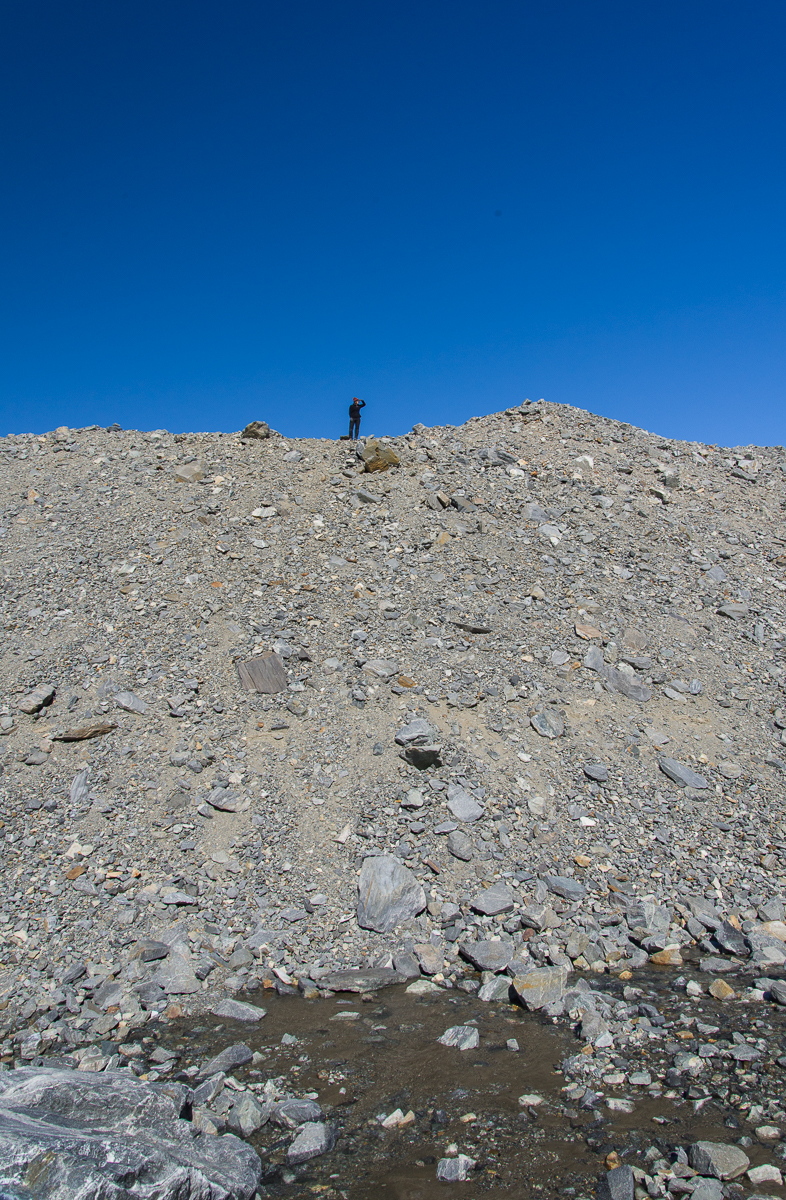
Mari scouts the best path around a large hill of gravel.
As we continued following the lake’s shoreline, we soon reached a very tall gravel hill that blocked our view of the glacier. Mari climbed to the top to scout the best route around it (remarkably quickly, too — it’s hard to get a footing on steep, loose gravel). As you can see in the photo at left, a stream of water was running downhill off the glacier into the lake. Mari had determined there was no shortcut to the glacier from where we were so we continued around the lake side of the hill.
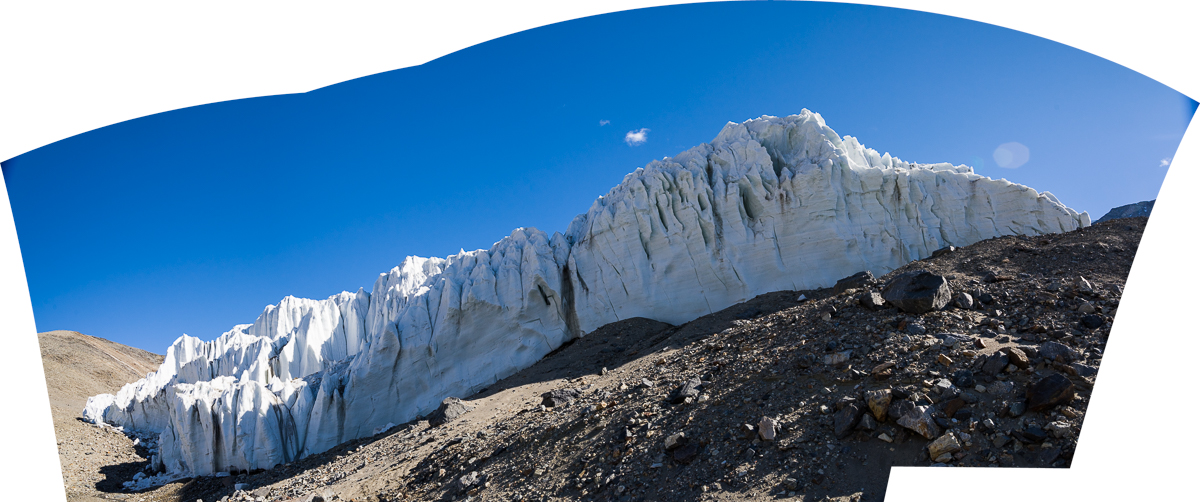
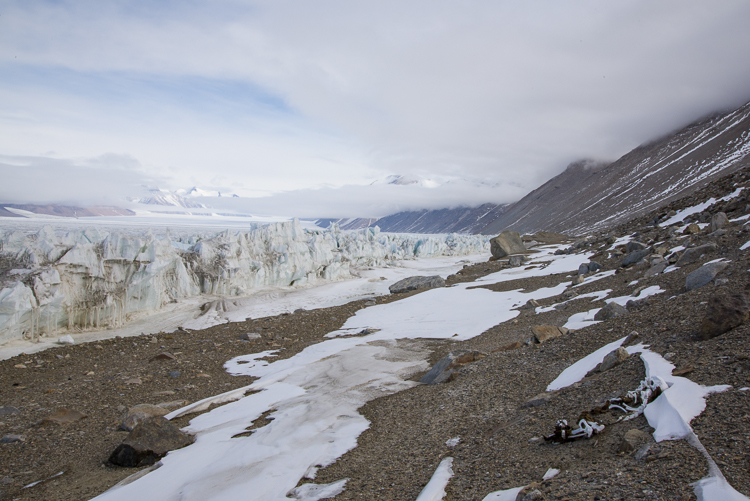
From the Lake Hoare side, the Suess glacier is not nearly as impressive as the Canada Glacier in size or height. This panorama made from three negatives is pretty much what you see as you approach from the lake:
Panorama of the Suess Glacier from the end of Lake Hoare. The glacier flows downhill from the right and comes to rest against the steep gravel hill on the left.
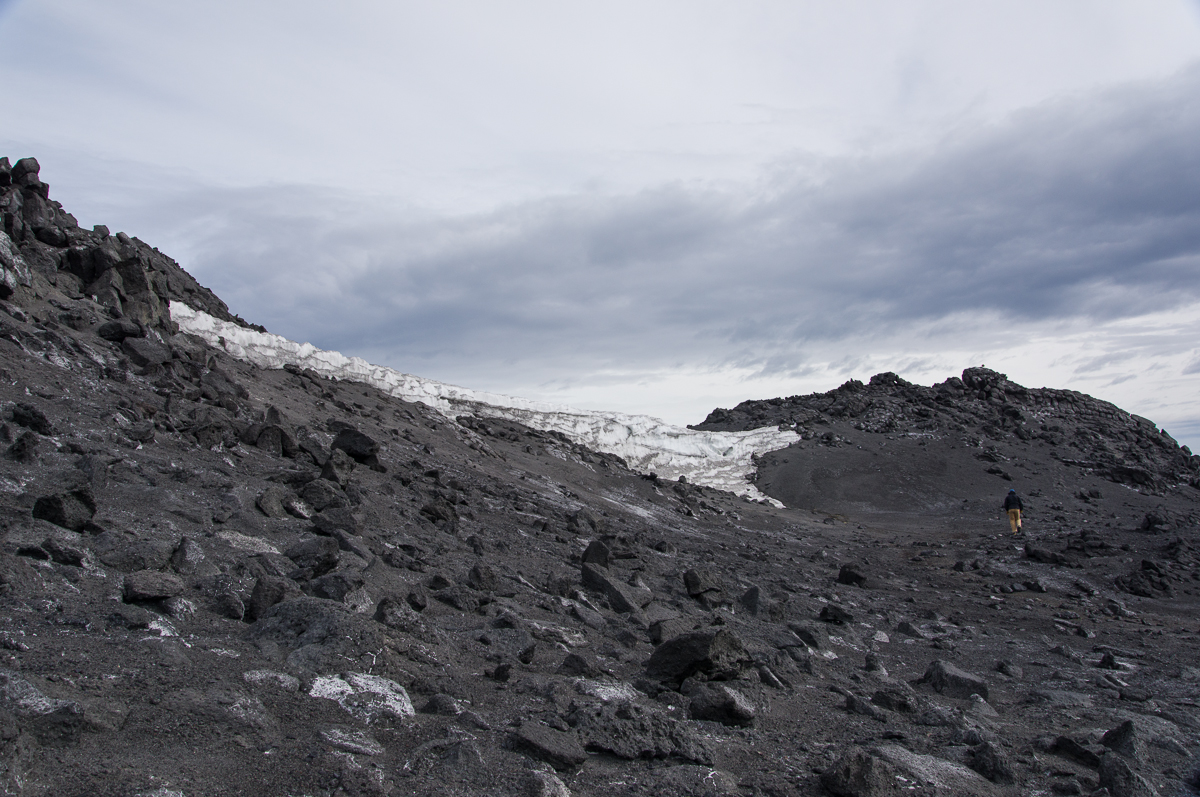
Walk around to the left of it and you can look uphill to see it flowing from the crest of the hill on the right:
The Suess Glacier, looking uphill to where it begins.
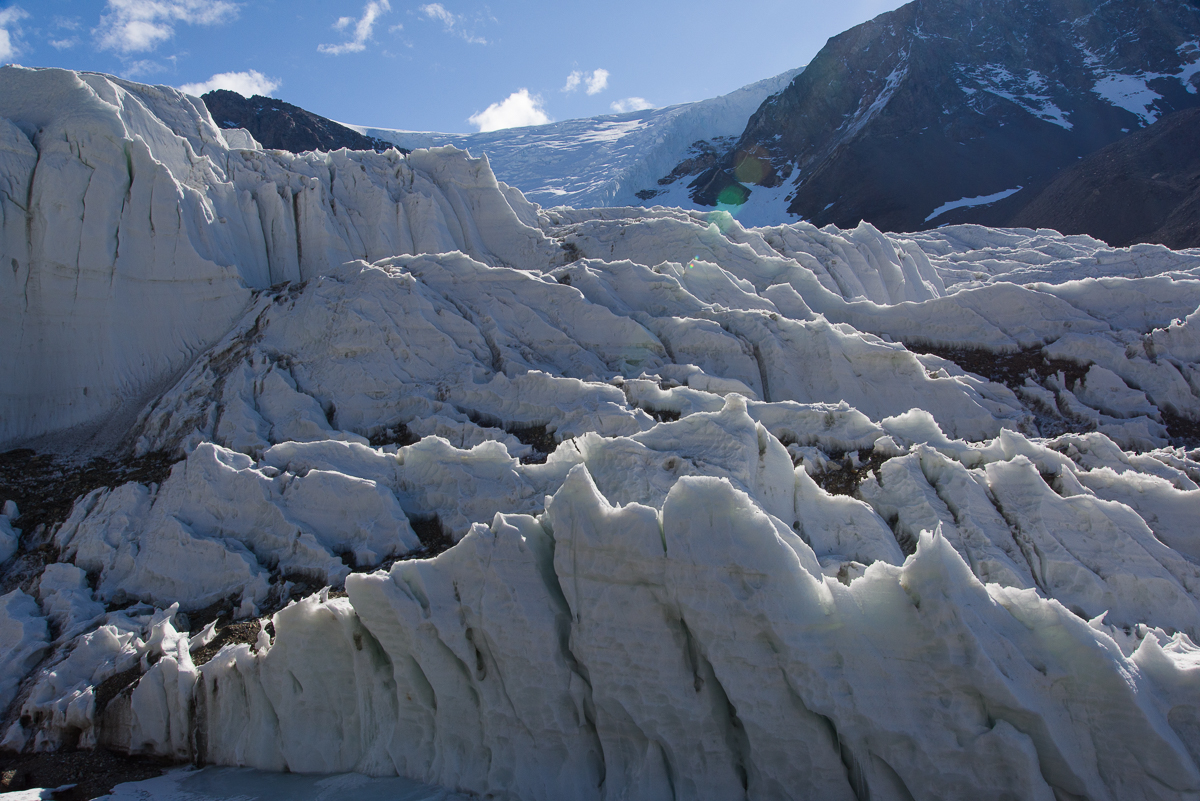
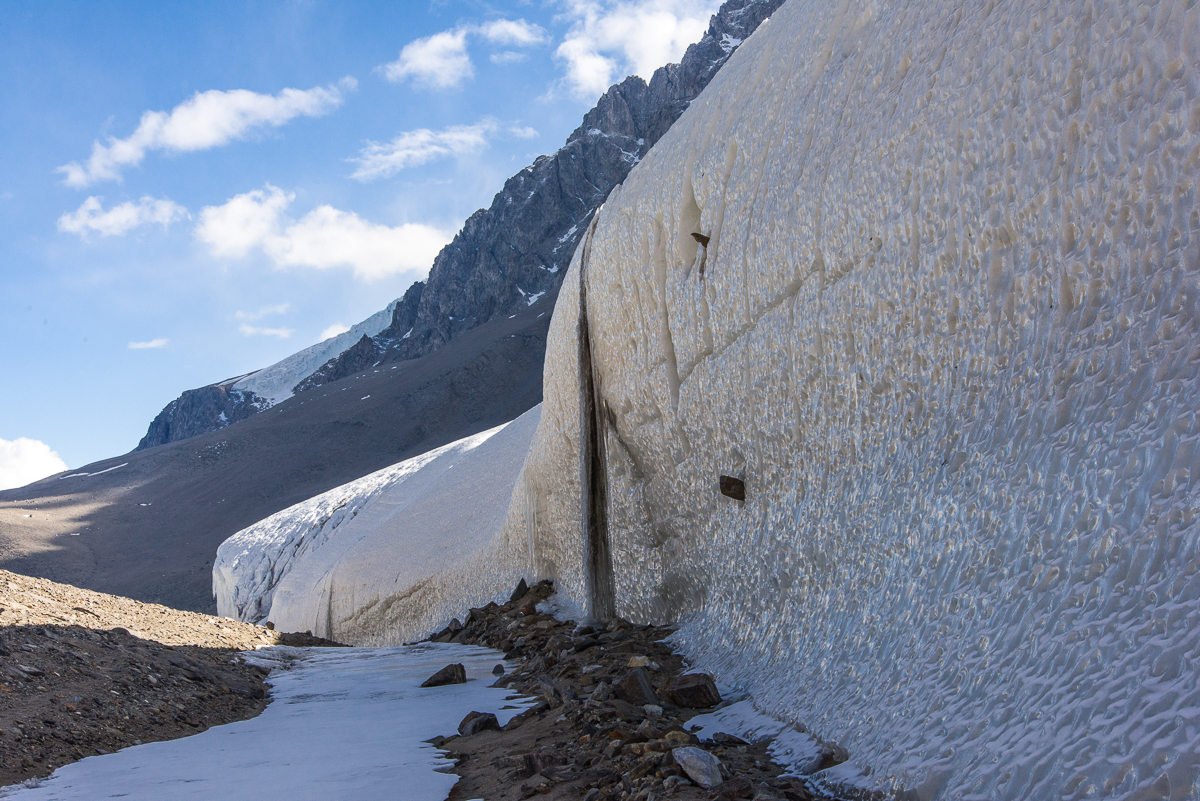
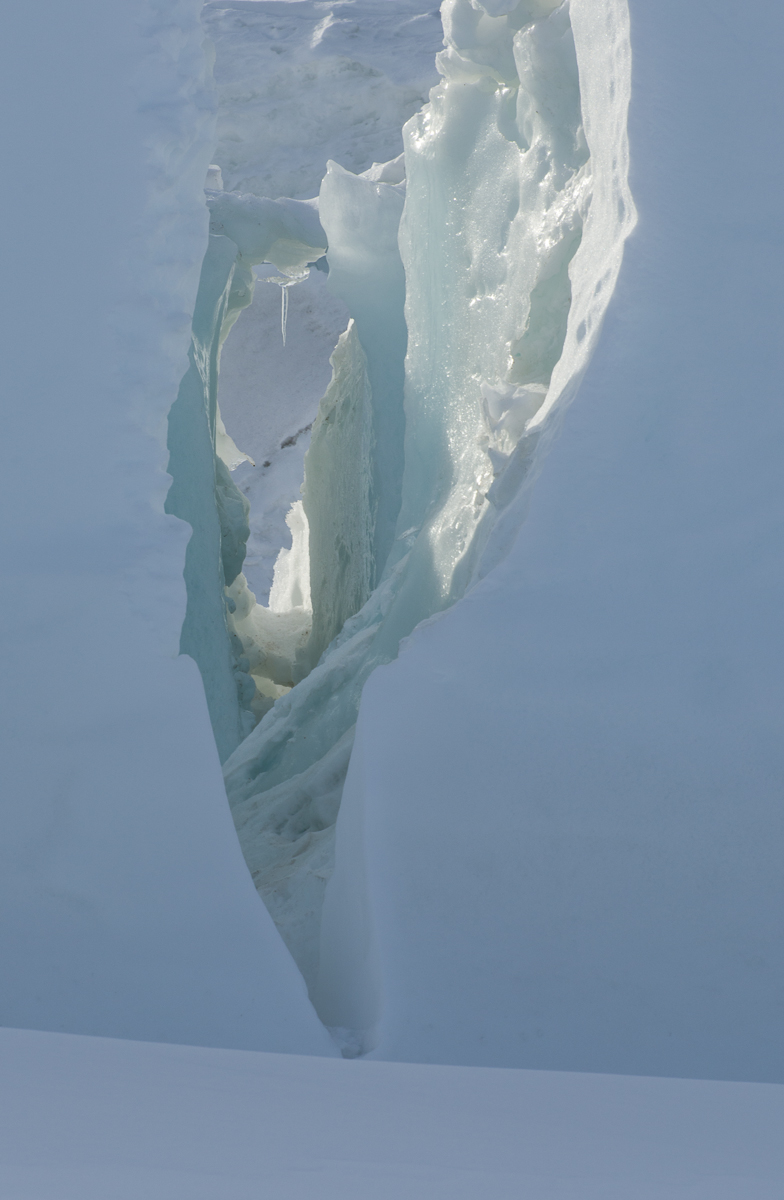
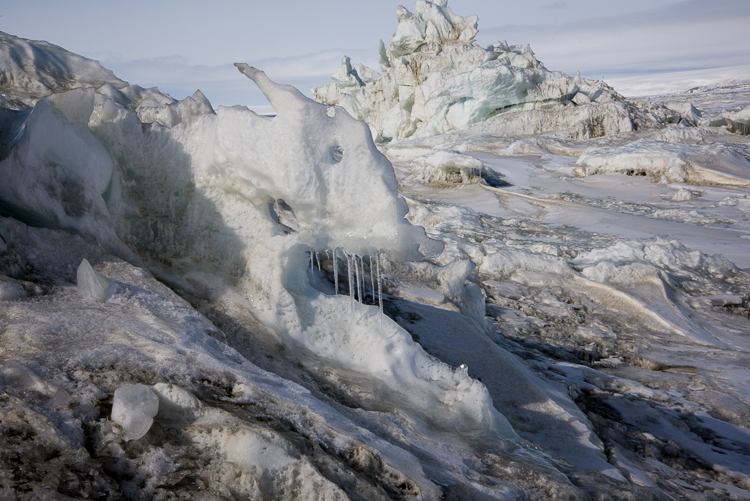
But the really good stuff was just around the corner. The Suess flows down one steep hill and comes to rest where another steep hill meets it, forming a narrow passage called a defile. Once you enter the defile, you encounter another side of the Suess, a towering wall of glistening scalloped ice. It glowed with a peachy color reflected off the gravel hill:
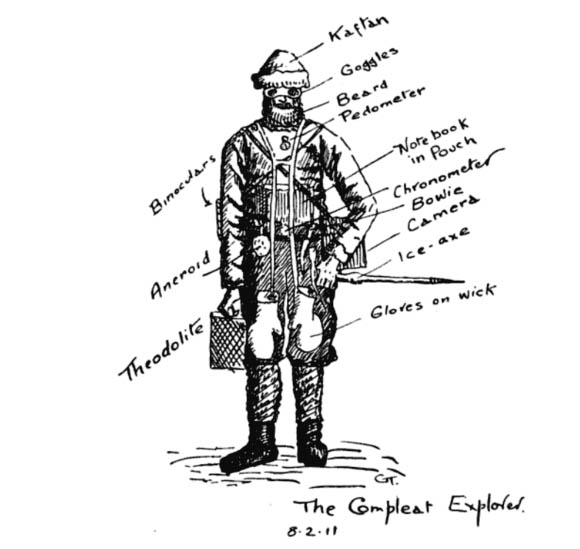
At the beginning of the defile, looking back toward Lake Hoare, the Suess turns into a wall of wind-scalloped ice and icicles.Griffith Taylor’s sketch of “The Compleat Explorer” was made on February 8, 1911, in the midst of exploring the valley that came to be named after him.
One of Scott’s party in the 1910-13 expedition, the geologist Griffith Taylor, described the discovery of the Suess in his 1916 book With Scott: The Silver Lining (you can find the section referred to here on Google Books). The title implies a motivation to spotlight the expedition’s accomplishments and successes, which had been to some degree overshadowed by its sad ending, when Scott and four of his men died on their way back from the South Pole. The following year, World War I broke out and was still raging when the book was published. As the book’s editor, Leonard Huxley, put it in the Introduction, “It is for Mr. Griffith Taylor to tell of the daily life of that company from within, to tell in careless detail its lighthearted cheerfulness lining solid effort, which the cloud of English earnestness so constantly turns out upon the night.” The section on the journey through what is now known as the Taylor Valley exudes the joy of discovery and is illustrated with Taylor’s charming drawings, including a humorous depiction of “The Compleat Explorer” wearing the state-of-the-art cold weather gear for 1911. (This includes “Beard,” which continues to be a popular male accessory in Antarctica. Once somebody said, “You know who I mean? The tall guy with the beard,” and the rest of us started laughing since that did not narrow it down at all.) At any rate, I’m guessing the Dry Valleys were associated with particularly fond memories for Taylor, because along the way Scott informed him he was naming the magnificent Taylor Glacier after him! Taylor’s book also includes his sketch of the Suess:
Sketch of the Suess Glacier by Griffith Taylor, made in 1911 when he explored the area with Robert F. Scott.
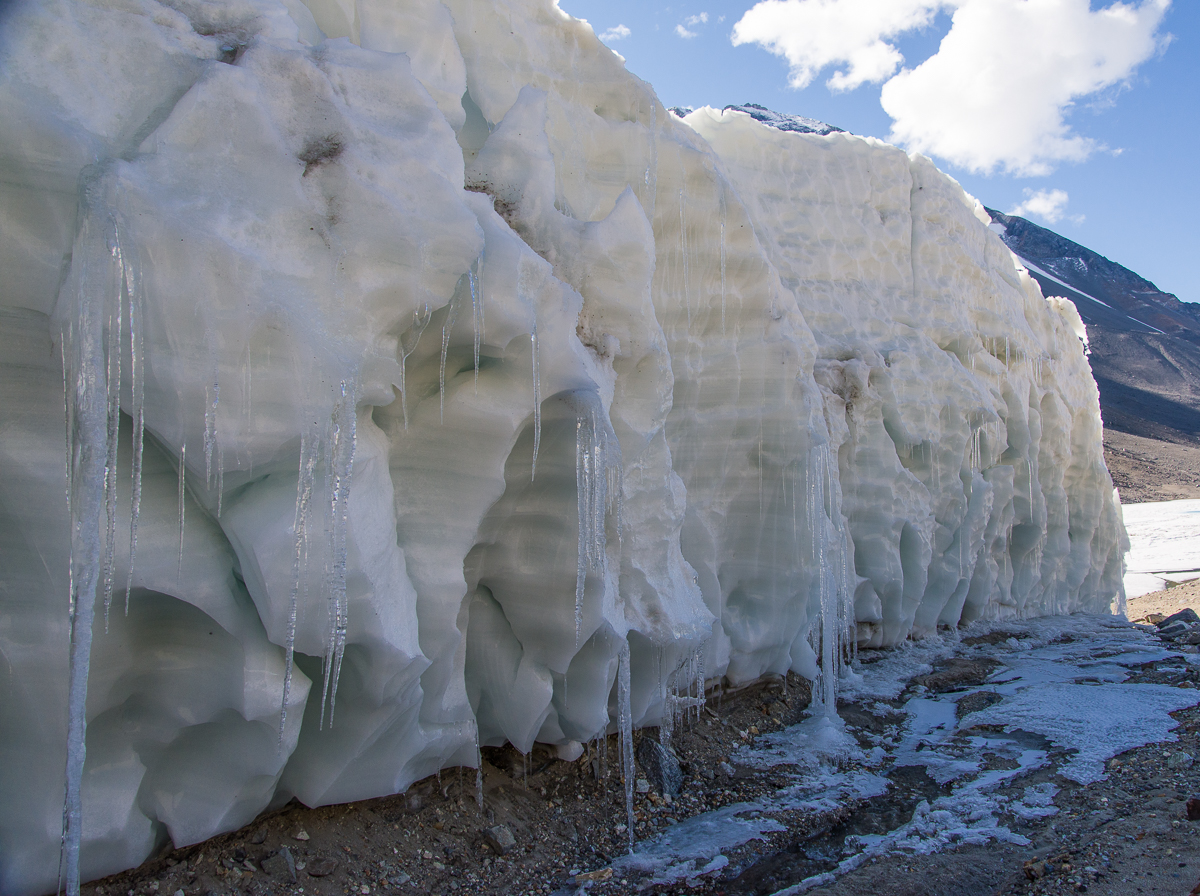
Taylor and company approached the Suess from the west, i.e. the opposite direction we took. His description remains apt today: “a face of ice forty feet high; but just where it butted into the steep south slope of the defile, there was a narrow gap where thaw-ice had filled in the interspaces between the cliff debris.” Mari and I put on crampons (velcro sandals with spikes on the soles) over our boots to walk on the icy passage where it narrowed to the width of a typical sidewalk.
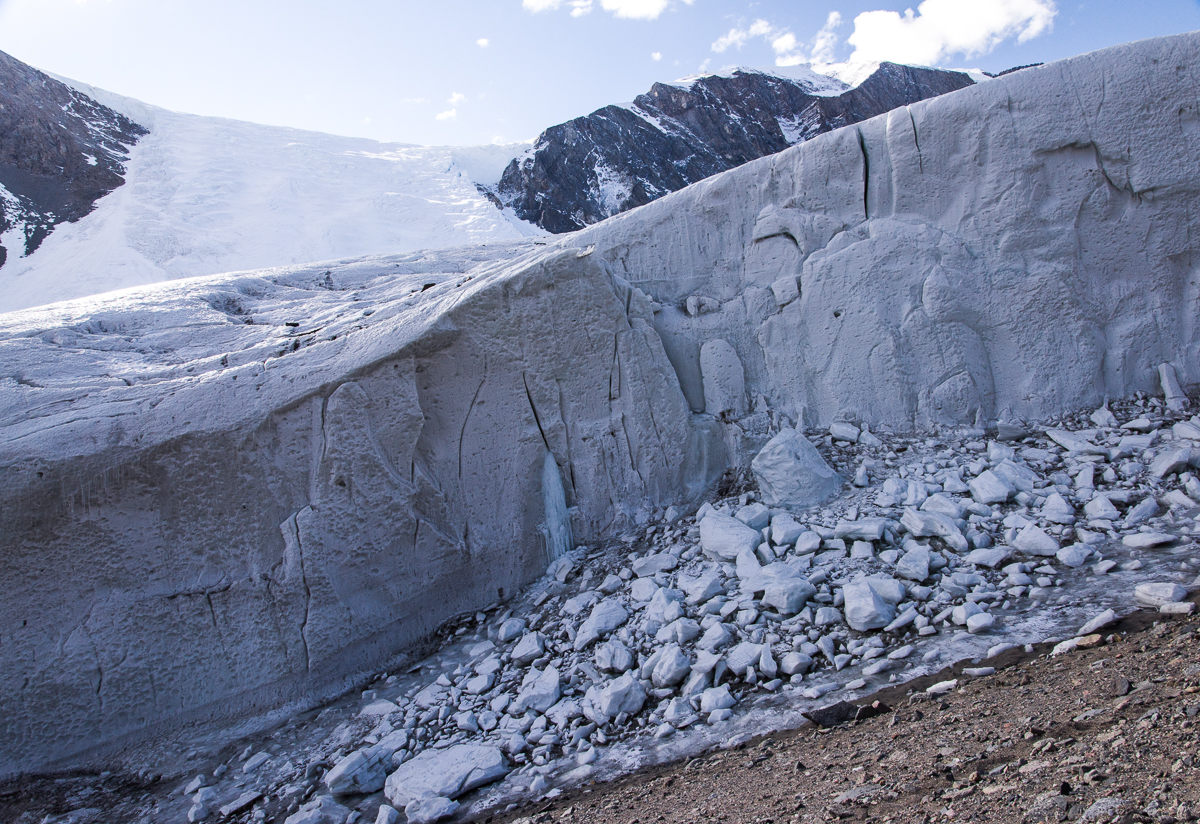
We walked alongside a wall of ice with such hard, polished surfaces that it looked like it had been cast from a mold:
The side of the Suess Glacier bordering the defile is very different in appearance from any other glacier I saw: an icy, dimpled wall. Maybe it has to do with facing the defile, where it gets little sun and the wind is funneled through the narrow gap.
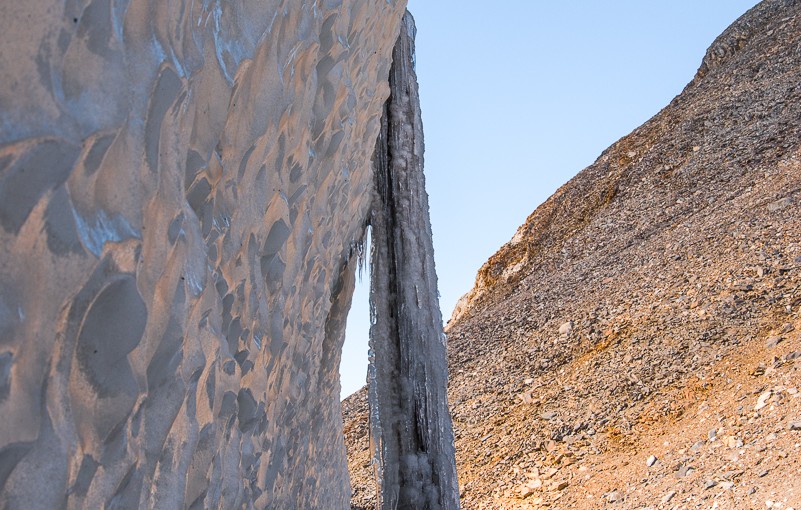
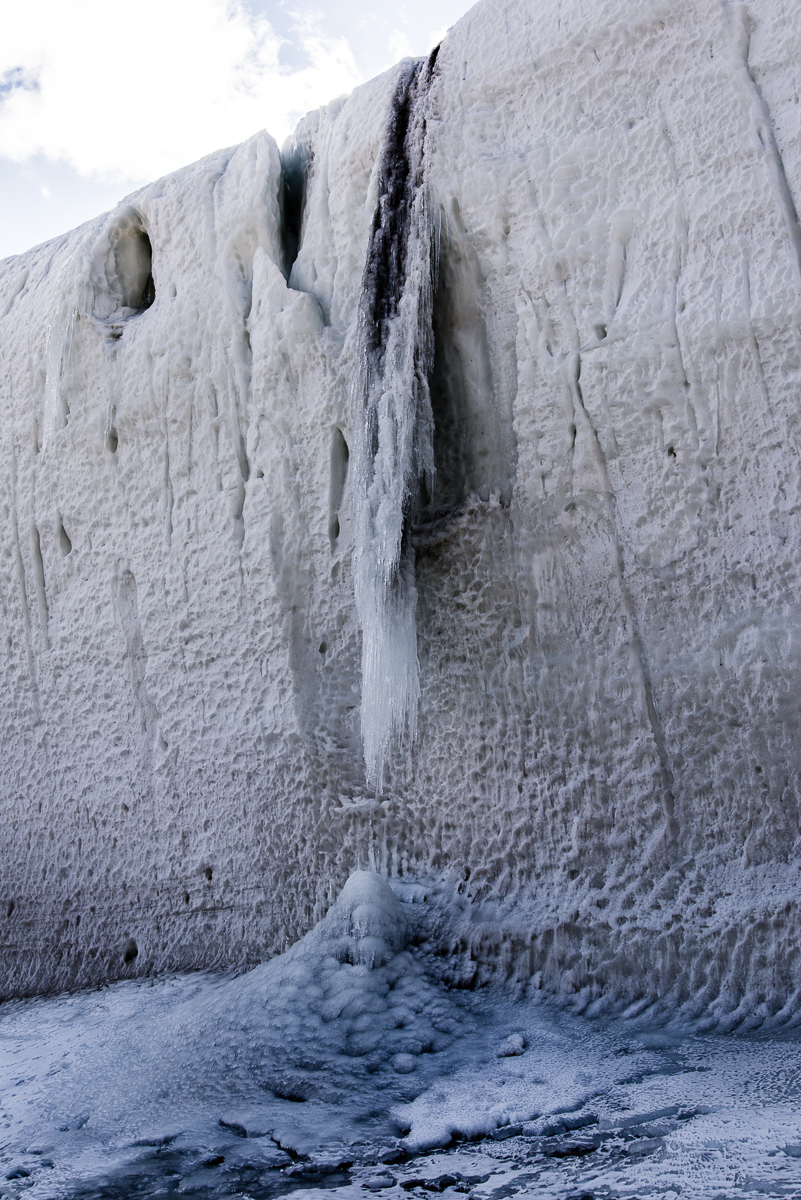
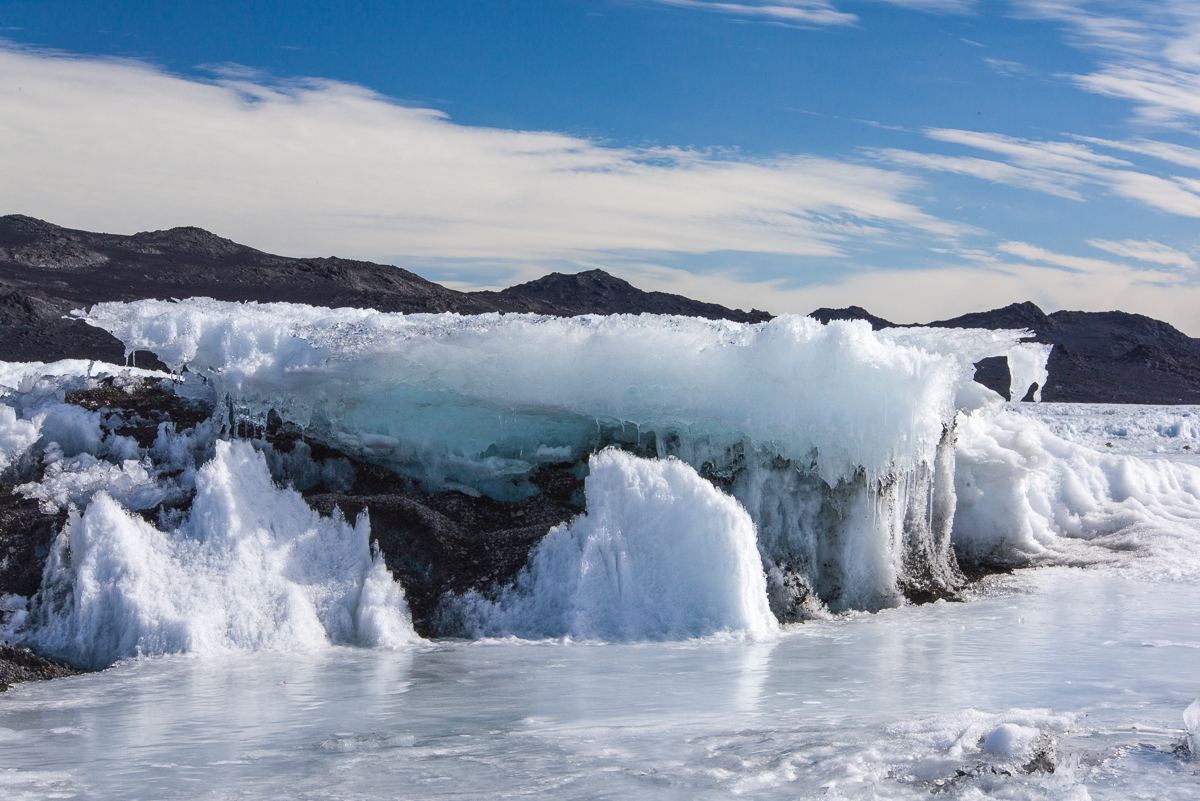
We also encountered the most impressive frozen waterfall I saw anywhere in Antarctica:
Freezing the action: a frozen waterfall of ice and sediment was an impressive sight.The other side of the frozen waterfall along the defile.
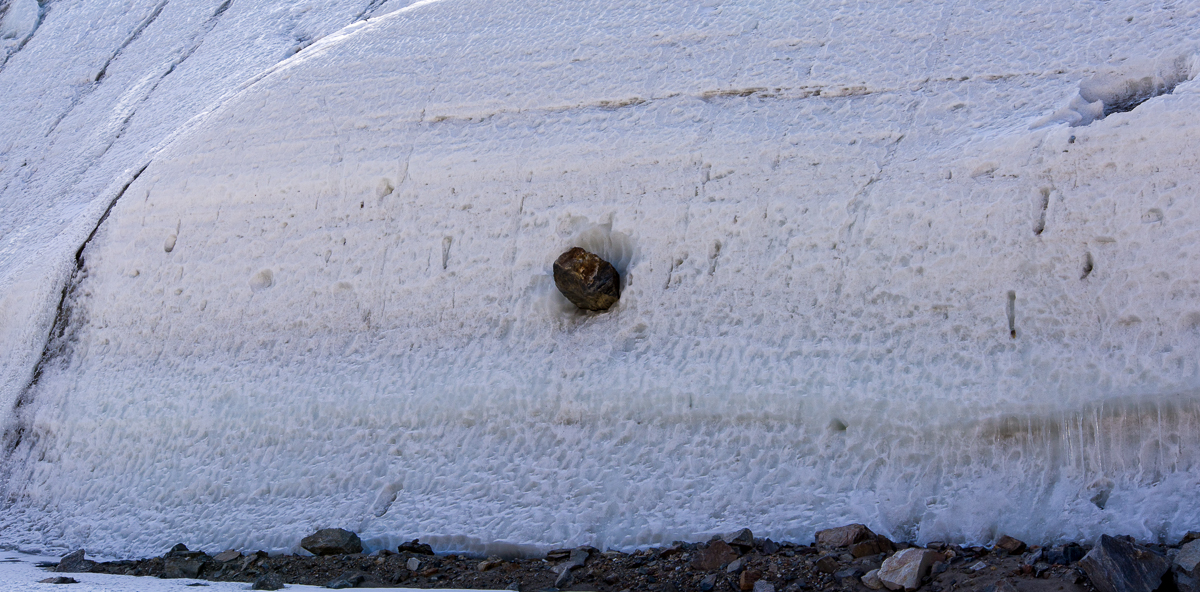
I was fascinated by the large rocks protruding from the icy wall that had apparently been swept up by the slow-moving glacier long ago. You see a couple of them in the photos of the waterfall above. The one below had to weigh several hundred pounds, and yet was somehow securely frozen in place in its icy niche:
That’s a big rock! And it looks like it’s not going anywhere anytime soon.
Toward the end of the defile, where the narrow space opened up and the glacier height tapered off, another frozen waterfall had formed an ice stalactite and stalagmite:
A smaller frozen waterfall gives an idea how the larger one probably looked before it connected into a column.
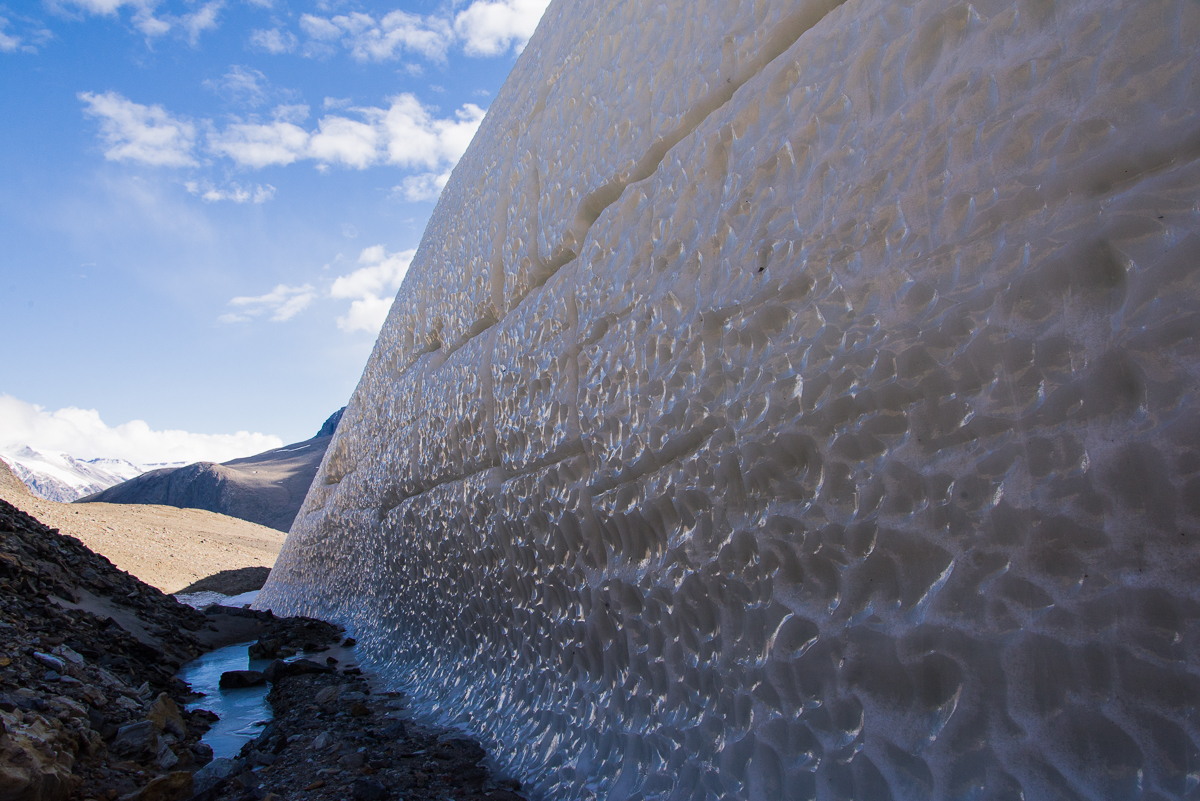
Once out of the defile, the Suess presents yet another aspect, a frieze of rounded shapes:
The icy dimpled surface gives way to a frieze of smoother, rounded shapes.
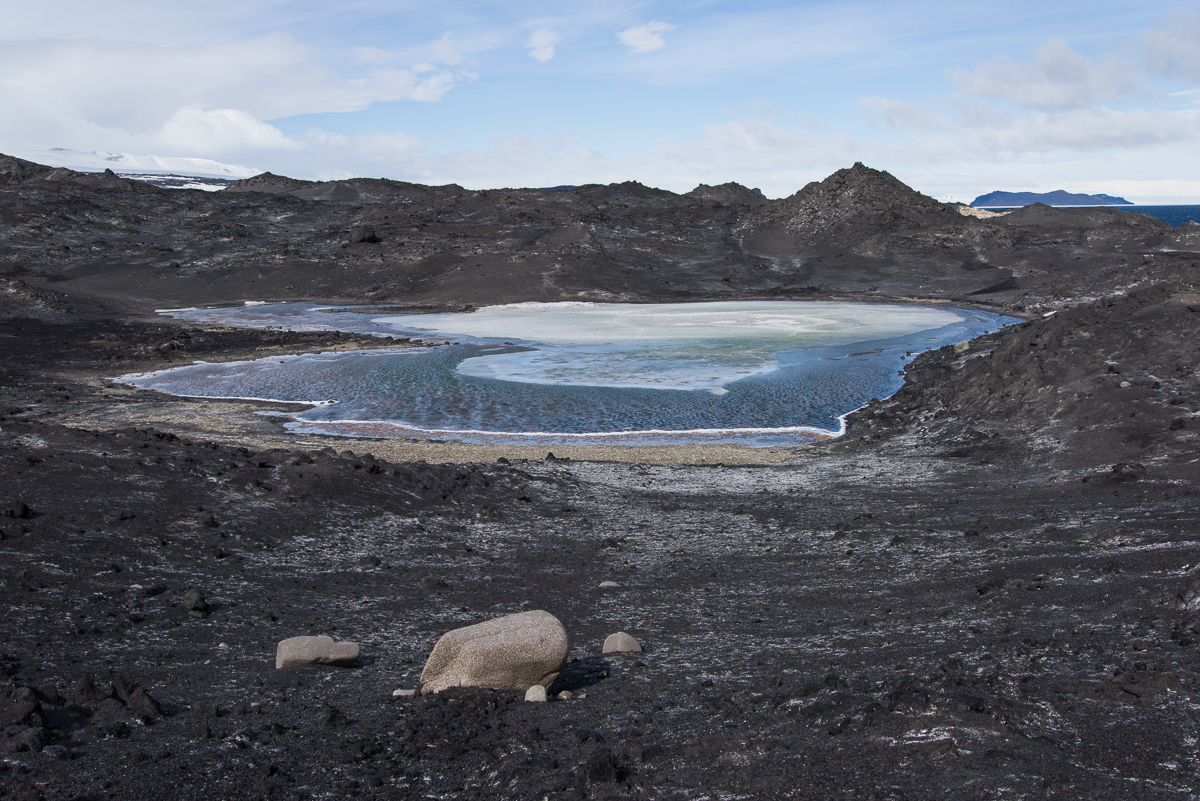
We reached the end of the defile, and looked down at the small blue lake on the other side (below). It was 5 p.m., we’d been out for four hours and decided to go back to the camp, figuring we’d be there in 90 minutes, just time for dinner. That was the time we decided to take a direct route back across the lake ice which turned out to be, ah, no shortcut at all for us lake ice rookies. If you haven’t read that story, you can find it here. Long story short, we made it back, albeit almost three hours later with wet socks. It was unnerving while we were in the middle of it, but funny once it was over: silver lining!
The west side of the Suess Glacier faces a small lake.
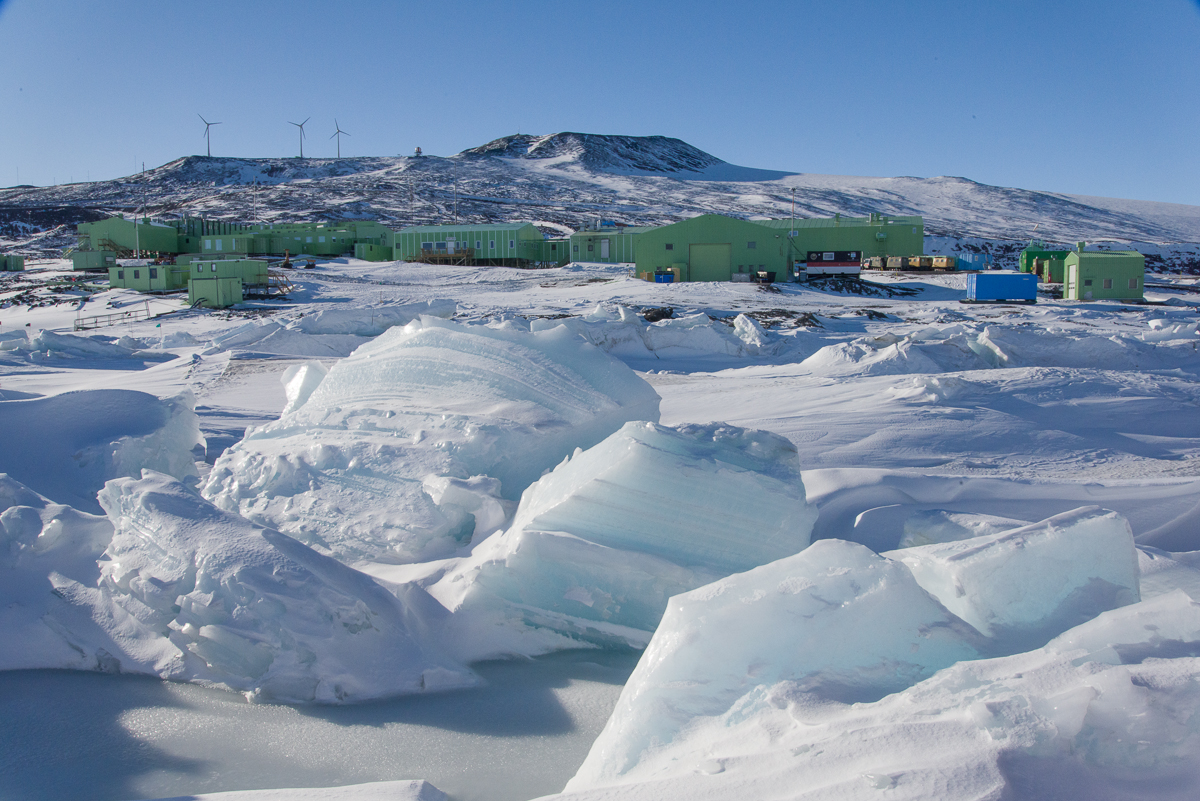
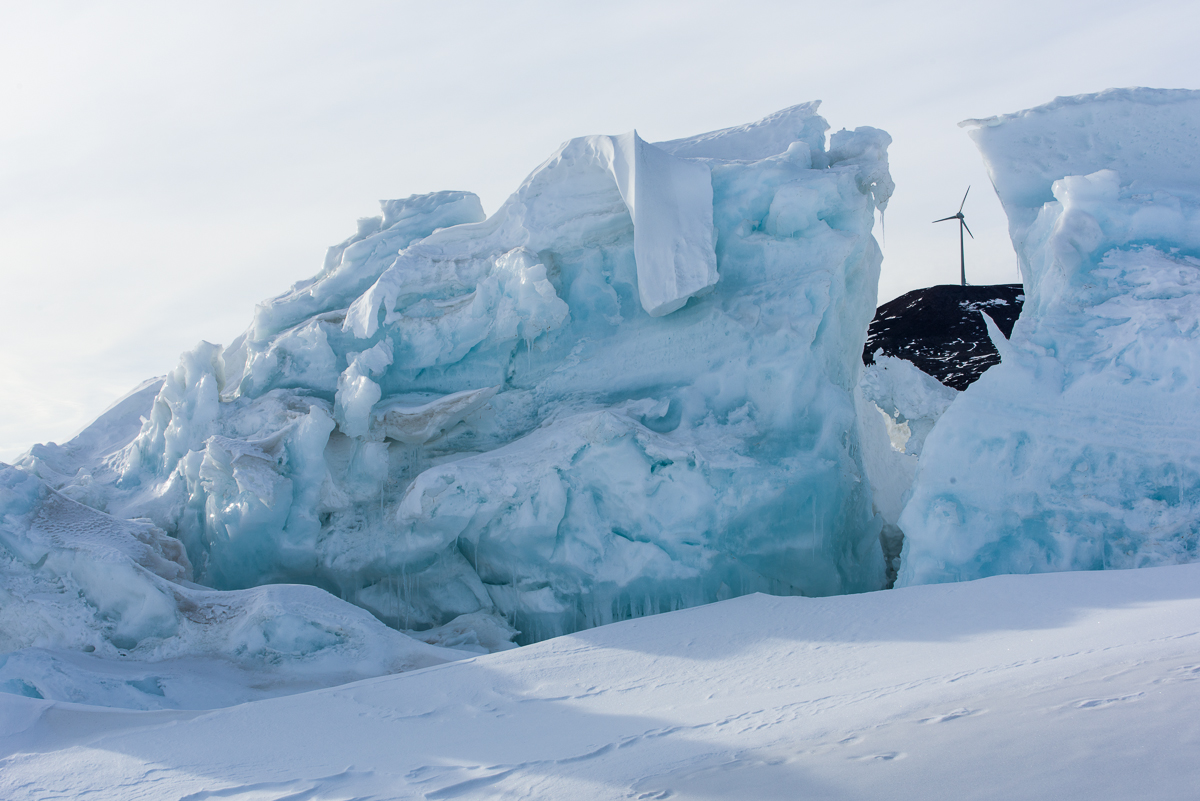
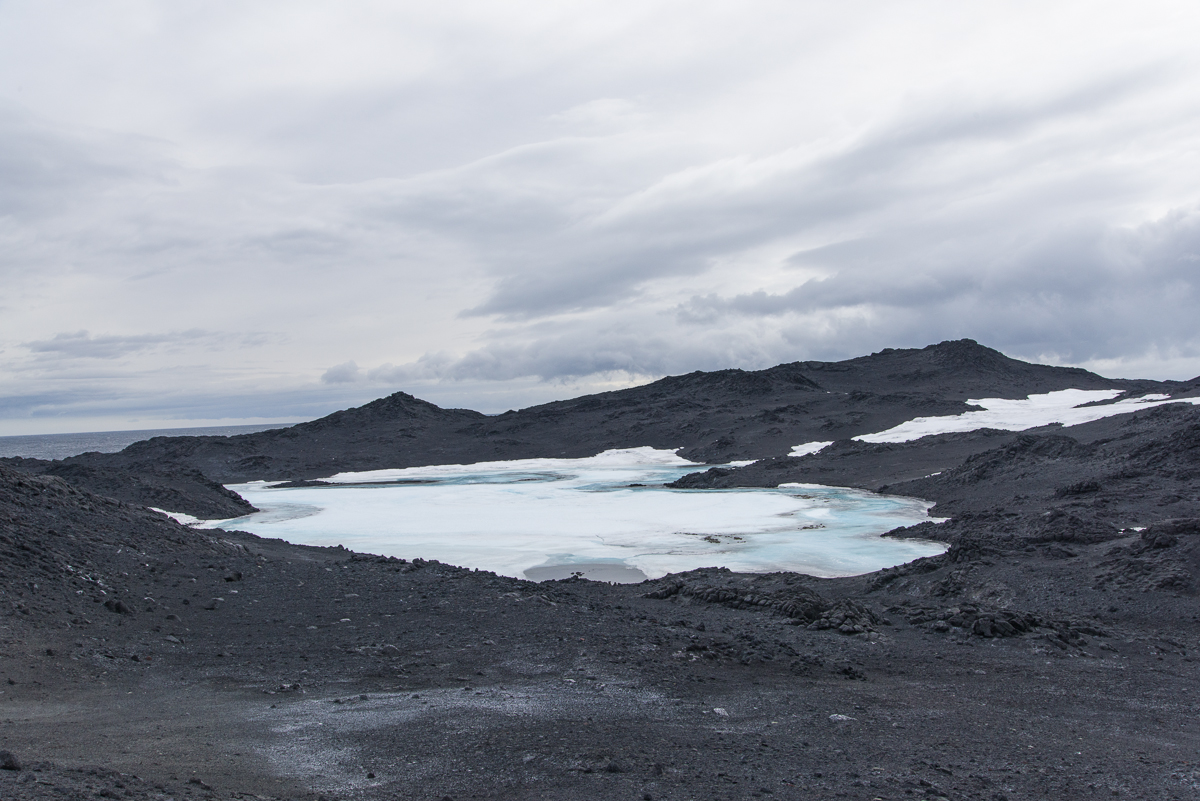
The Scott Base pressure ridges present an undulating landscape of unending variety. In the center of this photo is a melt pool.
If you’ve been following this blog, you’ve been introduced to the pressure ridges near the Double Curtain Glacier, which is across McMurdo Sound from McMurdo Station in the New Harbor/Explorer’s Cove area of the Dry Valleys. During the seven weeks that I was based at the US Antarctic Program’s McMurdo Station, I also made two trips to visit the extraordinary pressure ridges at Scott Base, which neighbors McMurdo and is operated by New Zealand’s Antarctic program. If you’ve seen Anthony Powell’s excellent documentary film, Antarctica: A Year on the Ice, you may have noticed the Scott Base pressure ridges among the time-lapse photography sequences.
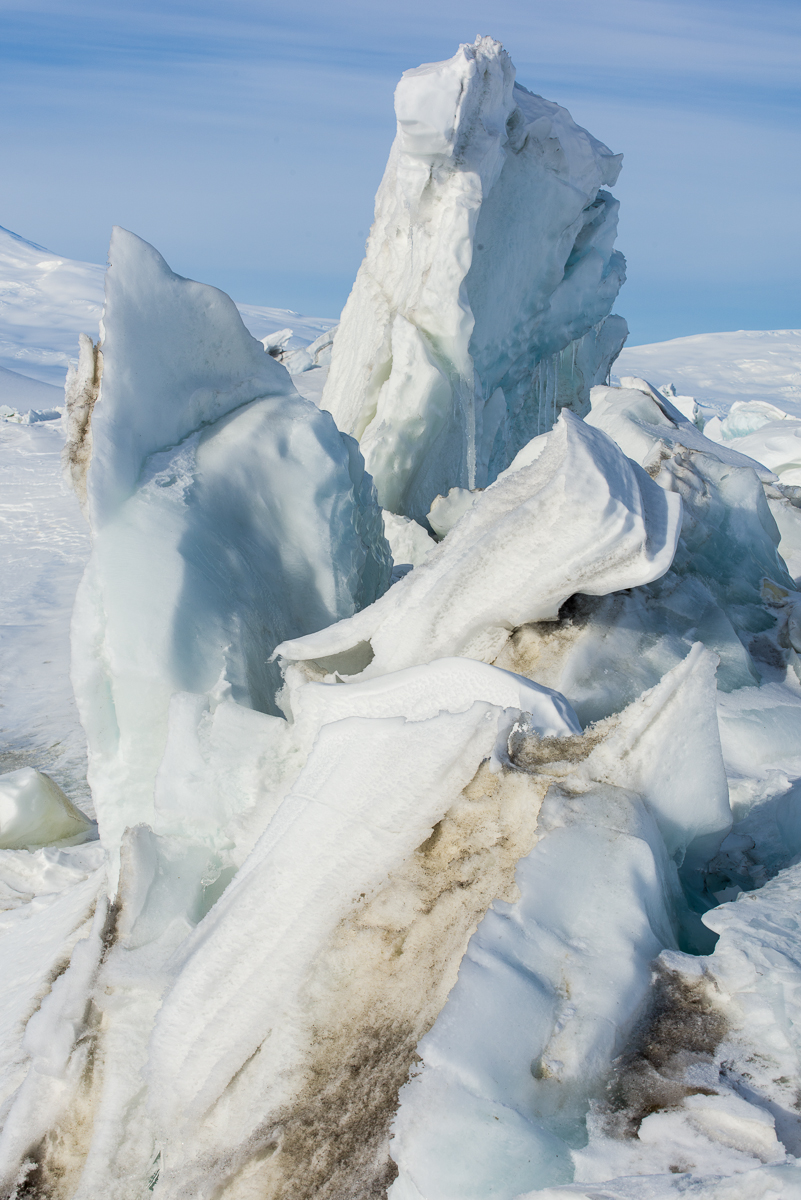
From the 754-foot-high summit of Observation Hill at McMurdo Station, you can see an aerial view of the Scott Base pressure ridges, including the undulations in the ice shelf that have helped form them. The little black dots on the ice a little left of center are Weddell seals. (Click on photo to see enlargement.) I also photographed the prominent formation in the center from the ground (next image) and made a 3D file of it (shown further down in this post):This formation is large enough to stand out even from the top of Observation Hill (see panoramic photo above). I also made a 3D file of it from 53 photographs taken while walking around it (scroll down further below).Scott Base pressure ridge with Scott Base in the background.
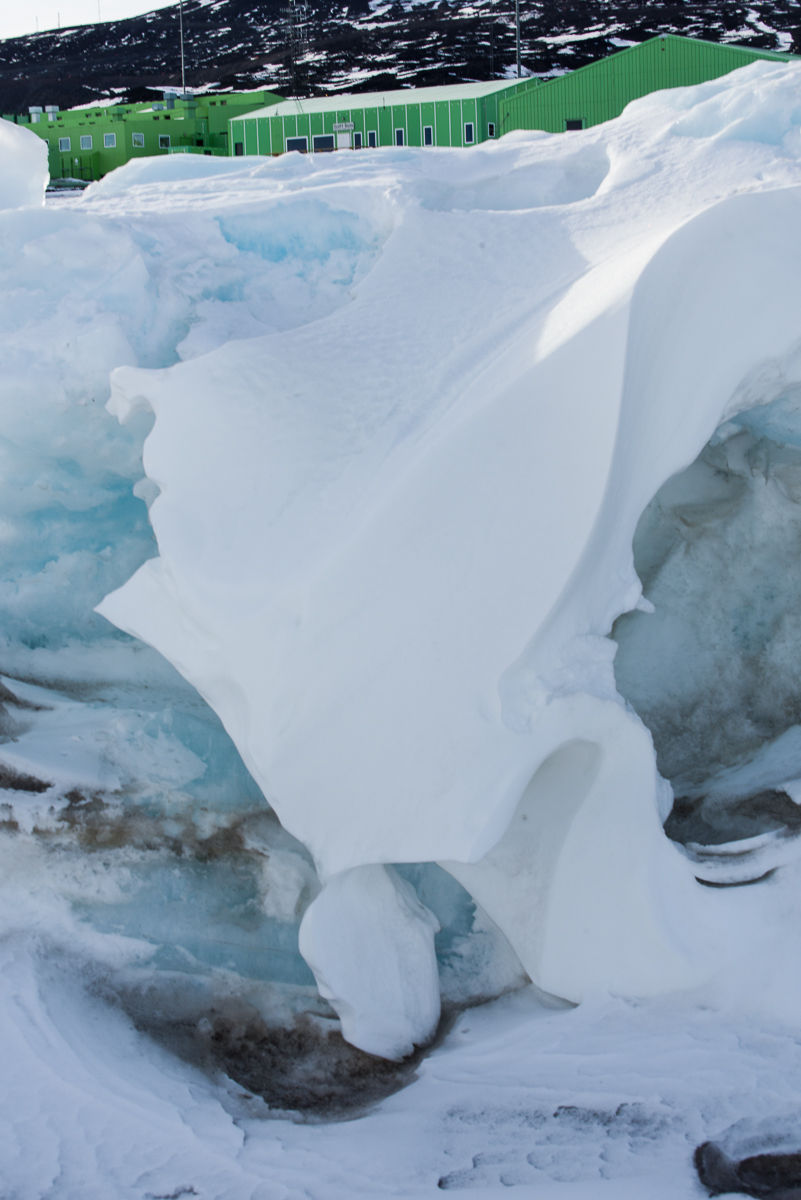
In Antarctica, the interaction of permanent thick ice shelf (that constantly floats atop the sea), sea ice (that is subject to melt cycles, and some years even melts to the point where it breaks up and floats out to the ocean) and the stationary rock of the coastline, can cause the ice near the shore to buckle and push up chunks into formations called pressure ridges. The pressure ridges are dynamic and constantly changing due to the action of the forces described above along with the 24-hour summer sun. Summertime temperatures at McMurdo when I was there mostly stayed in the 15 to 30 degree Fahrenheit range, and only a few times that I recall got into the upper 30s (and once a balmy 43 degrees — a few of the young guys took advantage of that heat wave to walk around in shorts!). But even in below-freezing air temperatures, when the sun beats down on the ice, it softens and sometimes melts. Then there are icicles, large chunks splitting off and falling, or gravity sometimes causes a chunk of snow to bend and flop over like a draped cloth.
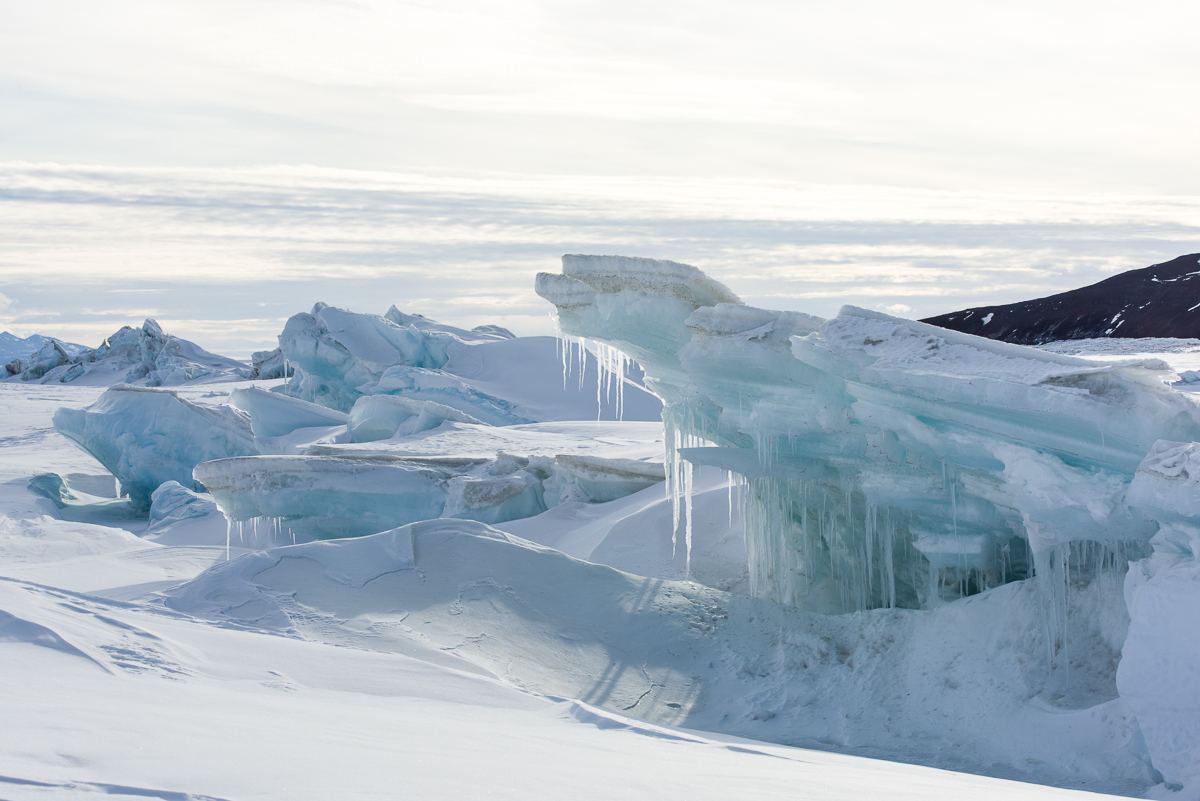
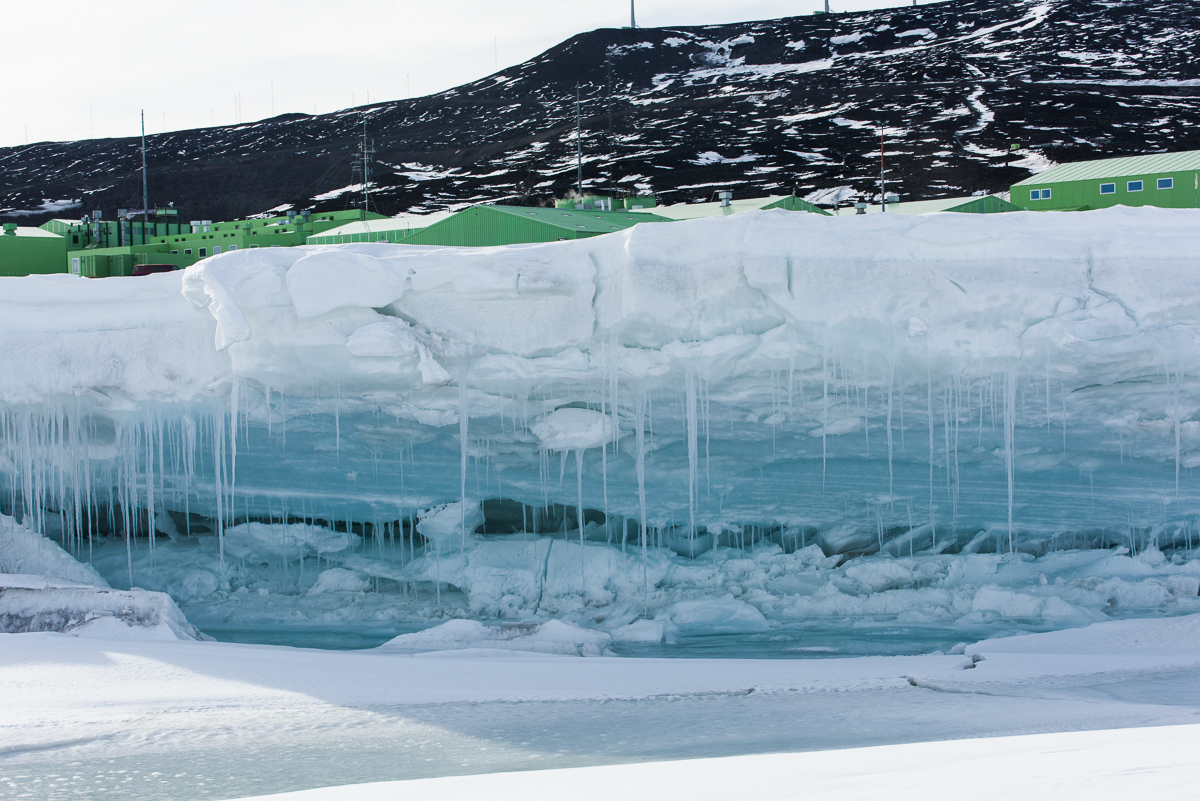
By November 30th, long icicles had formed beneath this this sheet of ice.The underside of this large chunk of ice was a deep blue and decorated with icicles. In the background are the green buildings of Scott Base.A thick mat of softened ice can bend like a draped cloth (lower right) and form graceful curved shapes.
Because of the ice shelf and sea ice dynamics, there are also cracks in the ice and melt pools on the surface that widen and deepen as the air warms (one of those was prominently featured in my post about Mt. Erebus). So there is a small window of time from November until mid-December when it is safe to walk out on the ice to get close to the pressure ridges. The McMurdo Recreation Department leads evening tours for the workers and others in residence there during that rare period. I went on two such trips, on November 24th and 30th. These photographs are, essentially, documentations of ephemeral formations: even though these photo sessions were only six days apart some of the ice had already changed in that brief time.
Another spot where the snow has drooped over like a towel on a rack (upper center).
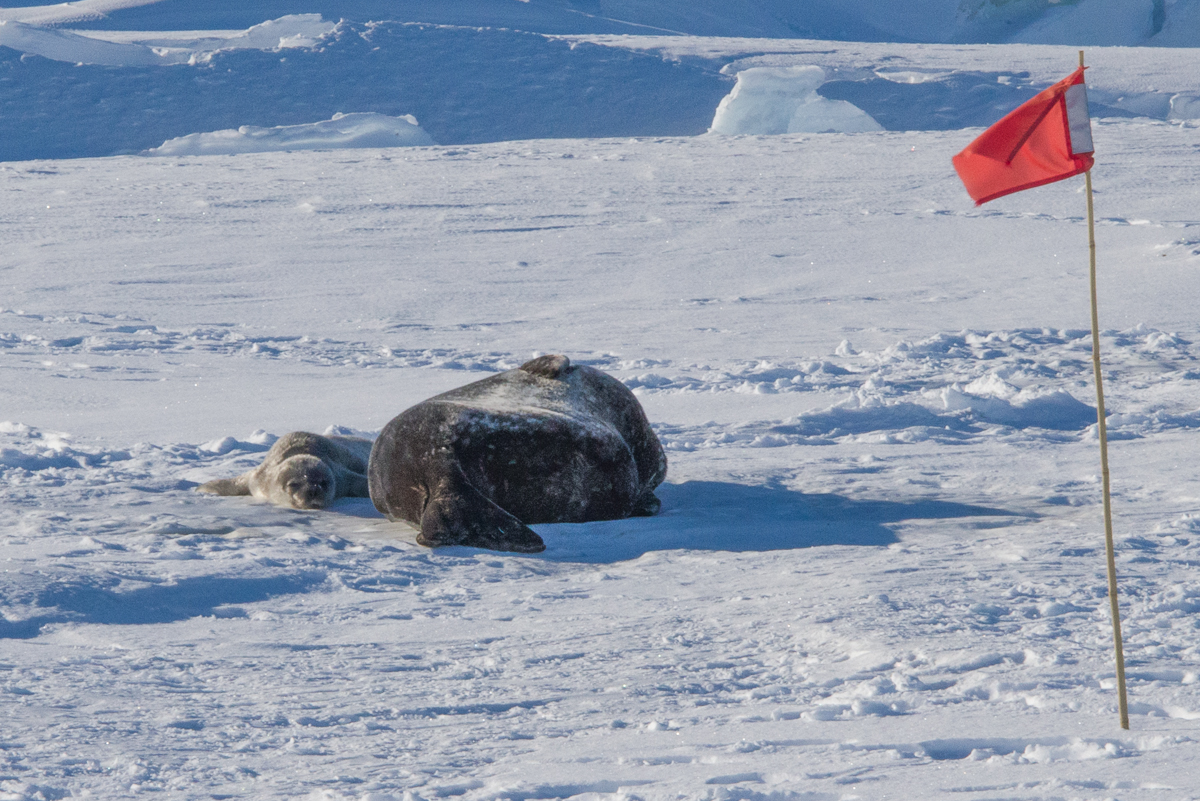
Where there is a nice-sized crack in the sea ice near the shore of McMurdo Sound or one of its islands, chances are you’ll find a group of Weddell seals laying out along it. Cracks give them a head start in chewing out a seal-sized hole in the ice where they can haul themselves out of the water for a break from non-stop swimming and foraging for food. I’ve never seen an animal that sleeps more soundly than a Weddell seal! They also give birth and nurse their pups on the ice. At least one of the Scott Base seals had a pup:
Baby Seal!: A Weddell seal and her pup chill out at the Scott Base pressure ridge.
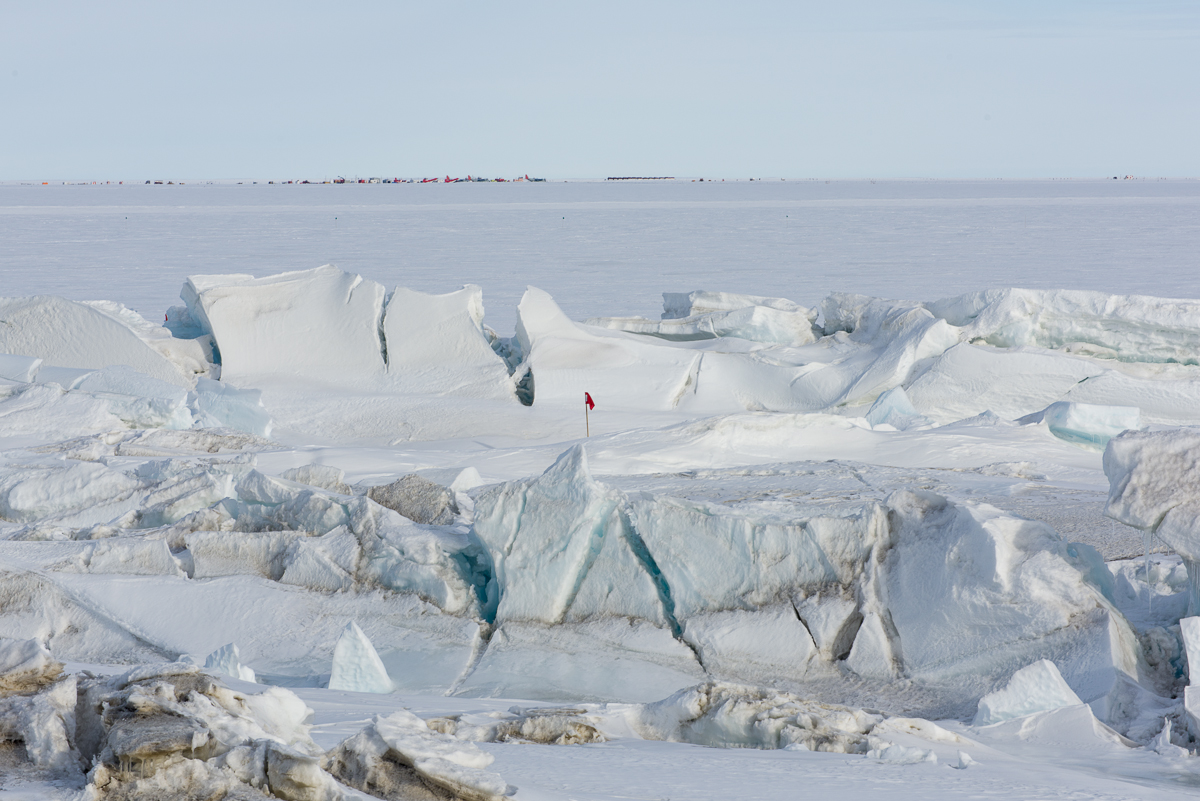
From the shoreline, the ice formations are flatter and some have straight lines and more angular profiles:
Looking out from the Scott Base shoreline at angular pressure ridge formations. On the horizon is Willy Field, one of the airstrips that serves McMurdo and Scott Base. It’s probably about a 15- to 20-minute drive from that spot, i.e., not as close as it looks! It’s pretty much impossible to judge distances in Antarctica. You learn to not even try.Planar ice formations close up.
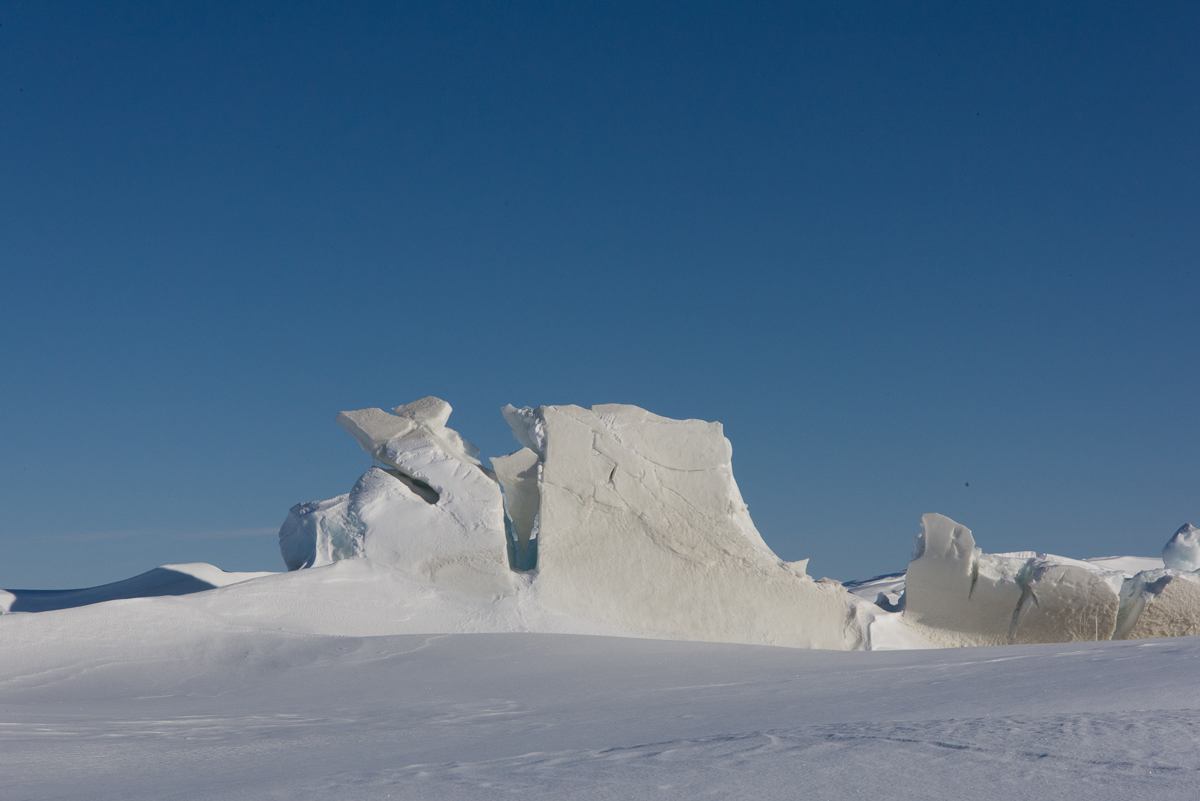
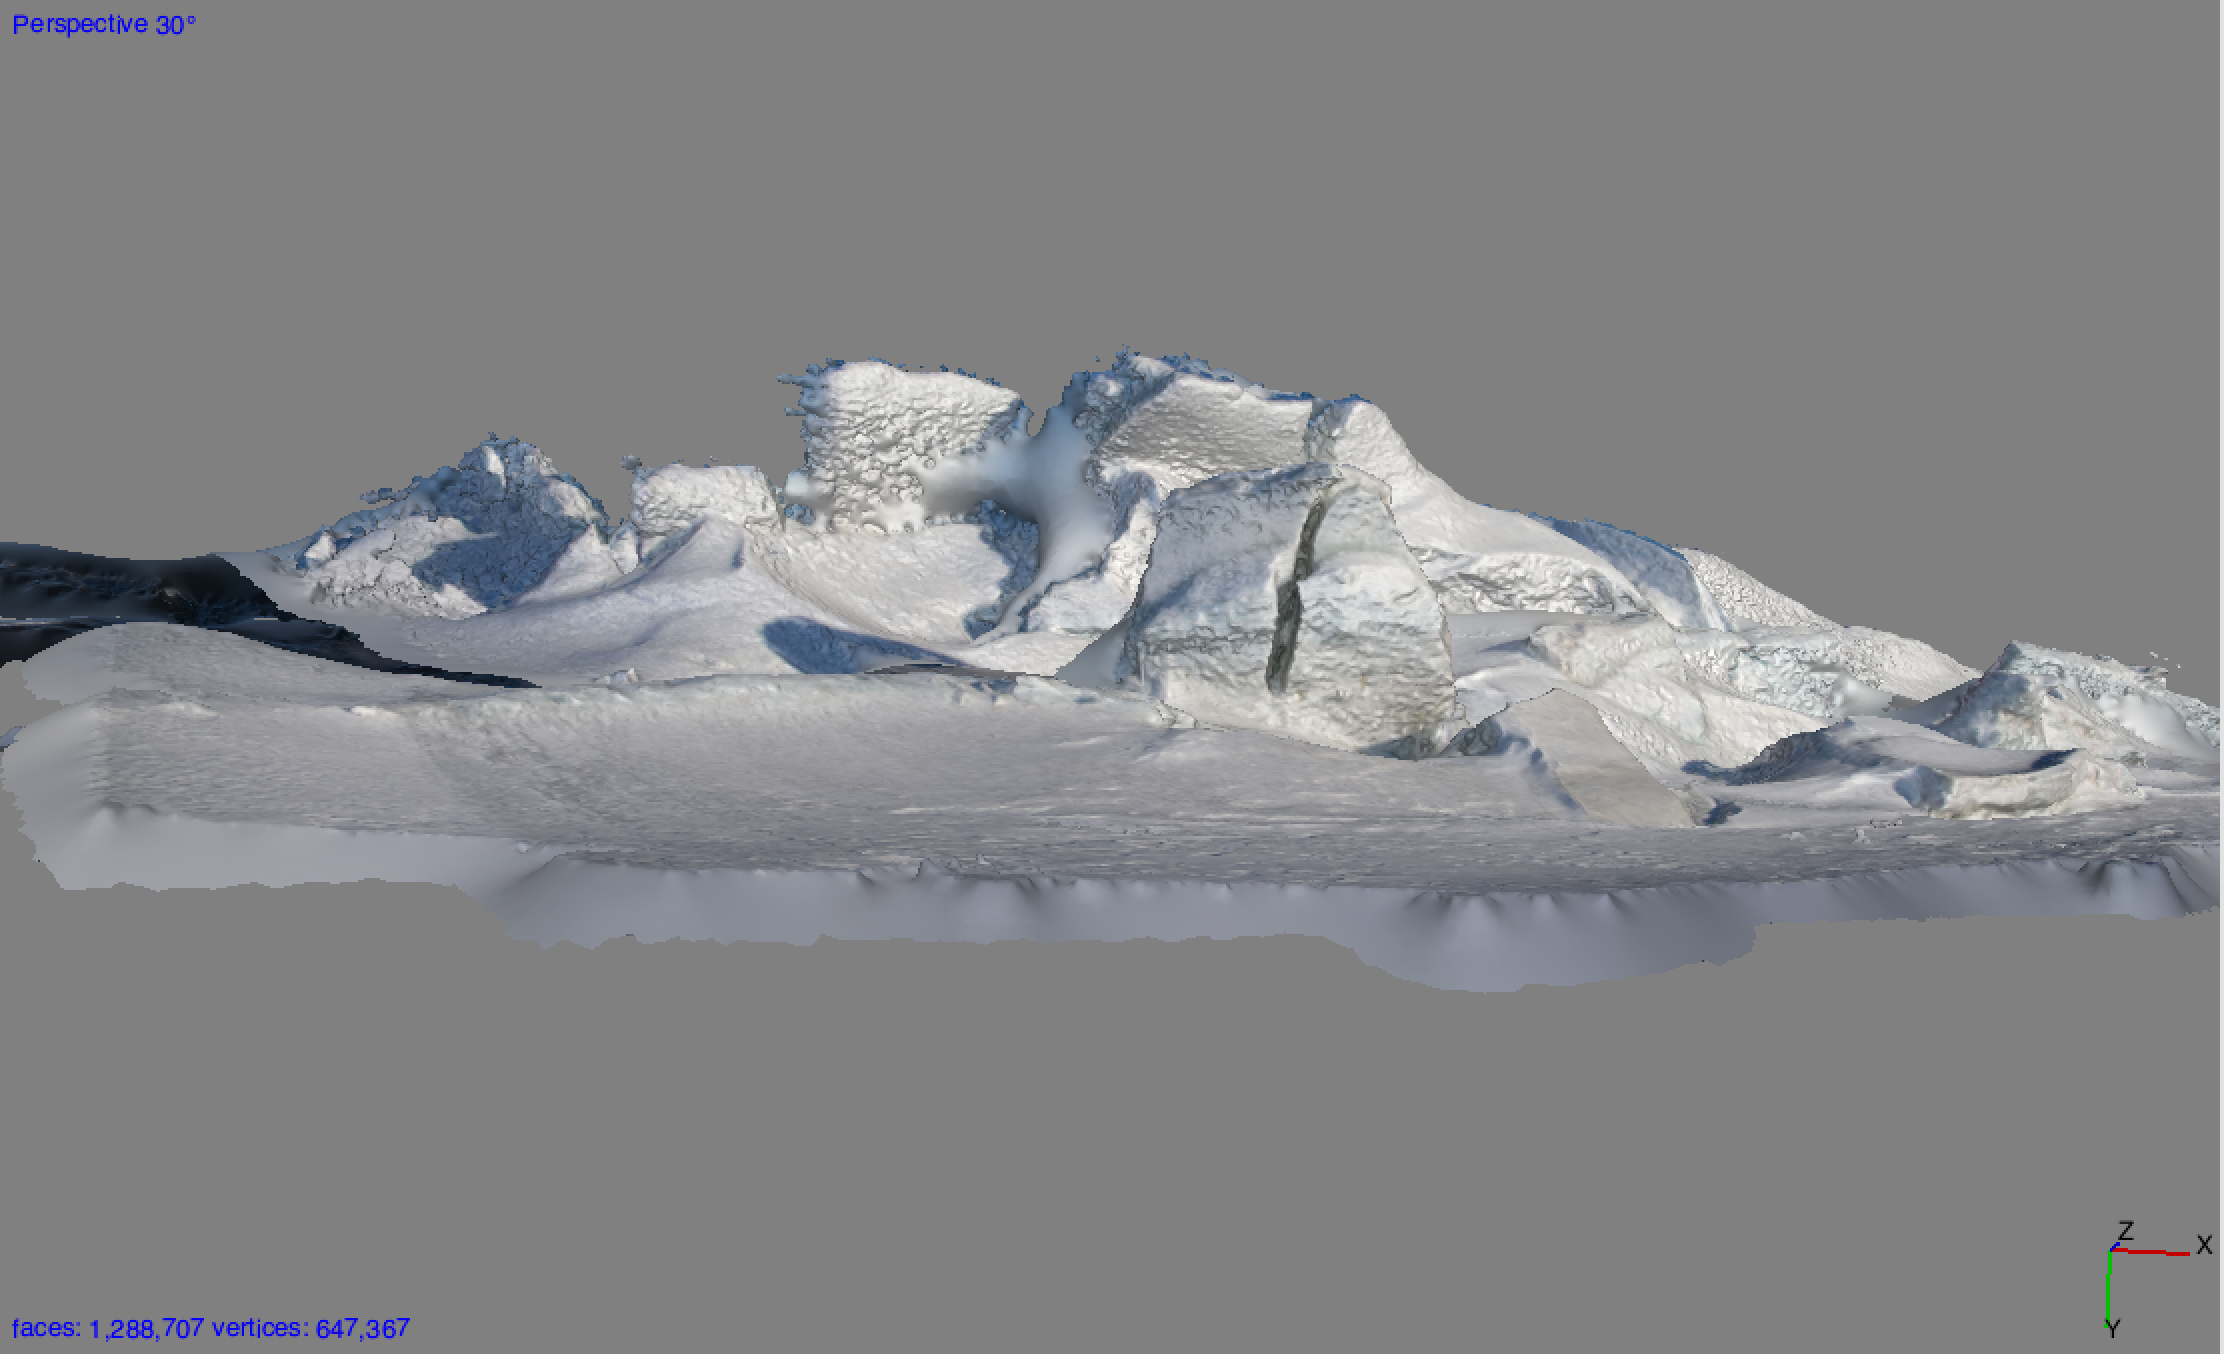
From other angles there were other formations to see, as in the two vertical photos below. I also did a few walk-arounds for photogrammetry captures. I’ve processed one of those files for a potential sculpture (horizontal image below those).
Peering through a crevice at the Scott Base pressure ridges results in a puzzling and ambiguous spatial reading.Another unexpected sculptural ice formation.A 3D file made from 53 photographs walking around a portion of the Scott Base pressure ridges. I need to edit out a few extraneous forms, but the capture came through mostly intact, with great detail and very few gaps.
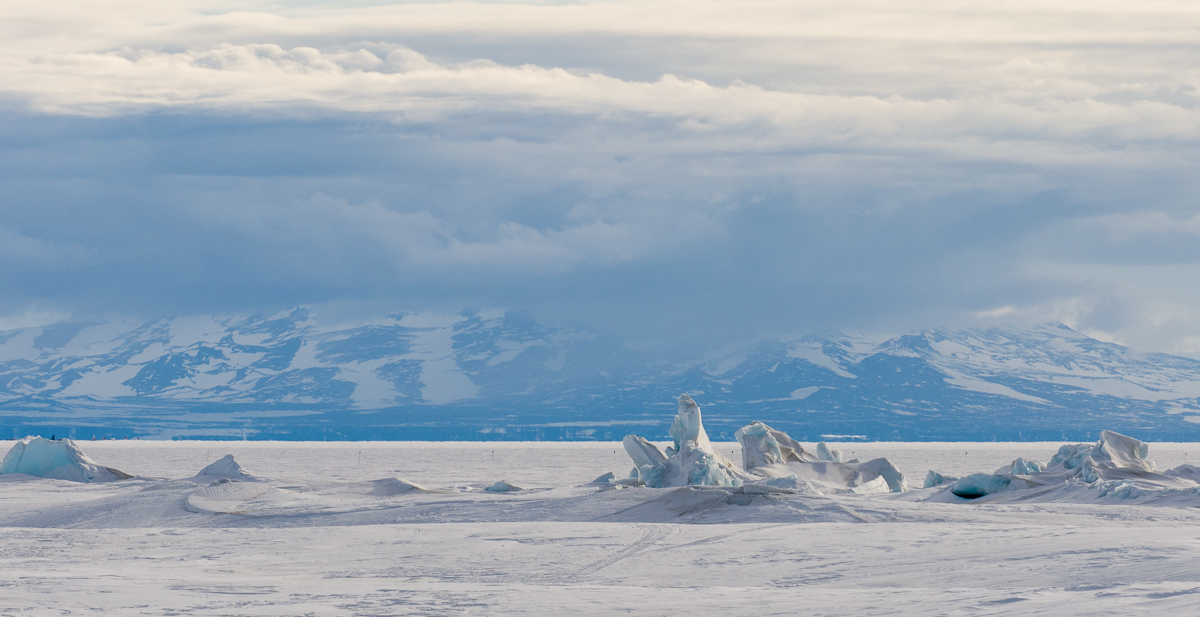
At the end of this post is a photograph of another fascinating phenomenon we saw on the November 30th trip to Scott Base: a type of mirage called a fata morgana. It has nothing to do with pressure ridges, but it does have to do with looking across the wide flat expanse of the sea ice toward a distant shore. A young man in our group noticed it first. In a fata morgana, a strip at the bottom of the land seems to be stretched like Silly Putty. This one was subtle, but unmistakable. There are more dramatic examples online. Just search Google Images for “fata morgana Antarctica” or read this explanation.
Across the sea ice from the Scott Base pressure ridge there was a fata morgana effect that made the bottom strip of the Transantarctic Mountains across McMurdo Sound appear to be stretched into a horizontal band at the bottom. Fata morganas appear in Antarctica when a band of air just above the sea ice is a different temperature than the air above it, causing a temperature inversion and distorted reflection at the horizon. Fun fact: the name comes from the Italian for Morgan Le Fay, half-sister of King Arthur.
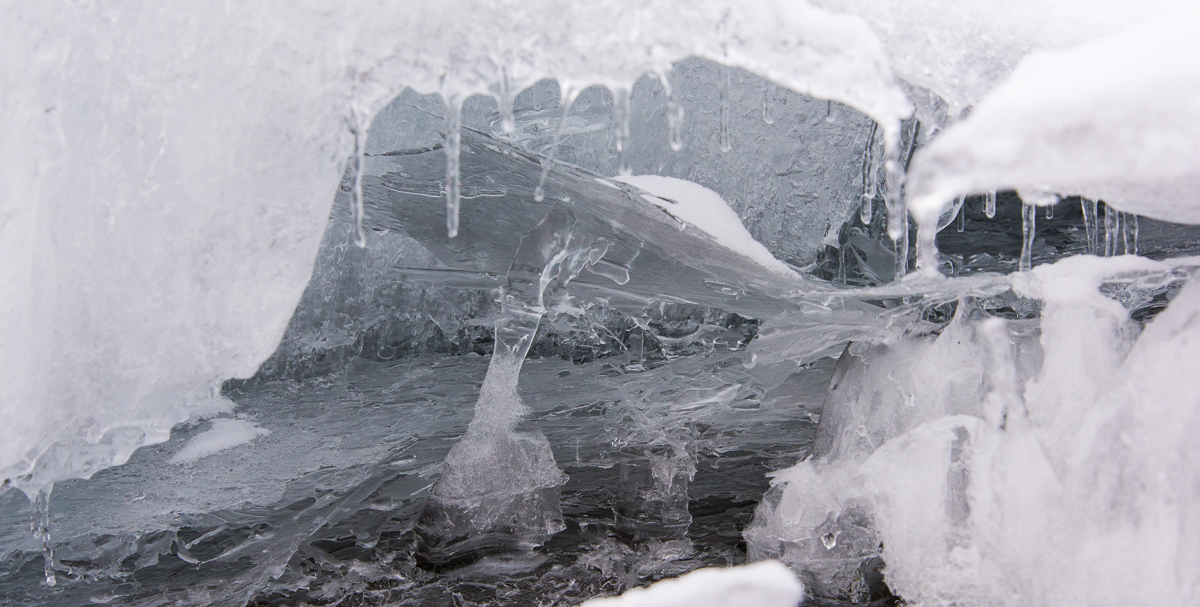
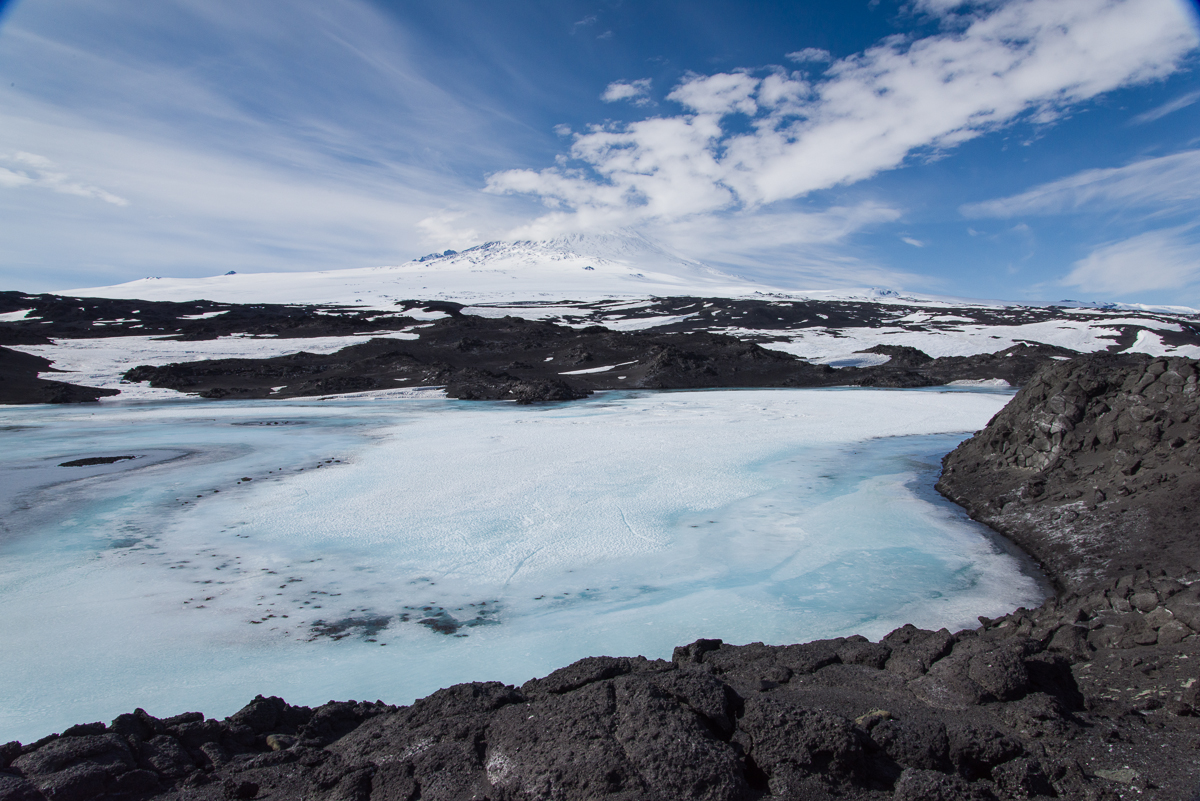
This isn’t the shore of Lake Hoare, this is what large sections of the lake surface looks like when you walk onto it, especially at the end closest to the Canada Glacier. You wander between flat-topped structures two to three feet high, the tops having formerly been the surface of the lake. The rest of the lake has ablated (vaporized into the air) leaving this peculiar world of glass-like ice architecture and thin, delicately etched pieces on the sediment around them.
As I mentioned in a previous post, the lakes in the Dry Valleys have a permanent crust of ice that’s on average four meters thick, a thickness that stays constant from year to year. The lakes themselves can be as much as 30 to 112 feet deep. The thick ice layer is added to by water freezing from the bottom, while the top is lost to ablation — that is, it goes from solid to gas. Scientists who studied the lakes used to think that 30 cm was added to the bottom and 30 cm was lost from the top each year, but recent research suggests that the average rate is more like 75 cm.
Some of the tops cantilever out so far without much support you wonder how they haven’t collapsed yet.Lake Fryxell has some flat-topped ice structures at the end near the Canada Glacier, but they aren’t as extensive or complex as the Lake Hoare ones, and are spaced farther apart. Most of Fryxell looks like this. Researchers routinely drive an ATV across it with ease.
In December, even with temperatures that never get much above freezing, under the 24-hour summer sun a moat melts around the shallow areas of shoreline. The width of the melted water and adjoining thin ice varies and camp manager Rae cautioned that it can change from day to day. So getting out onto the ice on Lake Bonney while I was there only necessitated about a six foot walk on a plank of wood the limnology team placed there, while to get on Hoare a more substantial (although still pretty makeshift) bridge of lumber lashed to pipes was needed, and at Fryxell there was a rowboat with a rope pulley rigged up to cross the much wider moat of shallow water. Once you get onto the lake ice, any ice that’s rough and crunchy is a better bet to walk on than ice that’s smooth and blue, because it’s older and likely to be thicker. Both Bonney and Fryxell were relatively level and stable to walk on once you got across the moat. In fact, on both those lakes, the researchers drive around on an ATV if they have a distance to travel.
Sometimes it’s difficult to know what’s under the fresh snow surrounding something like this structure (doesn’t it look like a little pavilion?): more sand, firm crunchy ice, or a coating of ice hiding six inches of water.
Hoare is different. Ice that has a thick layer of sediment blown onto it is generally firm to walk on, but you still have to watch where you step or you may end up in ankle-deep — or mid-calf-deep water, as Mari (a McMurdo field center worker who was helping out at the camp the week I was there) and I discovered when we returned from a hike to the other end of Lake Hoare one day. We had hiked down to the Suess Glacier via a little footpath that followed the shoreline, and had been told if we could get onto the ice down there, we could just walk down the middle of the lake on the way back as long as we had on ice crampons, so we wouldn’t slip. We started back on the trail, then after about 10 minutes we saw a spot where we could just take a giant step across the moat onto the lake. This appeared quicker and more direct than the land route we’d taken earlier. Turns out, slipping on slick ice was not the problem. After about 15 or 20 minutes, Mari tripped when her foot abruptly punched through to her mid-calf. She scrambled to her feet. We were both a little spooked, but it seemed to make sense to continue rather than double back. Seemed. Some parts were solid, while others made an ominous hollow sound, and they looked pretty much the same from the top with the slight coating of snow remaining from the storm a few days before, which definitely obscured thin areas that would otherwise have been more obvious. We zigged and zagged from one highly uneven patch of sediment to another, sometimes making good progress, but punching through up to our ankles periodically. This was unexpected after my experiences on Lakes Bonney and Fryxell. I had already walked out onto Hoare with Dave, one of the scientists, and hadn’t encountered this much difficulty. That’s when I took some of these photos — the others I took on another walk onto the lake with him the day after Mari’s and my adventure. But Dave’s been coming here for several years and can size up where to walk pretty readily. At one point, Mari said, “I just remembered, in case you don’t know this, if you fall in, you’re supposed to stick out your arms straight in front of you like this and catch the edge.” Then we started laughing at the absurdity of the situation.
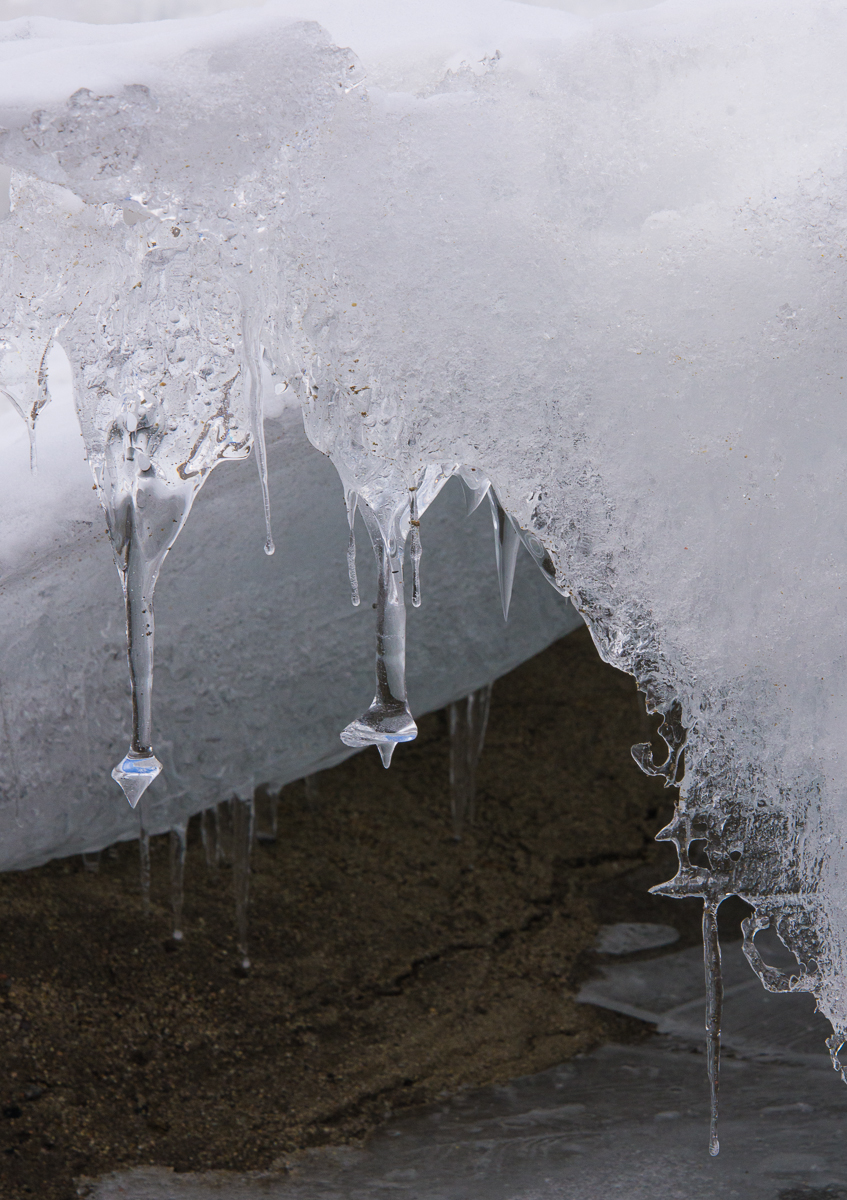
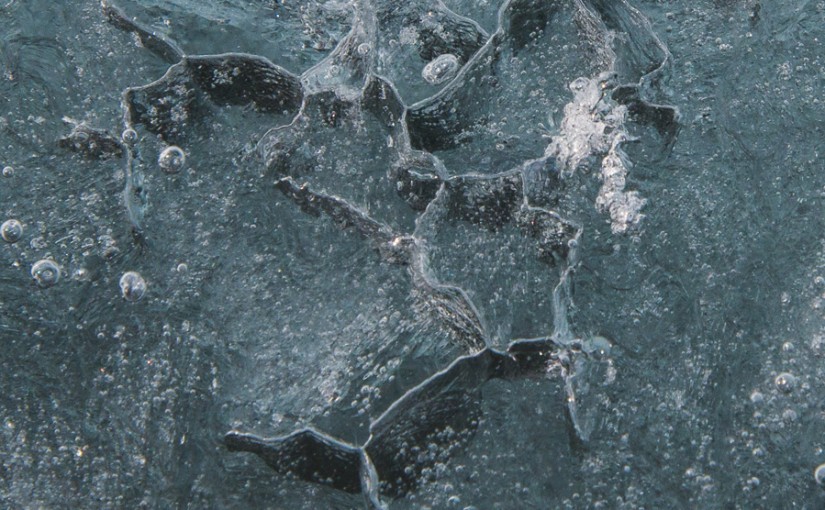
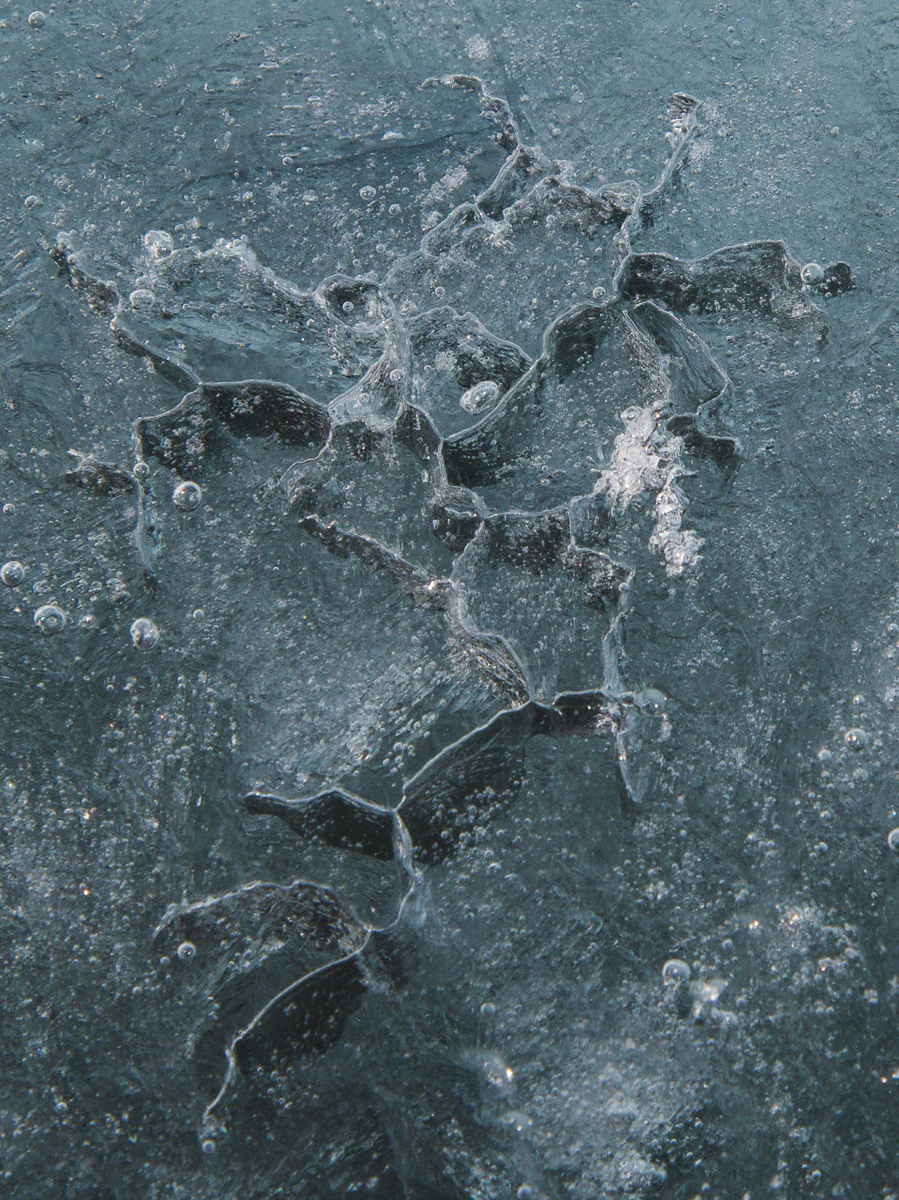
When thin sheets of ice break, they look and sound like broken glass. You can see how some of these ablated areas get hollowed out underneath, and continually melt and refreeze into layers of thin ice.
None of the areas of thin ice were more than a foot deep before you hit the permanent lake ice, but it still was unnerving. Also, sometimes there was no water under the ice, but it shattered with the sound of breaking glass, which I think we’re all hard-wired to find jarring even when we’re not worried about stepping in the wrong place. We didn’t see any narrow moats to cross back to the shore, so we ended up walking cautiously down the middle of the lake, and kept camp manager Rae informed over the two-way radio of our progress. Our “shortcut” ended up taking an extra hour over the path. Boy, were we relieved when we stepped off the bridge onto the shore.
Antarctica continually surprised me. One phenomenon — in this case ablated lake ice — has surprising permutations in one relatively small section of one lake.
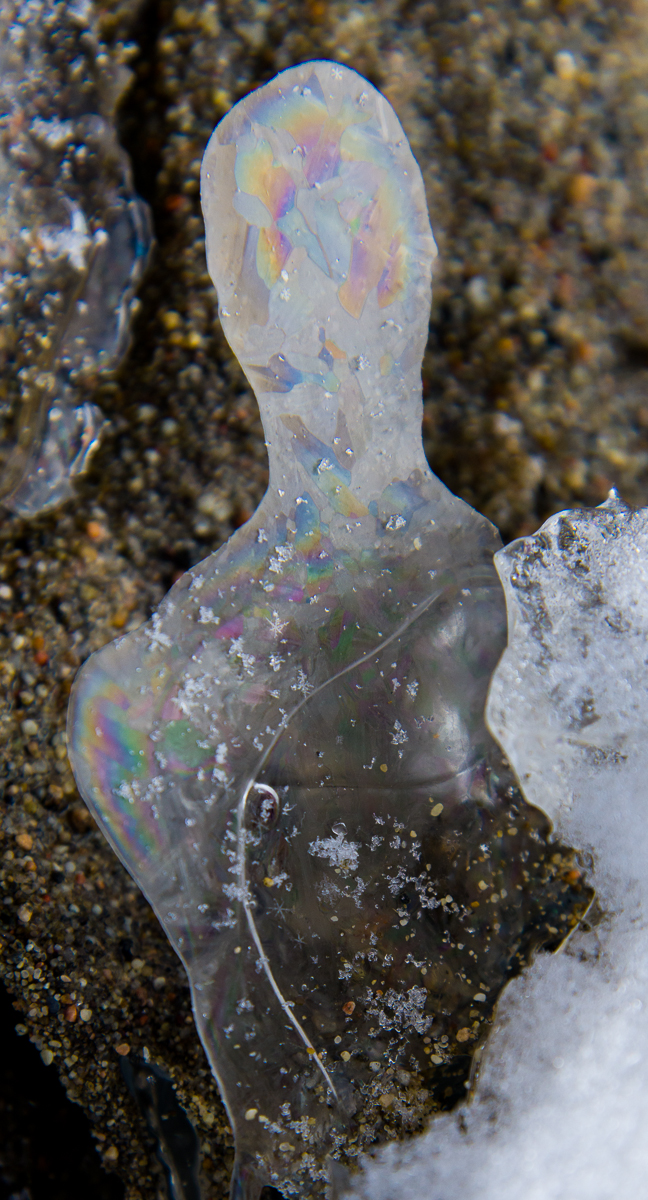
As long as I knew I would not end up in freezing water up to my armpits, I enjoyed walking around with my camera looking for interesting formations and peering inside the taller ones, which were about knee high. There is no shortage of oddities and we didn’t have to walk far to find a wide variety. Some were like thick glass pillars. The ones at left looked like part of a chandelier. Then there was a whole other world of fascinating designs that looked drawn or painted on thin layers of ice that had formed on the surface of the sediment.
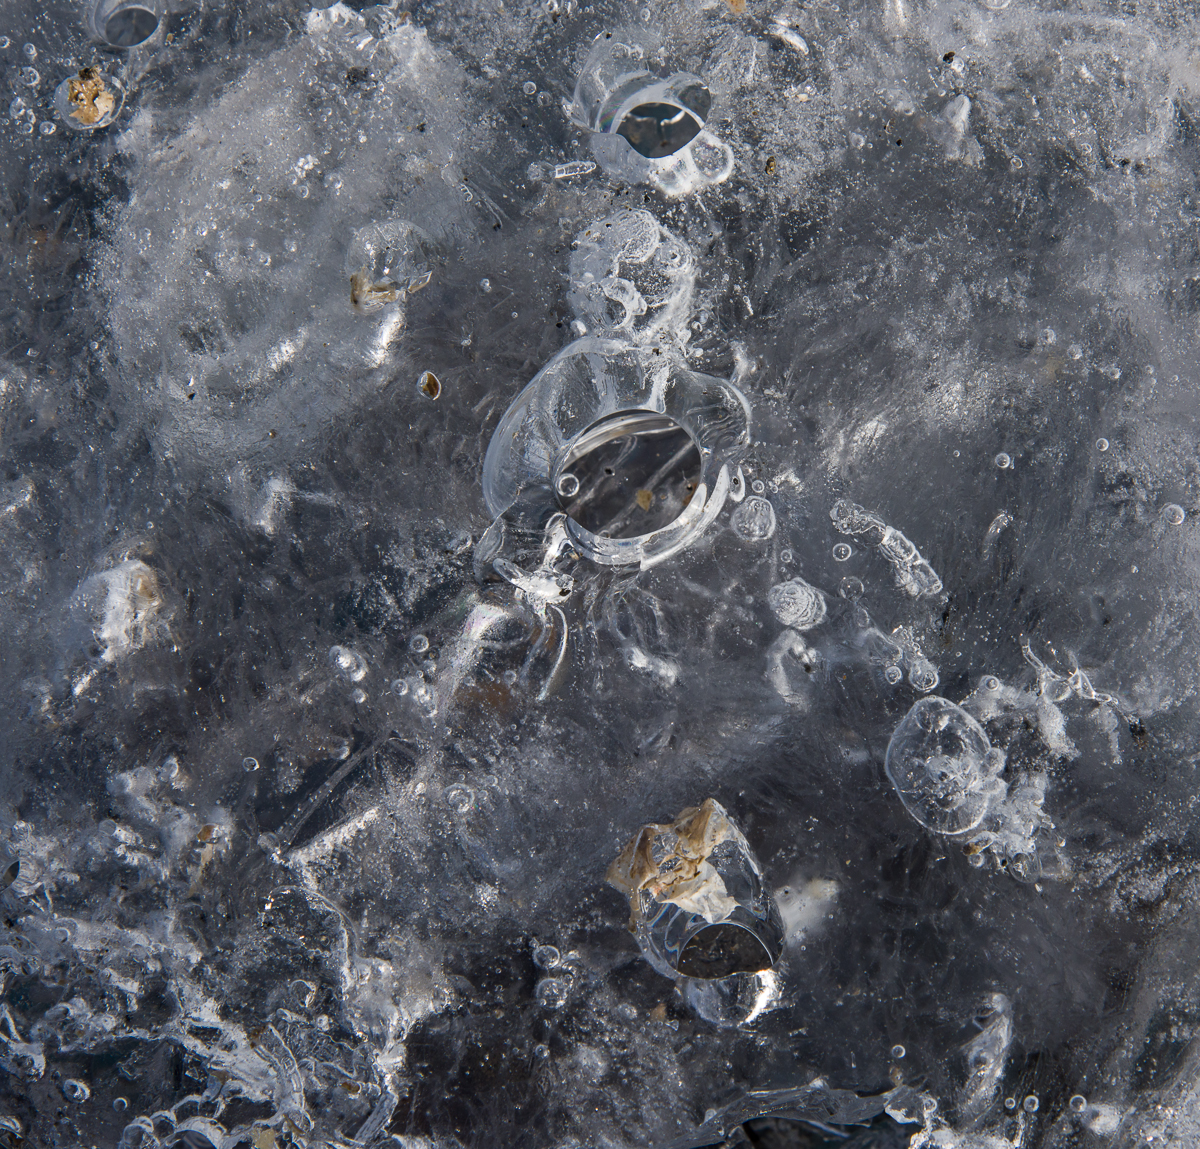
I’ve zoomed in on the formation at left so you can see how a thin ice layer has formed a rainbow-colored interference pattern.
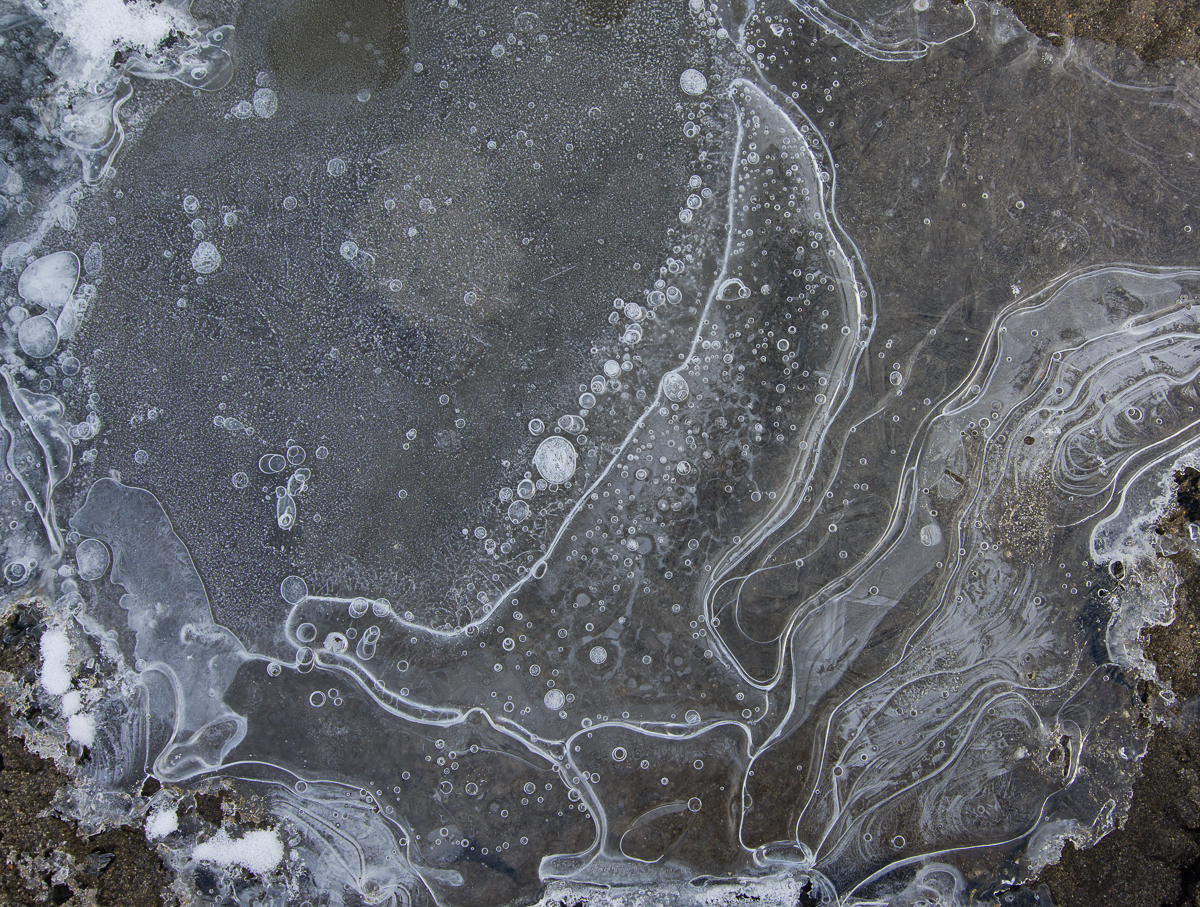
We saw ice embellished with concentric curving lines, overlapping dots, and so-called Tyndall figures, which are pale shapes separated by straight and curved lines. And sometimes there were combinations of any or all of the above as in the following photos:
A lake ice trifecta of Tyndall figures, bubbles, and a rainbow-colored interference pattern upper right.I call this one, “The Skua.” Kind of looks like a bird in profile, right? There actually was a skua that sometimes came around the Lake Hoare camp, which the staff and scientists had nicknamed Taylor, since the camp is in the Taylor Valley. Though a lot of people at McMurdo view skuas as pesky, the Hoare camp always got a kick out of seeing Taylor, since he/she was the only bird in the area. Otherwise, the only animals in the Dry Valleys are microbes and nematodes.More abstract art from ice.You can see how thin many of these formations lying on the sediment are.A series of drips freezing a leaving a white outline? A drop leaving traces of its path as it moved? However these formed, the result is delicate and lovely.
This bumpy ice at the edge of one of the inland lakes at Cape Royds looked like flash-frozen oblong bubbles.
For my Antarctic Artists and Writers Program project, I expected to be photographing glaciers and large ice formations, but once I got to Cape Royds and the Dry Valleys, I also discovered some small scale — even tiny — ones that fascinated me in their variety and the unexpected shapes or colors. It seems that the extreme cold of Antarctica generates some peculiar ice formations in the freshwater lakes fed by glaciers.
Looks like waves lapping on the lake shore, but they’re completely frozen.One of the large lakes at Cape Royds. Mt. Erebus is in the distance. The first couple of days I was there, the lake was frozen and you could walk right onto it from the shore and cross to the middle. That’s when I took these photos. But a couple of days later, the edges had thawed and there was no way to get to the ice without wading across a few feet of water.
Some of these lakes melt around the edges this time of year (December-January), but never thaw completely. I don’t know if the kind of ice formations you’ll see in the photos that follow are found elsewhere in other places that are cold much of the year, for example, the Arctic. Nobody I’ve asked so far could tell me, but then again, most people who are working in those places as mountaineer guides or researchers aren’t attending to that ice, except as a practical matter to check out if it’s safe to walk on it. So if anyone reading this has more information about what physical processes are causing these shapes, feel free to comment!
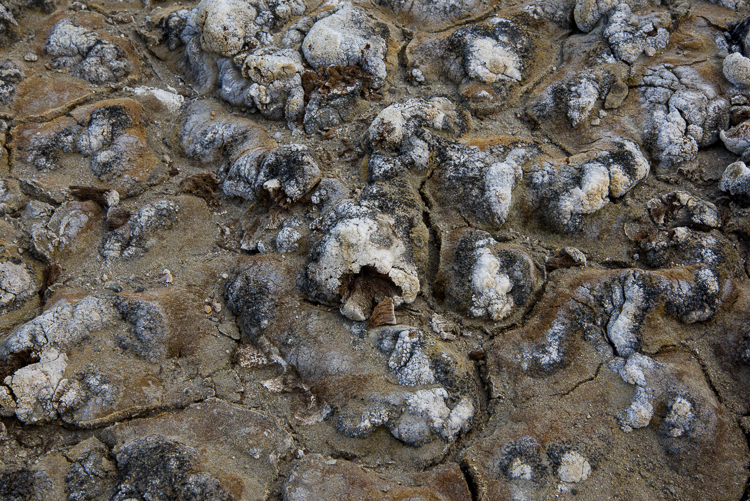
A close-up of a jagged ice pattern found walking along the black sand beach at Cape Royds. It’s pretty much all straight lines.
It also could be at Cape Royds that because of its proximity to the sea, there are salts in the water that are contributing to some of these effects. This cracking pattern at the left was not photographed at the lake, but at the edge of a black sand beach where there was a pressure ridge and sea ice. But snow was melting from a ridge above the beach so it’s hard to say if it’s frozen freshwater or frozen sea water or a combination.
Ice structure in the middle of a lake at Cape Royds. The ice around it was thick and solid enough to walk on.
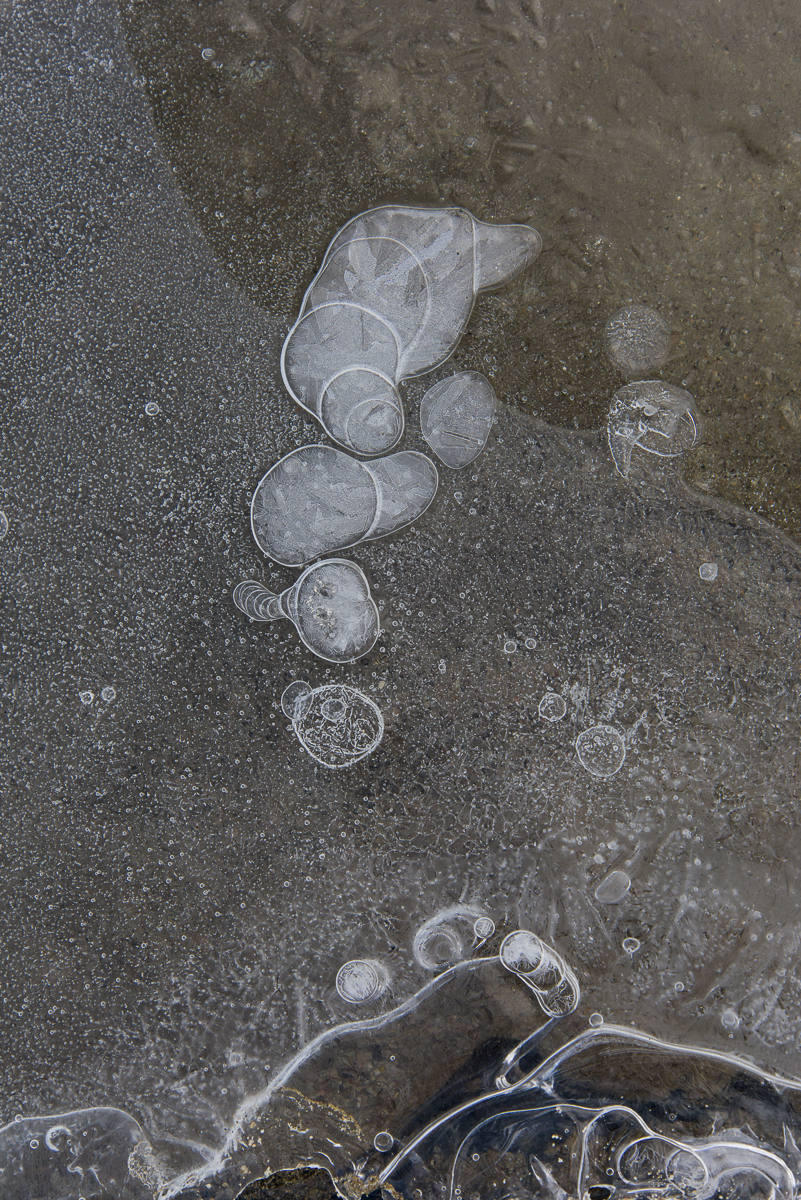
Some of the unusual patterns I found were at the center of one of the inland lakes at Royds, where gravel from the surrounding hills had blown onto the ice, piled up there, and there was a frozen flat-topped ice structure sitting on top of it. There were a lot of these isolated flat-topped ice structures at Lake Hoare in the Dry Valleys, too. The ice designs I found at Lake Hoare will be the subject of a later blog post. The explanation I got at Hoare was that while the ice forms from the bottom (and in the Dry Valleys the lake ice is a few meters thick), the frozen surface of the lake ice ablates — that is, vaporizes into the air — but sometimes leaves areas that haven’t ablated still sticking up above the frozen lake surface. The next few photos were taken near one of those structures, shown in the above photo. It was probably about three feet high, several feet wide and extended for several feet in the middle of the lake. You can see in the photo there was a lot of sediment around it.
This design, photographed near the formation shown above, has rounded shapes, within which are a combination of straight lines and curves. And it has distinct layers at different depths, presumably from freezing and melting and refreezing at different times.
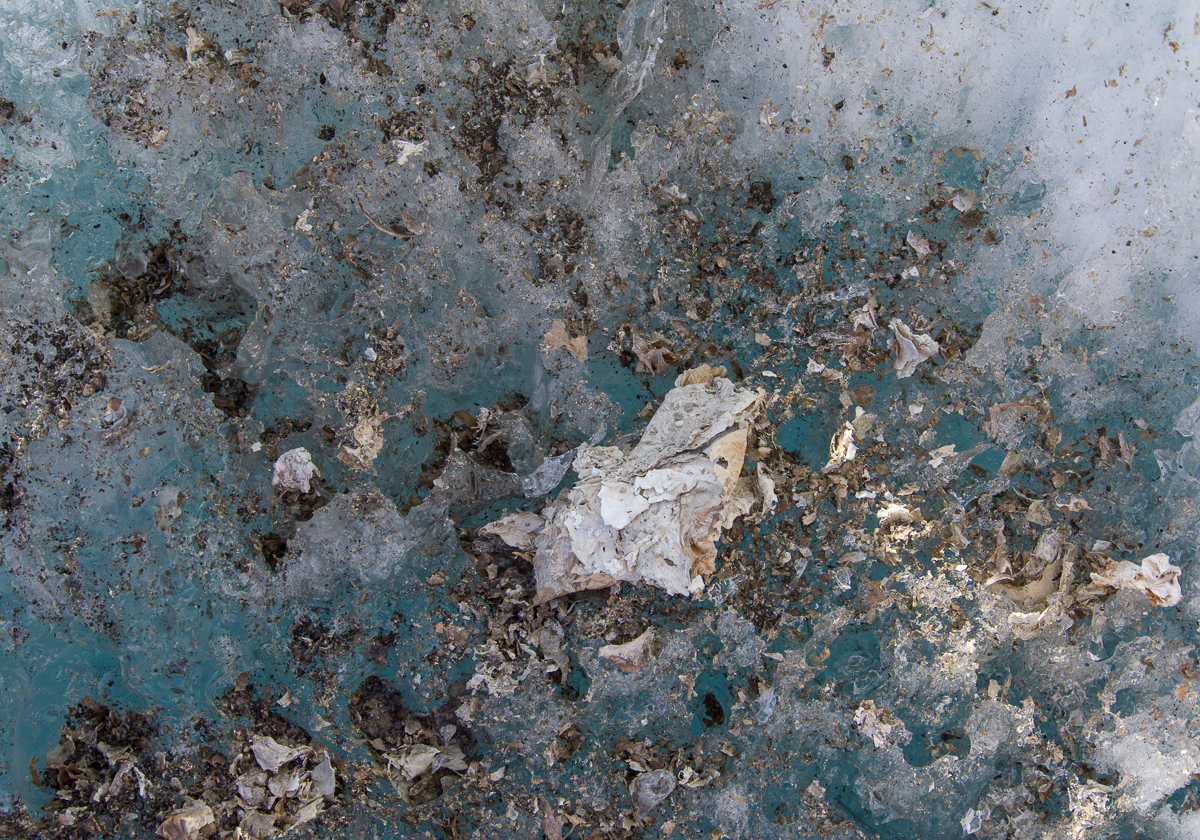
In the lakes at Cape Royds you’ll also find what looks like torn up bits of cream, tan and orange paper scattered on top of and within the ice. Those are algal mats. Around that tabletop shaped formation at the center of the lake were these “collages”:
An algal mat “collage” in the lake ice.This one looks like someone splattered turquoise paint on it. You can see where gravel has blown onto the ice and piled up. The gravel melts holes in the ice, too.This microworld of a thick layer of ice on top of sediment has some scattered fragments of algal mat, frozen bubbles of varying size and holes. It was taken nearby the two photos above.
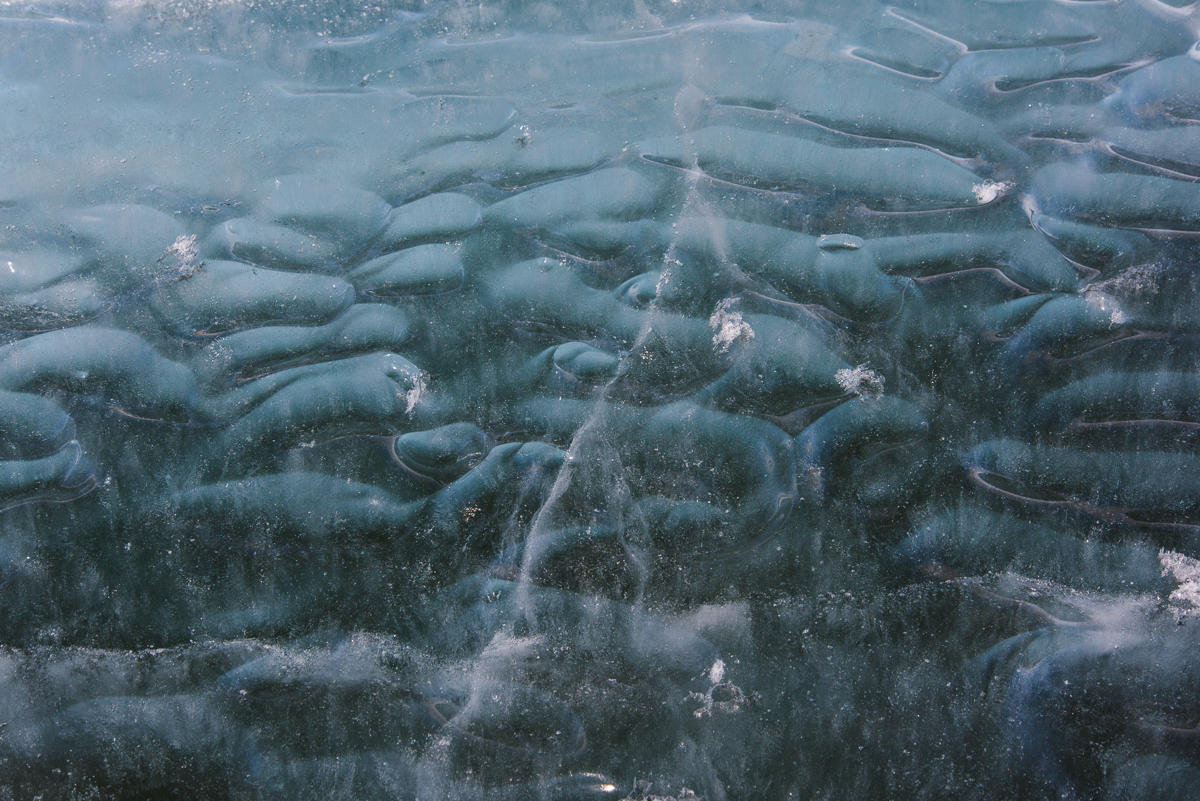
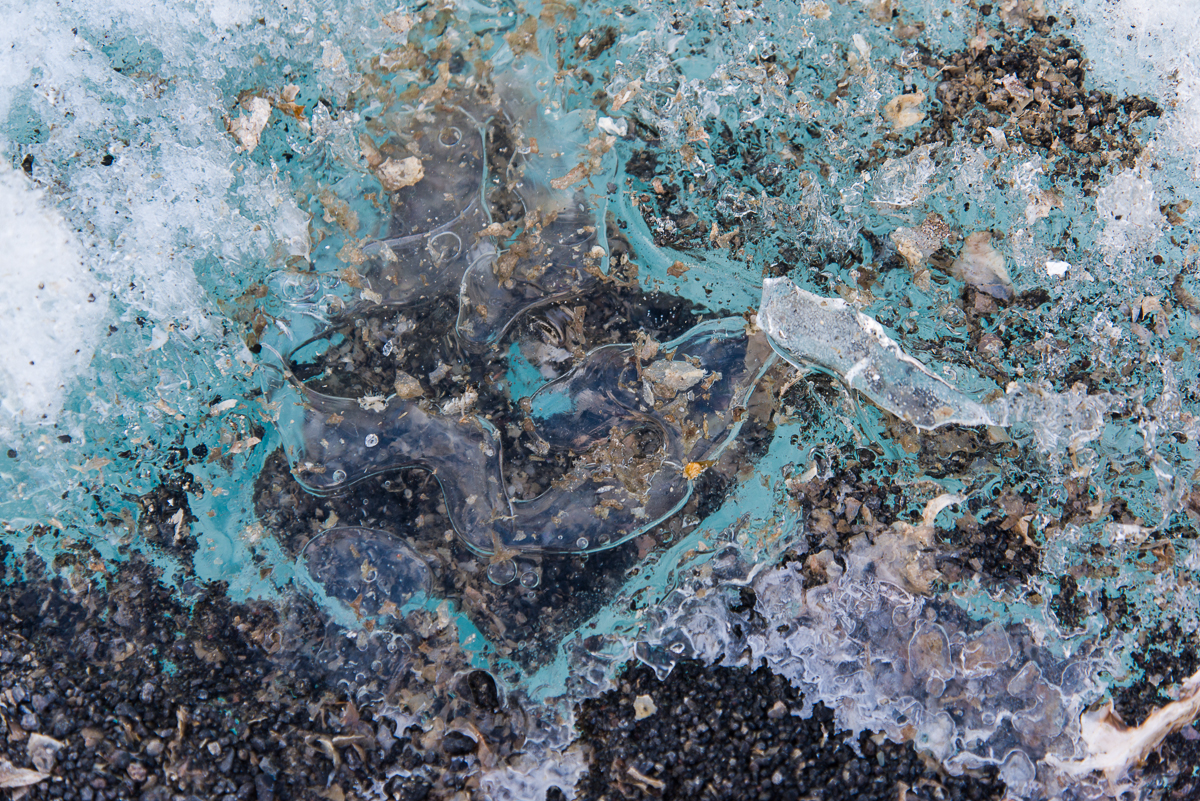
I’ve saved the strangest formation for last. This one was by the shore. The ice was a deep shade of turquoise, and inside were vertical ribbons caused by…what? They were definitely three-dimensional as you moved around them. I’m trying to find out what causes them. They looked to be about 3/4 of an inch wide. Here’s an overall photo and a detail:
Ribbons in the ice: anyone know what causes these? I also saw similar patterns in Lake Hoare but the ribbons were not nearly as wide, nor were they colorful, just plain white.Detail of the ice ribbons.
In a future post I’ll show some of the small surface ice formations from Lake Hoare, which were different than these. I’ve encountered much more variety of ice in Antarctica than I had expected, a happy discovery.
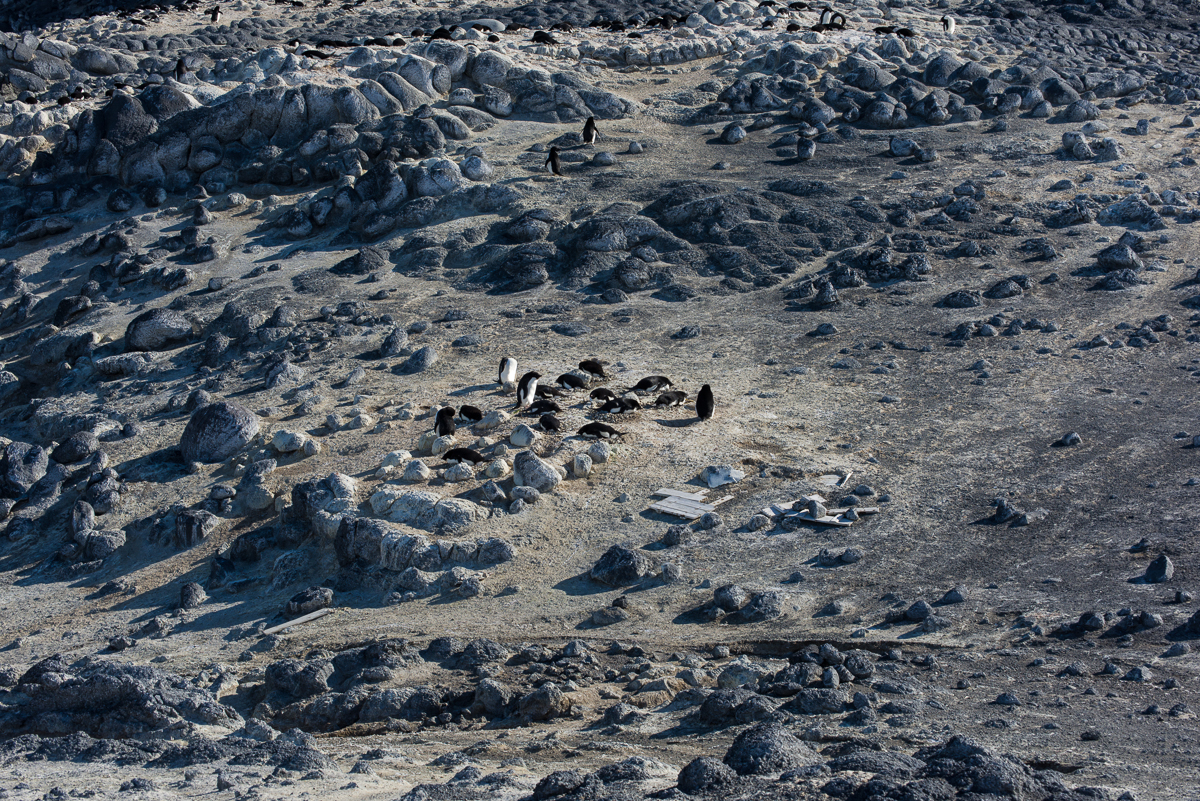
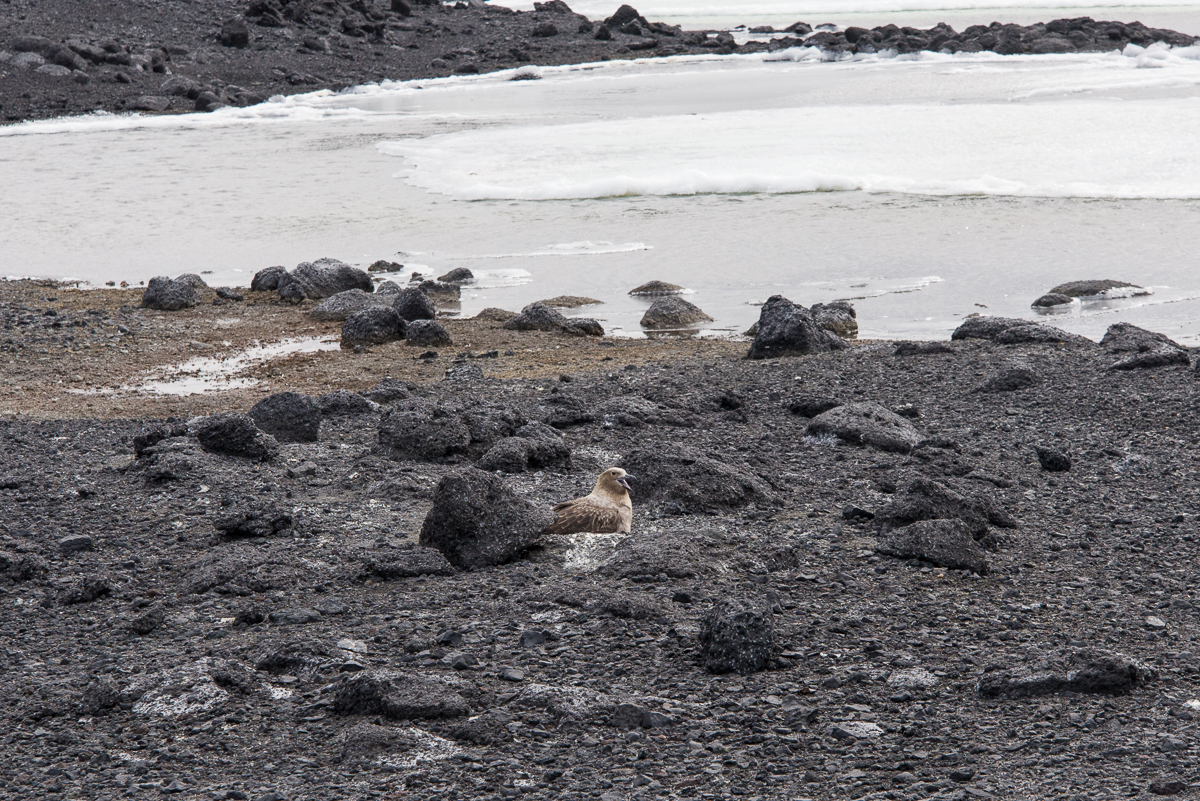
Off the beaten track: Most of the penguins hang out in the penguin colony, but a few wander further afield.
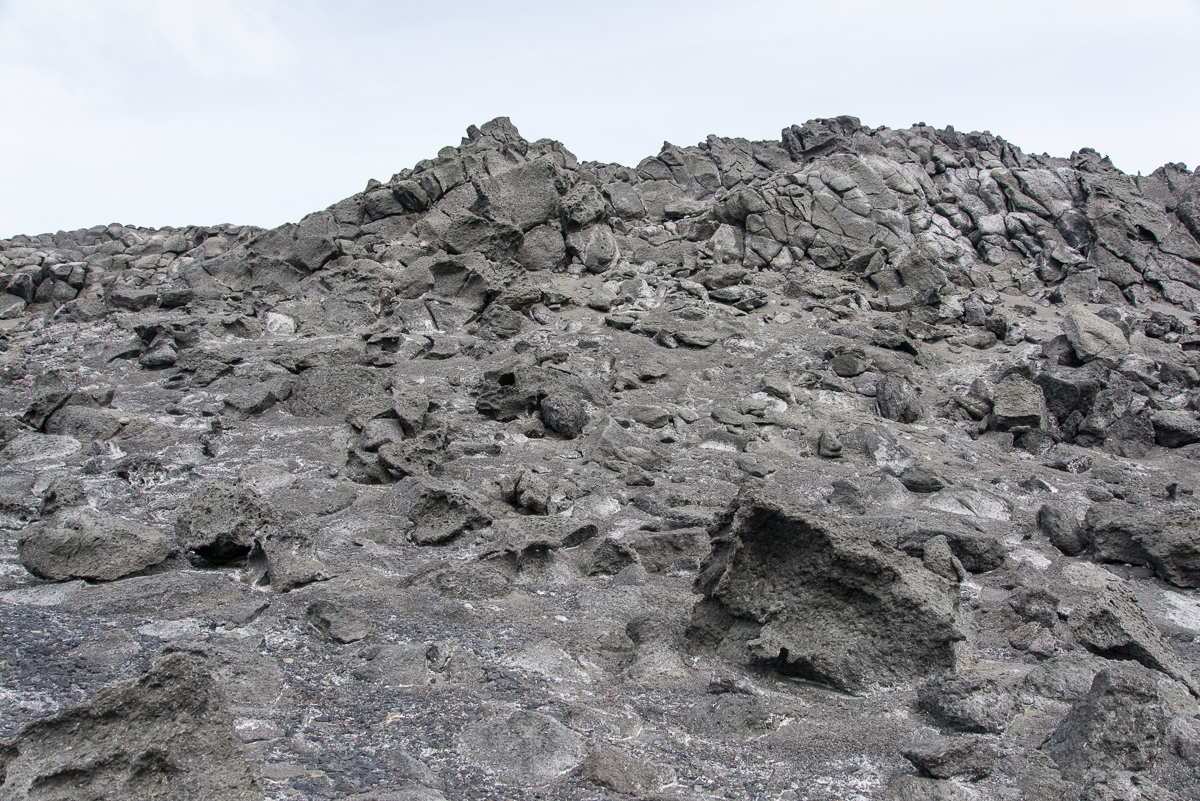
On Dec. 9th, I went via helicopter with Evan Miller (the mountaineer you met in previous blog posts) to the Adelie penguin colony at Cape Royds. At the Royds field camp, you are between Mt. Erebus and the Ross Sea. It’s a short hop via helicopter from McMurdo, about 15 minutes, but a completely different landscape. For one thing, McMurdo is still iced in with a thick layer of sea ice but Royds is beyond the sea ice edge, so there’s open water (which is typical for this time of year, though the sea ice broke out here before mid-November, which is on the early side). Erebus still looms in the distance, and you have more the feeling of being on the lower slopes of a volcano, since there are hills covered with black gravel and rounded stone formations they call volcanic pillows. The “pillows” have rounded protrusions so uniform in size it looks like an archaeological site where some ancient civilization had built stone walls by piling stones, but of course that’s not the case at all. Some of the structures that look like a wall made of a pile of stones are in face, one big rock.
Evan walks through a typical landscape around here, filled with black volcanic rock.
Evan was sent to accompany me for the first 24 hours to explore the site so I knew where I could orient myself so I could walk safely on my own for the rest of my stay. So on that very windy afternoon when we arrived, after lunch we set off on a walk toward the small lakes to the north and then looped back along a ridge that overlooks the coastline. The penguin colony itself we decided to save for the next day, since that’s terrain that I would not need the know-how of an experienced mountaineer to explore.
Right now there are two women working here, field camp manager and outreach educator Jean Pennycook and wildlife biologist Katie Dugger. Katie is leaving in the next few days, and her colleague David Ainley, the scientist who established this study, will take over her daily monitoring of the penguins. Jean makes sure the camp is supplied and is busy with outreach activities, making Skype calls to classrooms all over the world from the colony via her iPad, communicating with schoolteachers and updating the Cape Royds penguin project’s fabulous web site at penguinscience.com, which I highly recommend if you have any interest in learning more about penguins. There is information there for any level of education, from kindergarten to college. If you have kids, show them the site and tell their teacher about it! You’re probably saying, all right already, enough with the exposition, let’s see some penguins! So, even though this is out of order, here’s a quick peek. I promise more penguins up close and personal in the next post.
A portion of the main penguin colony at Cape Royds with scattered remains of one of Antarctic explorer Ernest Shackleton’s structures. One of his huts is here, and as with all the early explorers’ huts, any debris that is scattered around the grounds, even broken glass or bits of bones from their dinner, is left undisturbed and you are not supposed to touch it. Why is the ground tan? As Jean put it, “That’s about 10,000 years of penguin poop.”
Evan and I found the larger lakes:
Clear Lake, one of the frozen inland lakes.
…and smaller ponds:
The penguin folks call this one Skua Lake, since skuas often hang out here. You can see Inaccessible Island out in the Ross Sea in the distance on the right.
And volcanic rocks worn by the wind, called ventifacts:
The vocabulary word of the day is “ventifacts.” These are rocks eroded by the wind into unusual and striking shapes.
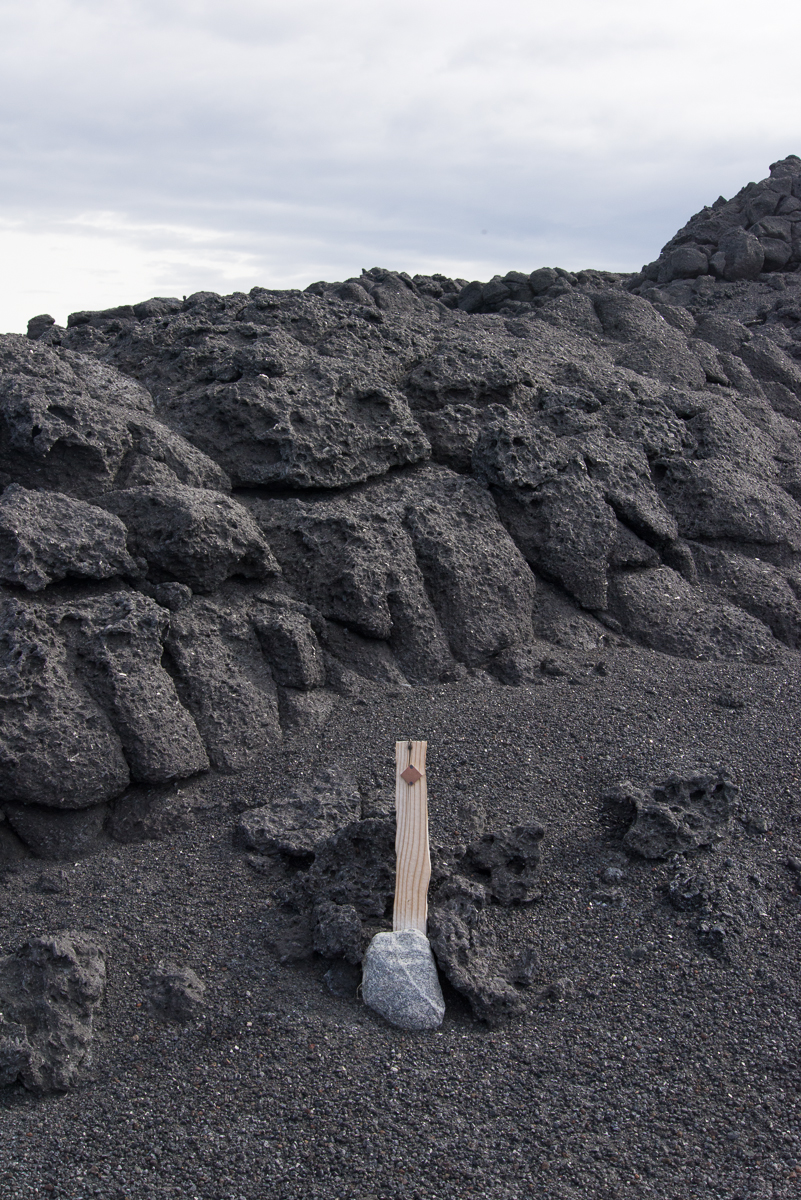
Evan and I also encountered this post on our walk. Jean didn’t recognize it. Maybe it’s a marker from a previous study. Anybody know what it is? Click image to enlarge it.
As we walked, Evan and I happened upon a nesting skua, sitting on an egg. She hyah-hyah-hyahed at us to warn us off for a while, and then stepped off the nest and took a few steps toward us as if to say, “Hey, I mean it, get the hell out!” So we made a big circle and ended up at a distance from the other side of the nest. Evidently that was good enough for her, and she walked back to her nest and settled back in, but we got a quick glimpse of the egg (photos below).
If you know what’s good for you, you’ll leave me and my egg alone!Good, they’re going away! Don’t worry, little egg, Mommy’s back to keep you warm.
We had, it turns out, inadvertently walked into a major skua nesting area. We kept seeing nesting pairs. Most either ignored us or squawked a little as we walked by but suddenly Evan was being dive bombed by a skua, who kept swooping down within a few feet of his head. Why it went after him and not me, who knows? Maybe because he was taller? But we walked faster and got out of there.
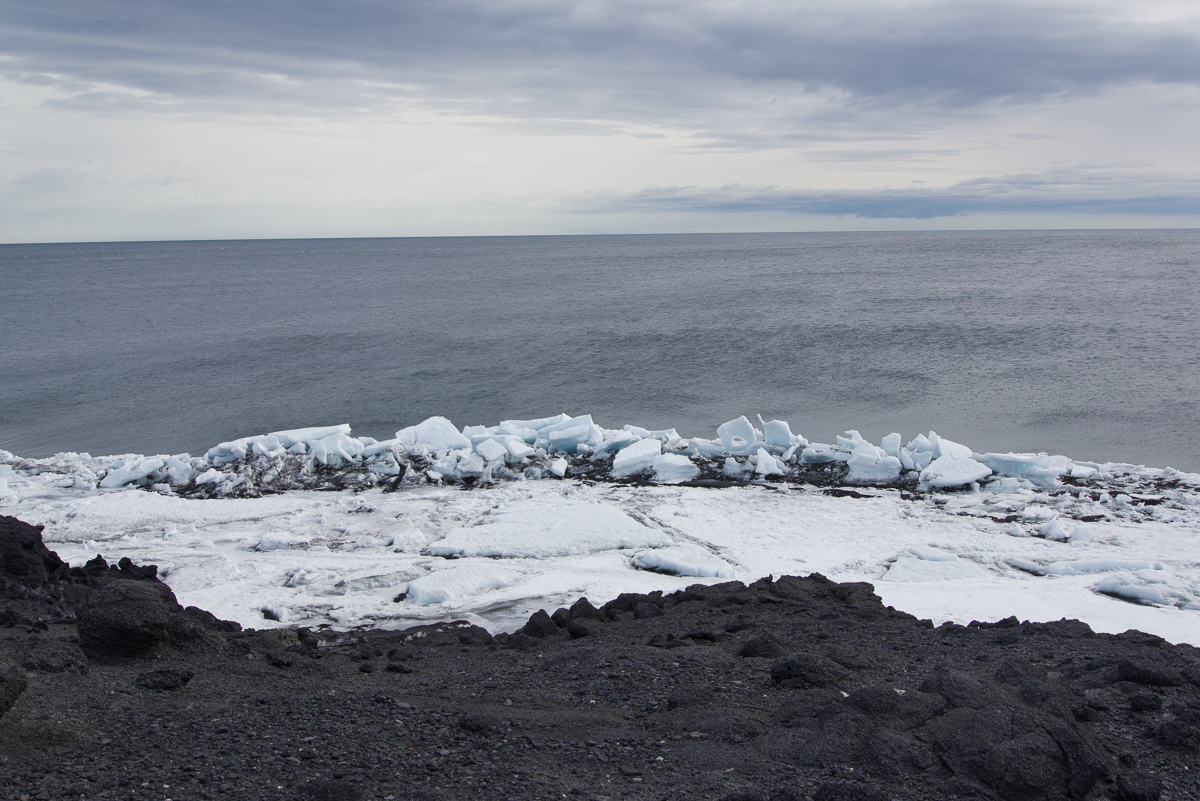
Coming over the ridge we saw the sea. The open water was a contrast to the unending vista of flat sea ice from McMurdo:
Our first day at Cape Royds, the wind was blowing from the south and beyond the pressure ridge was clear open water. See the pressure ridge formation a little to the right of center, where there’s a rectangular chunk with a hole in it and another piece with a little stalk to its right? Now look at the photo below from 24 hours later, after the winds had shifted.What a difference a day makes: 24 hours later, the winds had shifted, blowing in sea ice. See the formations from the previous photo, now on the left in the foreground? Notice all the ice that’s come in behind them.
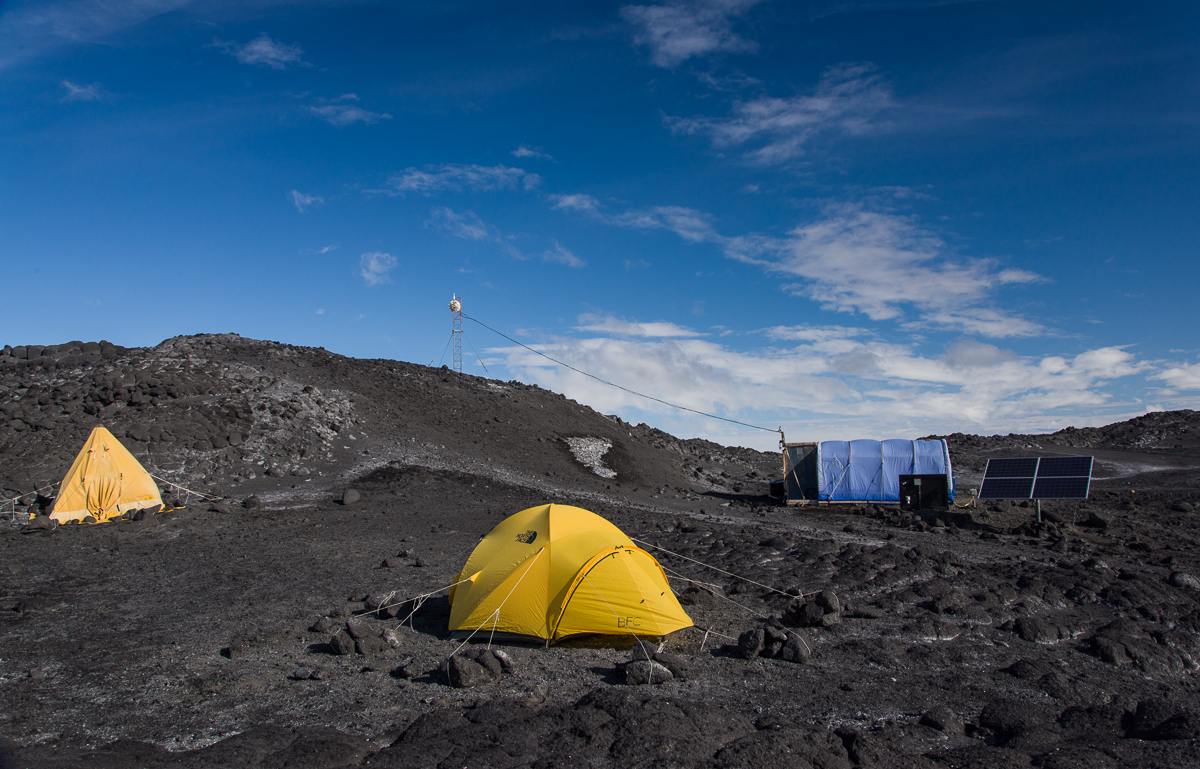
That’s my tent in the center, Jean’s on the left, and the main hut on the right, one roughly 9 x 15 foot room where we do all our cooking, working at our laptops, store the non-refrigerated food (a large picnic cooler set in the great outdoors serves as the camp “freezer”) and warm up if necessary — there’s a propane heater in the hut. The sleeping bags and fleece liners they gave us are incredibly warm and believe it or not, I’m completely comfortable sleeping in the tent in same short-sleeved PJs I wear at home, even though the tent is unheated and outdoors it’s probably been in the 20s with wind chill. An eyeshade is a must, though, as the bright yellow tent lets in the sunlight 24 hours a day.
The winds were blowing stiffly from the south all day. We kept waiting for them to calm down in order to set up my tent, but that wasn’t happening. So I got a one-on-one lesson from a certified National Outdoor Leadership instructor on best practices for setting it up in the wind.
A penguin stopped by while I was putting my belongings in my tent. Now there’s a sentence I’ve never written before.
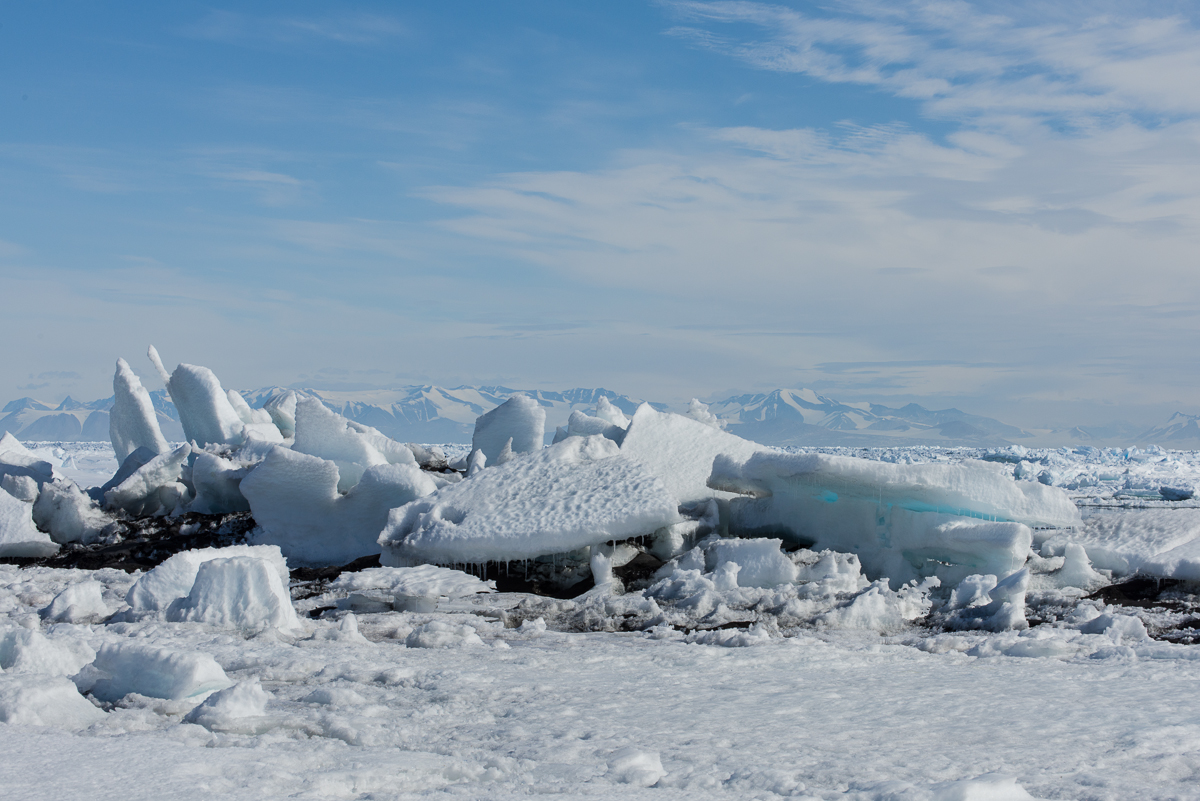
However, Katie assured us that the forecast called for the winds to die down and shift direction after midnight. The next day we were surprised to see that indeed they had, and the sound had filled with sea ice blown in by the winds coming from the north. Giant slabs of ice were moving briskly along.
C the ICC: Another view of the sea ice that blew in overnight. Everything that’s clean and white beyond the dark ridge wasn’t there the day before.
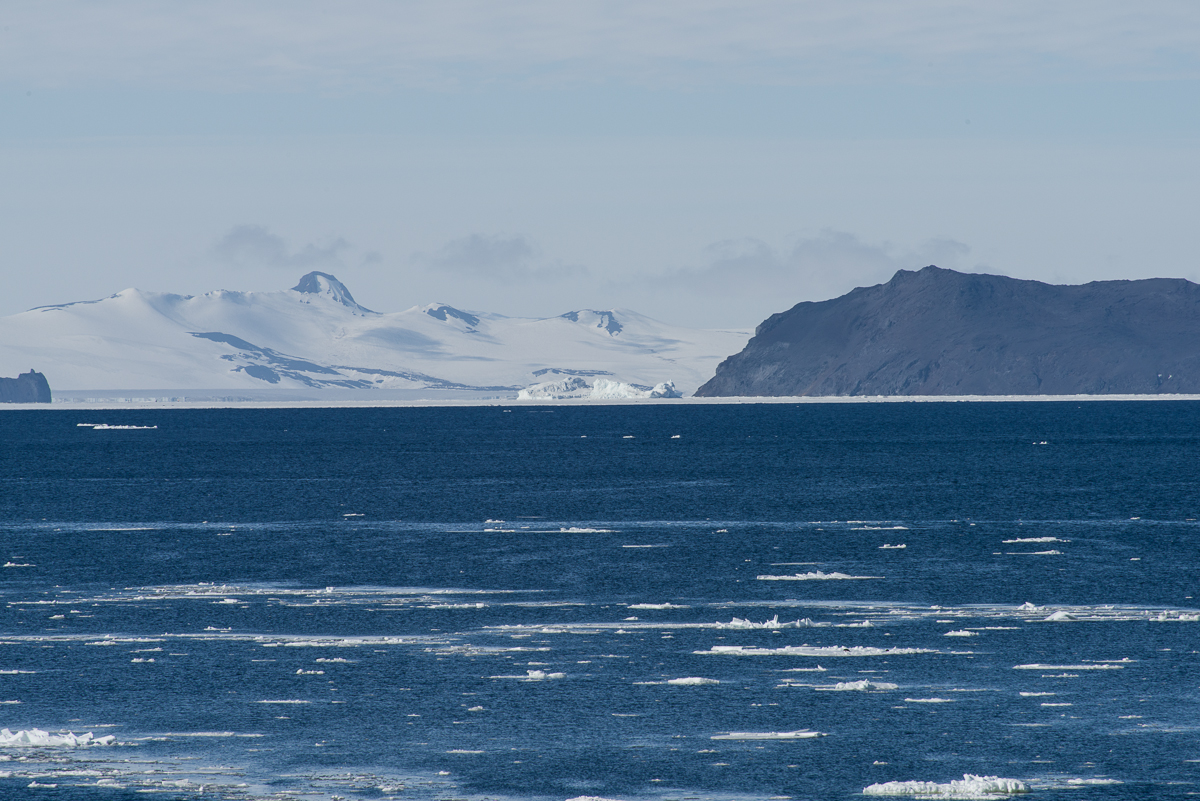
Earlier on the second day that we were here, when the above photo was taken, I also took one looking south. It was a nice sunny day and you could see the sea ice edge, and the very same iceberg I photographed on the excursion several days ago that I spoke about in an earlier post:
The sea ice edge, Inaccessible Island, and the iceberg I photographed several days before were visible in the distance from Cape Royds.
On that second day’s walk, we also walked down the steep slope to a black sand beach. We encountered the lone penguin you see in the first picture in this blog post. Walking along the beach are interesting snow and ice formations, big and small. I’ll end this post with a couple more:
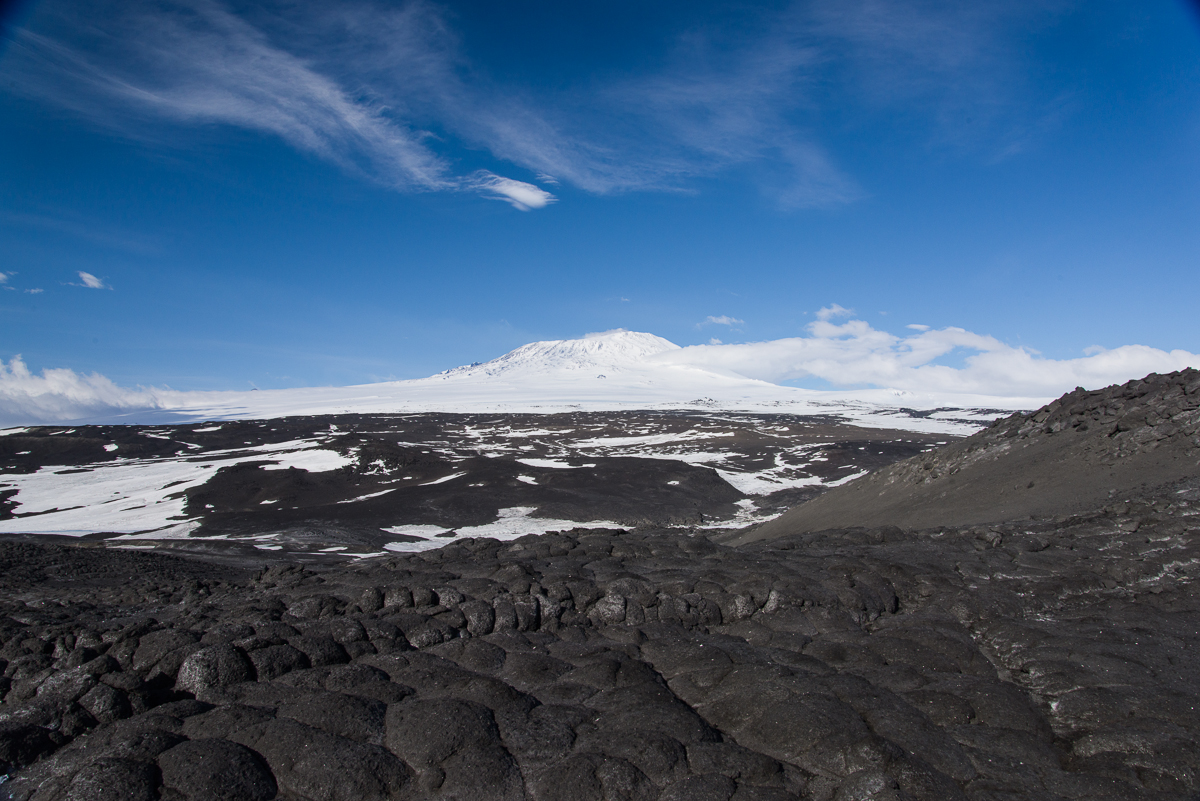
Looking up from the black sand beach.I never get tired of pressure ridges! Across the sound are the mountains.The view I wake up to: lava pillows and Erebus. It’s an austere place, but a wonderfully peaceful one.
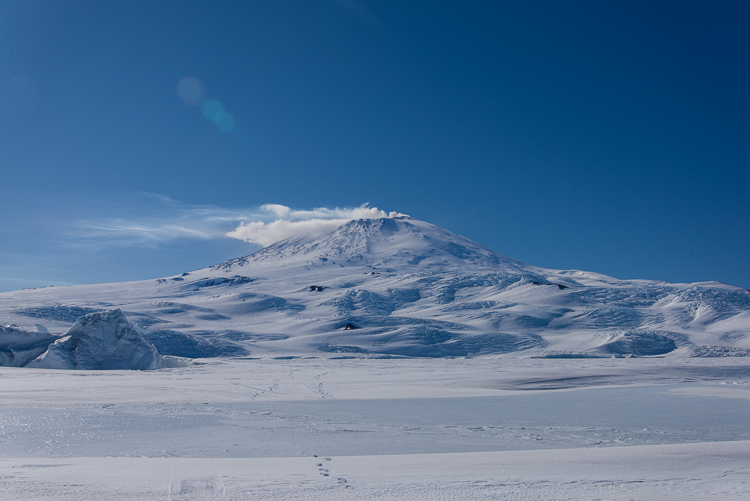
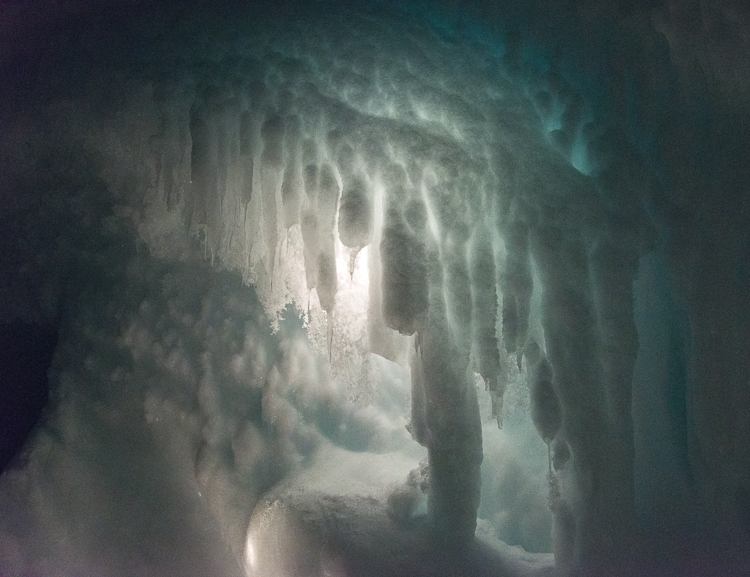
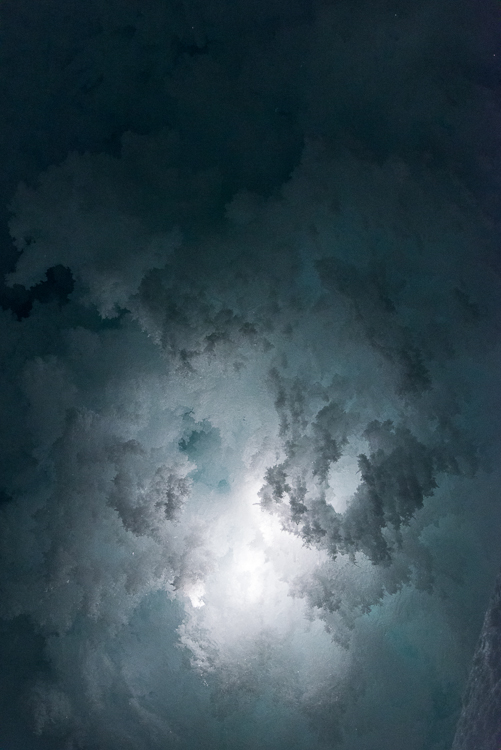
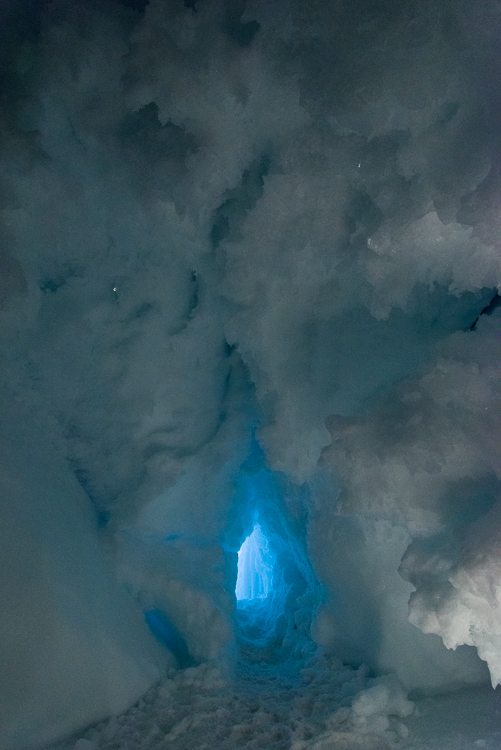
On my second visit to the ice cave, I experimented with indirect lighting and got some otherworldly images.Smokin’ hot: Tuesday you could see that Mt. Erebus is an active volcano, with a little puff of white smoke rising above the crater at the summit.
Tuesday I went out with Evan, one of the mountaineers on staff here, whose assignment for the day was to take me to any icebergs frozen in the sea ice that interested me and back to the ice cave in the Erebus Ice Tongue. We went in Gretel, the same Haagland tractor featured in my sea ice training blog post, so it was lot easier riding around than driving a snowmobile. Snowmobiles are fun, but they get somewhat less fun when you have to travel for an hour on one — your right hand gets tired from being on the throttle, and it’s obviously colder, too, though aside from inside the cave, it was a nice day with little wind. I photographed three icebergs that are frozen in the ice, so you can walk right up to and around them, certainly impossible when they’re floating because it’s too dangerous — a floating iceberg can flip unexpectedly. I’ll post those photos another time, because I haven’t really had time to go through them yet, but I’m certain I’ll get some 3D files from them. Also got to see Mt. Erebus with no clouds and little wind, so you could see a puff of smoke rising above it.
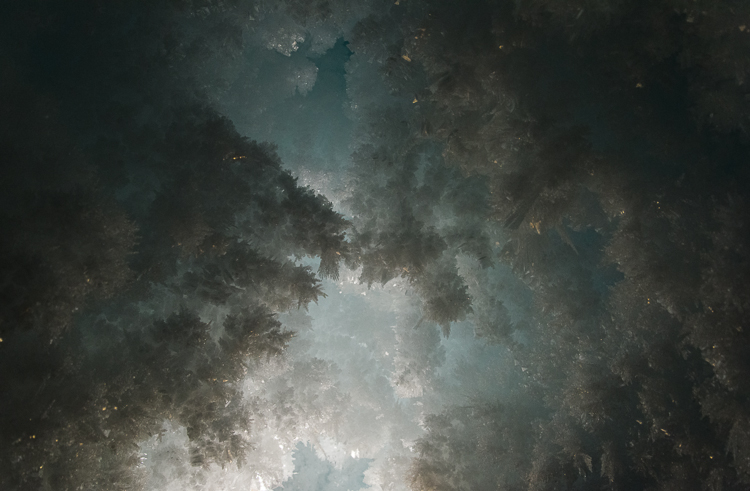
Evan checks out some unusually large hexagonal ice crystals.
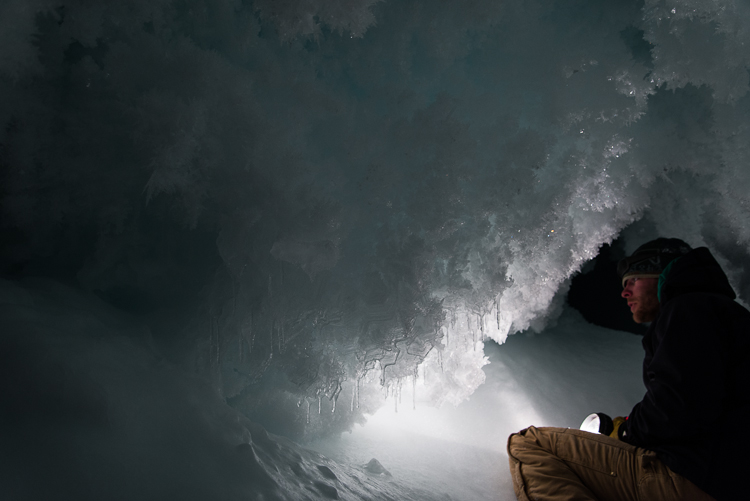
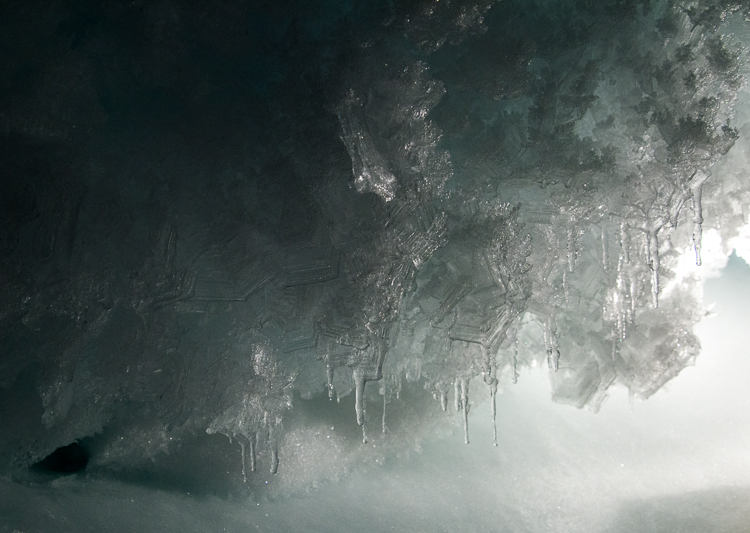
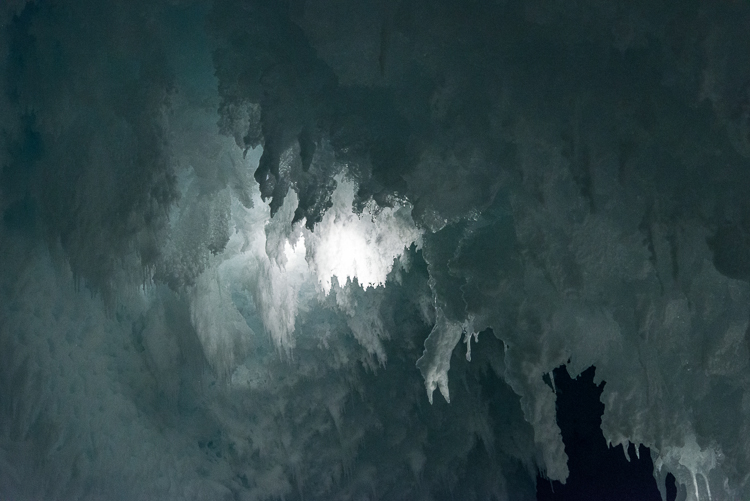
Then we went back to the ice cave, and this time, it was just me and him instead of a group of 15 people, and he brought a couple of good lights, which helped me get some better results. It also was a few hours earlier in the day, and it seemed to me there was more light coming through the small opening (very small — you have to crawl through it on your belly). I had learned from the first visit that the flash lit things too evenly. They were nice exposures, but you couldn’t see the depth. Even when I tried notching the flash down, it didn’t look so great. So, we experimented with having him point the lights he’d brought in different places to see what would work best for photography, and I discovered that indirect light worked the best — bouncing it off a wall, backlighting formations, or aiming it so the center of the beam was hidden behind a feature. Aiming the lights in that manner, we lit up some crystalline formations that I hadn’t even noticed the last time I was there, including some very large hexagonal crystals, an inch or more across! This is Evan’s first season here in Antarctica, but he leads winter mountaineering and backcountry ski camping trips in Idaho and Wyoming, and though he was familiar with hexagonal ice crystals he was astonished by the size of these.
A closer look at the giant hexagonal crystals.
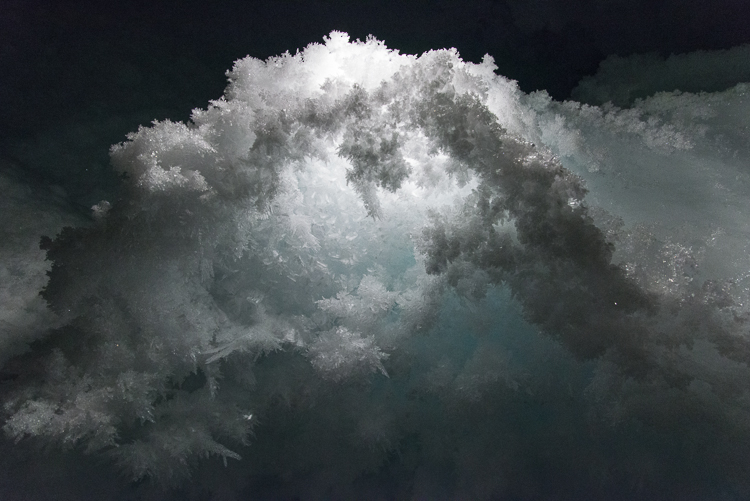
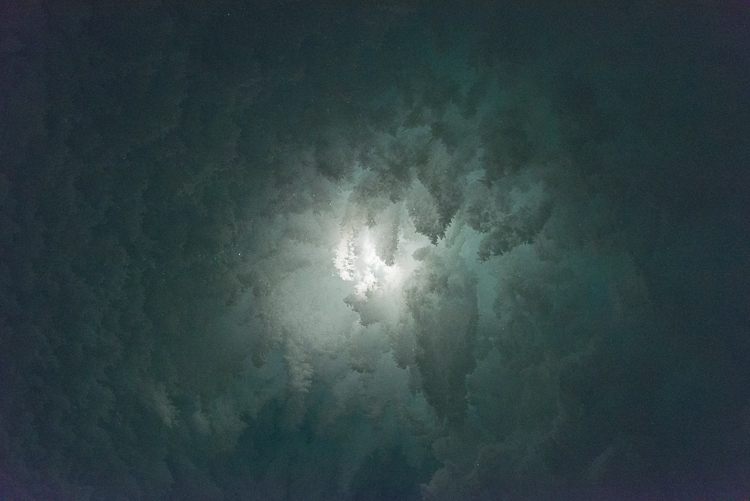
Being inside the cave was literally being inside a walk-in freezer so I had to pause periodically to warm up my hands — my glove liners are usually pretty good for photographing but it was very cold in there after a while. Evan showed me some tricks that helped — swinging arms or pumping your hands up and down with your palms facing down. But after we’d been in there for a little over an hour, my fingers and toes had had enough, so it was time to go. But I left with some magical and strange images. They did remind me of some of the photographs I’ve made of cloud formations:
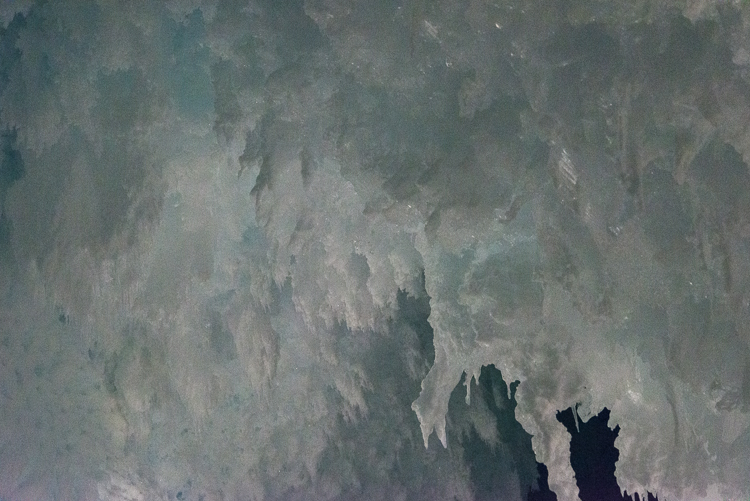
A change in the lighting makes this formation look different — see next photo.A change in the lighting makes this formation look different — see previous photo.
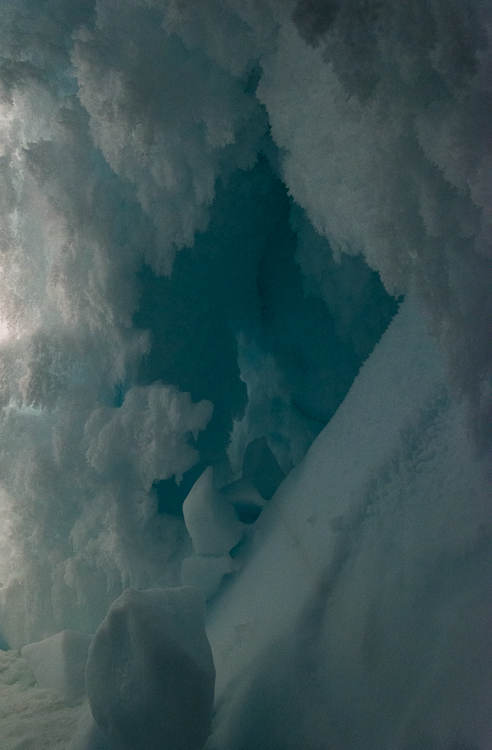
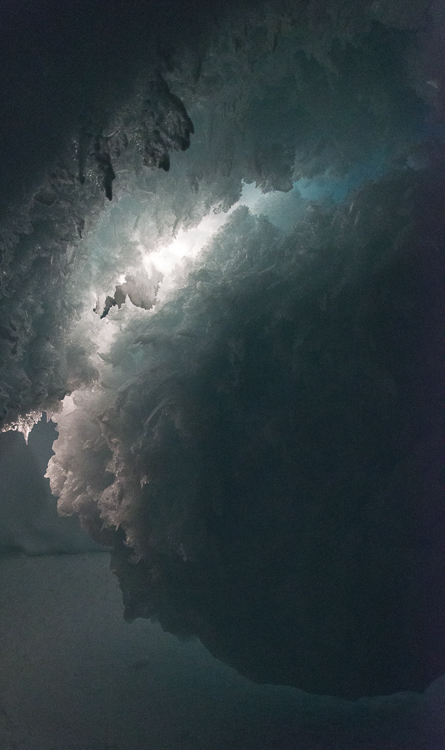
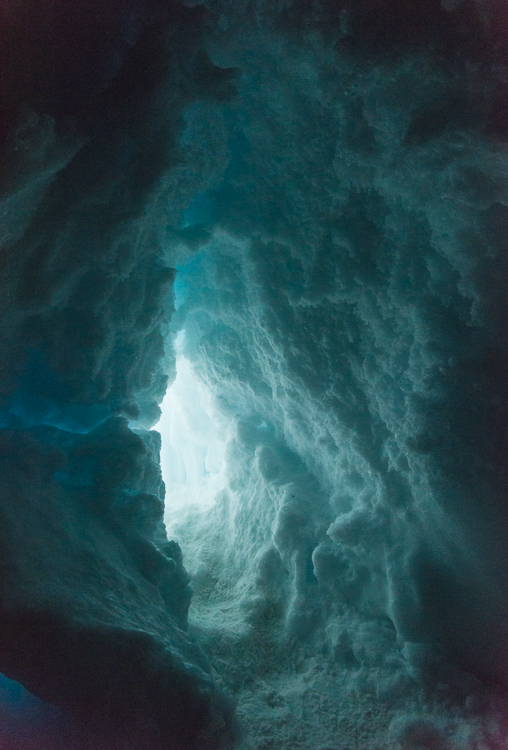
Approaching the entrance there’s a blue glow from the sunlight outside.Leaving the ice cave
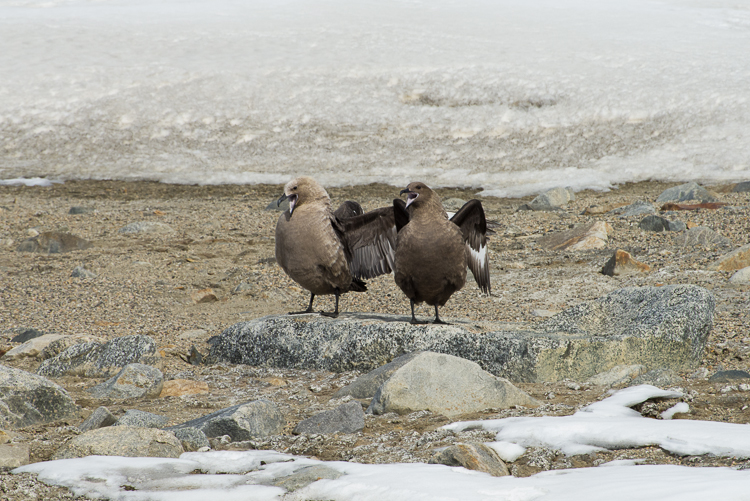
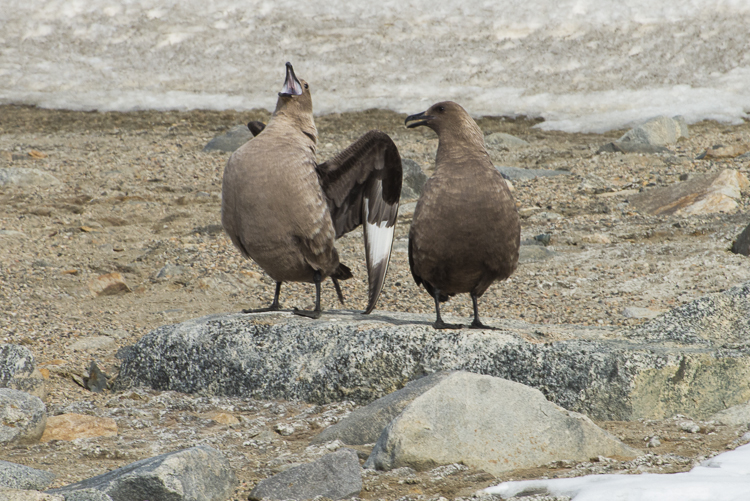
Sea ice pressure ridges looking toward the Ferrar Glacier.What does the skua say?: Haw! Haw! Haw! Haw! Haw!
I’m back from Sam Bowser’s camp — helicopter picked me up at 5 p.m. yesterday. Sam, his wife Laura and the rest of the team were really welcoming and fun to be with, and took me to a couple of fantastic places. I’ve already posted the trip Laura and I made in the previous blog entry.
The next day Sam, Laura and I went by snowmobile to a fascinating scenic spot that doesn’t really have an official name, but unofficially they call it “the road to Double Curtain Glacier.” Comic relief near the beginning of our trip was provided by a pair of nesting skuas standing on a rock. We stopped the snowmobiles and I got out the telephoto lens. They looked at us, and we looked at them, and then another skua flew a few feet above them, to which they responded by cawing loudly, “Haw! Haw! Haw! Haw!” as if to say, “Don’t even THINK about landing here while we’re on this rock.” Then they calmed down, then they started up again. It sounds like someone laughing sarcastically.
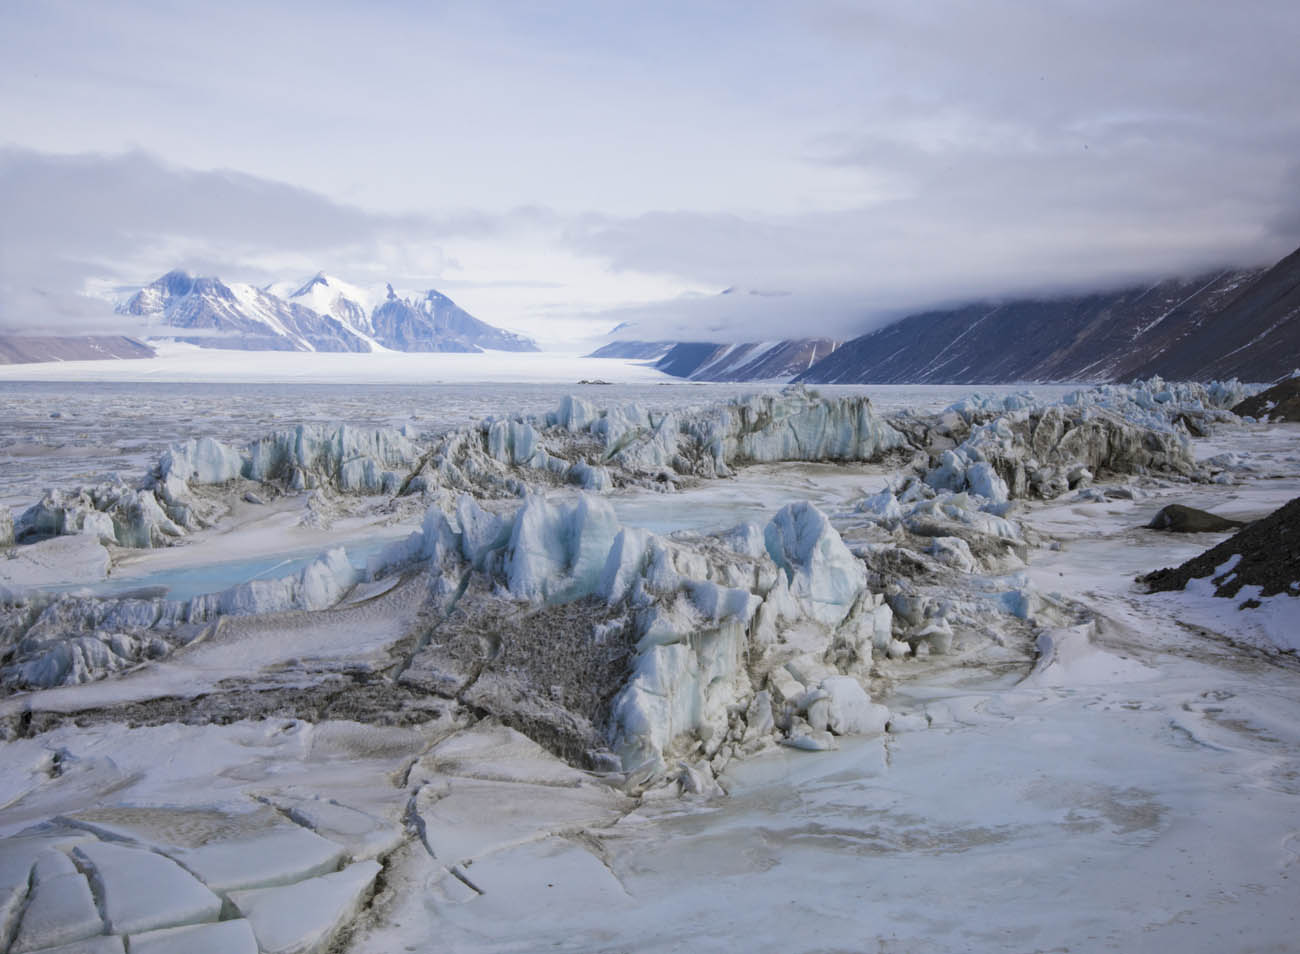
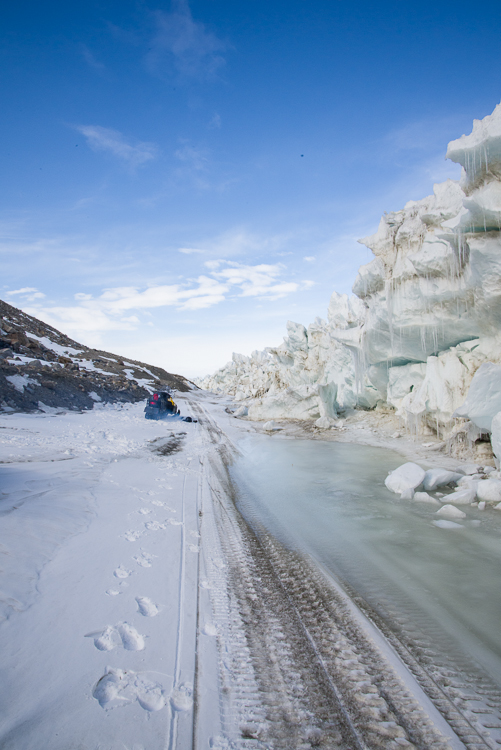
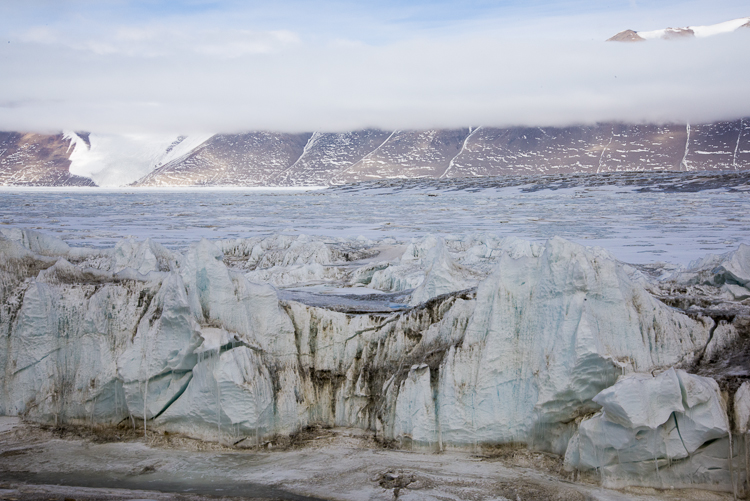
We must protect this house!The “Road” to Double Curtain Glacier has a lengthy section that looks like this, with very high pressure ridges where the sea ice has been pushed up against the coastline.
What we traveled on was not really a road, of course, it’s a flat area of coastline around New Harbor that this time of year is covered with snow and ice, and it looks like someone plowed a flat area of snow for vehicles and left the piles of snow and ice in a very even line on the sea ice side of the lane. What those piles really are is a pressure ridge, which is a ridge of ice pushed up by the movement of the sea ice. I saw such ridges on the McMurdo Sound sea ice when I was doing my training, but they were only a few inches high. I saw them by the New Harbor camp but they were a few feet high. But as we got closer to the Double Curtain Glacier, the lane got narrower and the wall got higher, forming a crazy Baroque facade that I’m guessing was 20 feet high in places! At some point, the road became so narrowed and slanted we parked the snowmobiles and continued on foot.
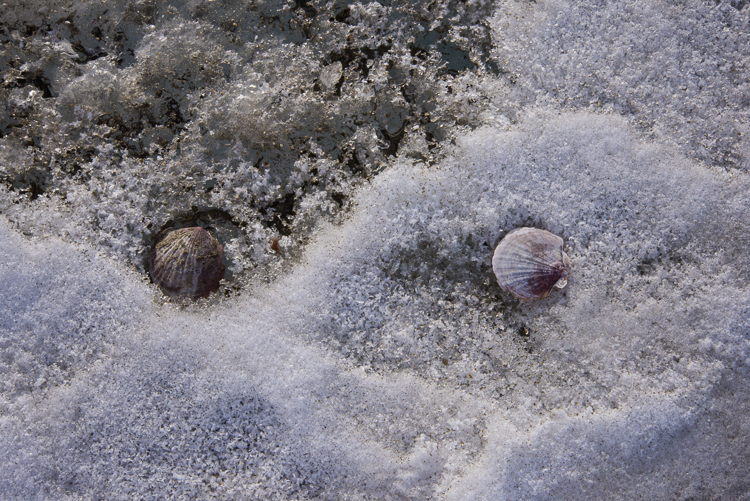
Sam was interested in the large numbers of scallop shells that had been carried to the shoreline by the ice.
The ice has begun to melt and form weird shapes of unending variety. You don’t want to walk too close to one of those towers in case it becomes unstable and collapses. The pressure ridges have carried along numerous scallop shells which are scattered in the ice.
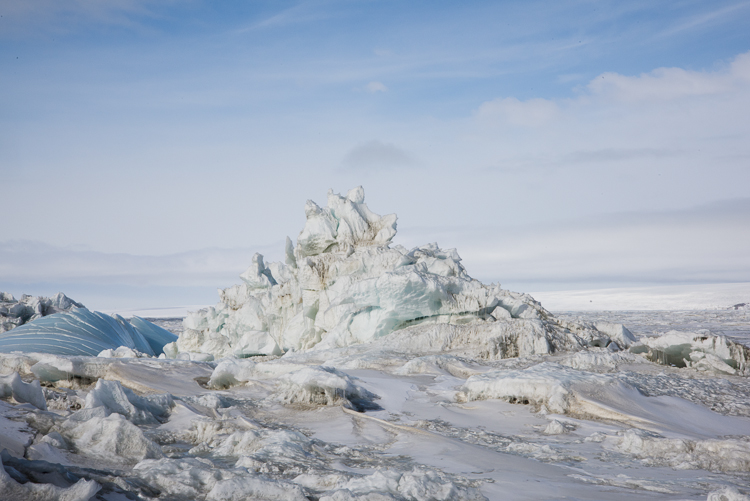
One of the odder sights was this blue curving wave of ice. I wanted to get a closer look, but it was hard to tell if the ice was stable enough to walk on, so I dared go no further.I named this formation “Fang,” because it looks like a cartoon wolf in profile.
We eventually came to a place totally blocked off with ice. We climbed a little ways up the hill under the Double Curtain Glacier, and saw a mummified seal skeleton and some moss — the first plant life I’ve seen here.
Mummified seal skeleton on the hillside above the pressure ridge. The Ferrar Glacier is in the distance.Close-up of the seal skeleton. The flipper anatomy is very clear on the right. There is some dried, mummified skin still attached. No telling how long it’s been here; could have been many years.The Double Curtain Glacier emerges from the fog above the seal skeleton. You can see how it has two different leading edges, hence the name “Double Curtain.”There was no plant life in evidence except a patch of moss with white salt crystals on top, not far from the seal skeleton. This is a close-up. We took care not to walk on it because it’s very delicate.From this elevated spot you get a good look at the Herbertson Glacier beyond the pressure ridge and across the sea ice from the Double Curtain Glacier.
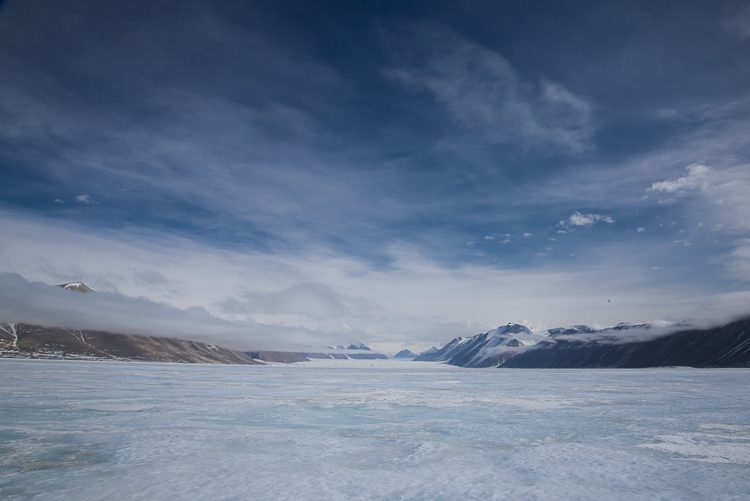
Many of the photos shown here were from that slightly elevated vantage point on the side of the hill. It was a clear day and we could see the Herbertson Glacier (which was directly across the sea ice) and the Ferrar Glacier (to our right from that spot). As we were leaving, we also drove onto the sea ice about halfway between the Herbertson and the Double Curtain and I got another nice photo of the Ferrar.
The Ferrar Glacier in the distance, as viewed from the sea ice.
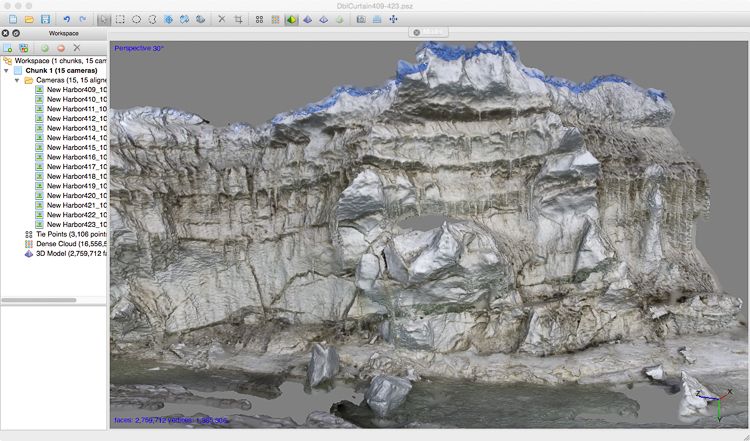
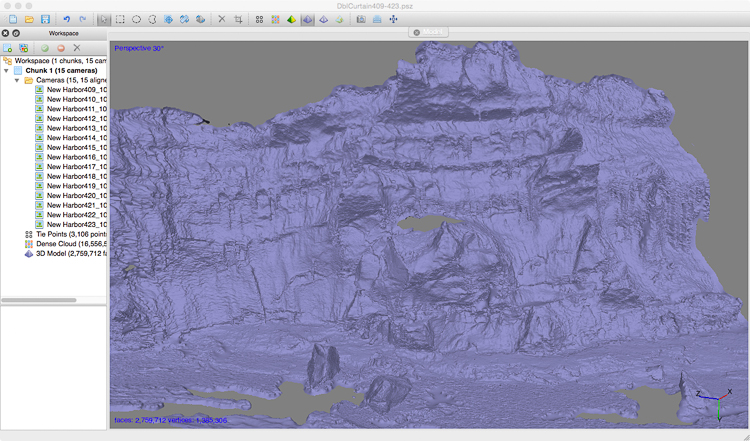
I am incredibly fortunate to have been able to visit this place, which one of Sam’s team told me very few people have gotten to see. Unless you are staying at the New Harbor camp, it is relatively inaccessible. I am working right now on processing some of the 3D captures I made there so I can bring back a little bit of the place for others to see. Once I clean up these files I’ll be able to fabricate them as sculptures with a 3D printer or router. I’ve got one capture processed already. Here are a couple of screenshots of it from the 3D file creation program:
3D file of part of the pressure ridge, shown with the “texture layer” (the coloration).3D file shown without the texture layer.